
An Authorize.net webhook is a notification that Authorize.net sends to Shoplazza when a transaction result is created or changes. When a transaction triggers Authorize.net's fraud filters and is held for review, the webhook lets Shoplazza receive the review result automatically once the transaction is approved in Authorize.net. To set it up, generate a signature key in Authorize.net, then save your Authorize.net account again in Shoplazza. The webhook is created automatically, and order statuses stay in sync. This keeps orders from getting stuck under payment review, so you can fulfill them on time.
Complete the steps below so that transaction review results sync to Shoplazza automatically.
1.Generate a signature key (required)
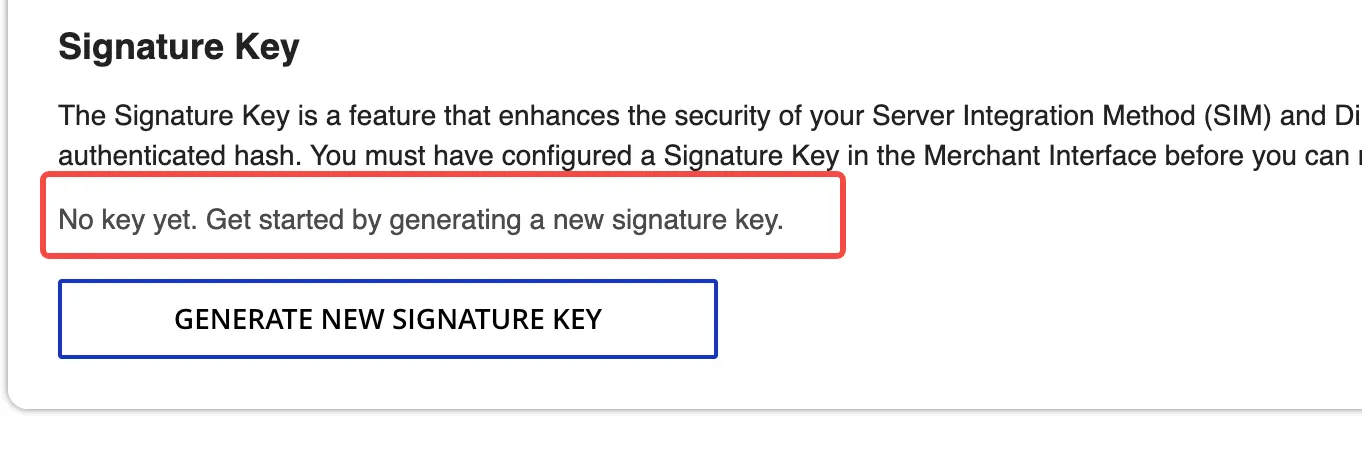
Authorize.net requires a signature key before you can create a webhook. Without one, adding a webhook returns the following error:

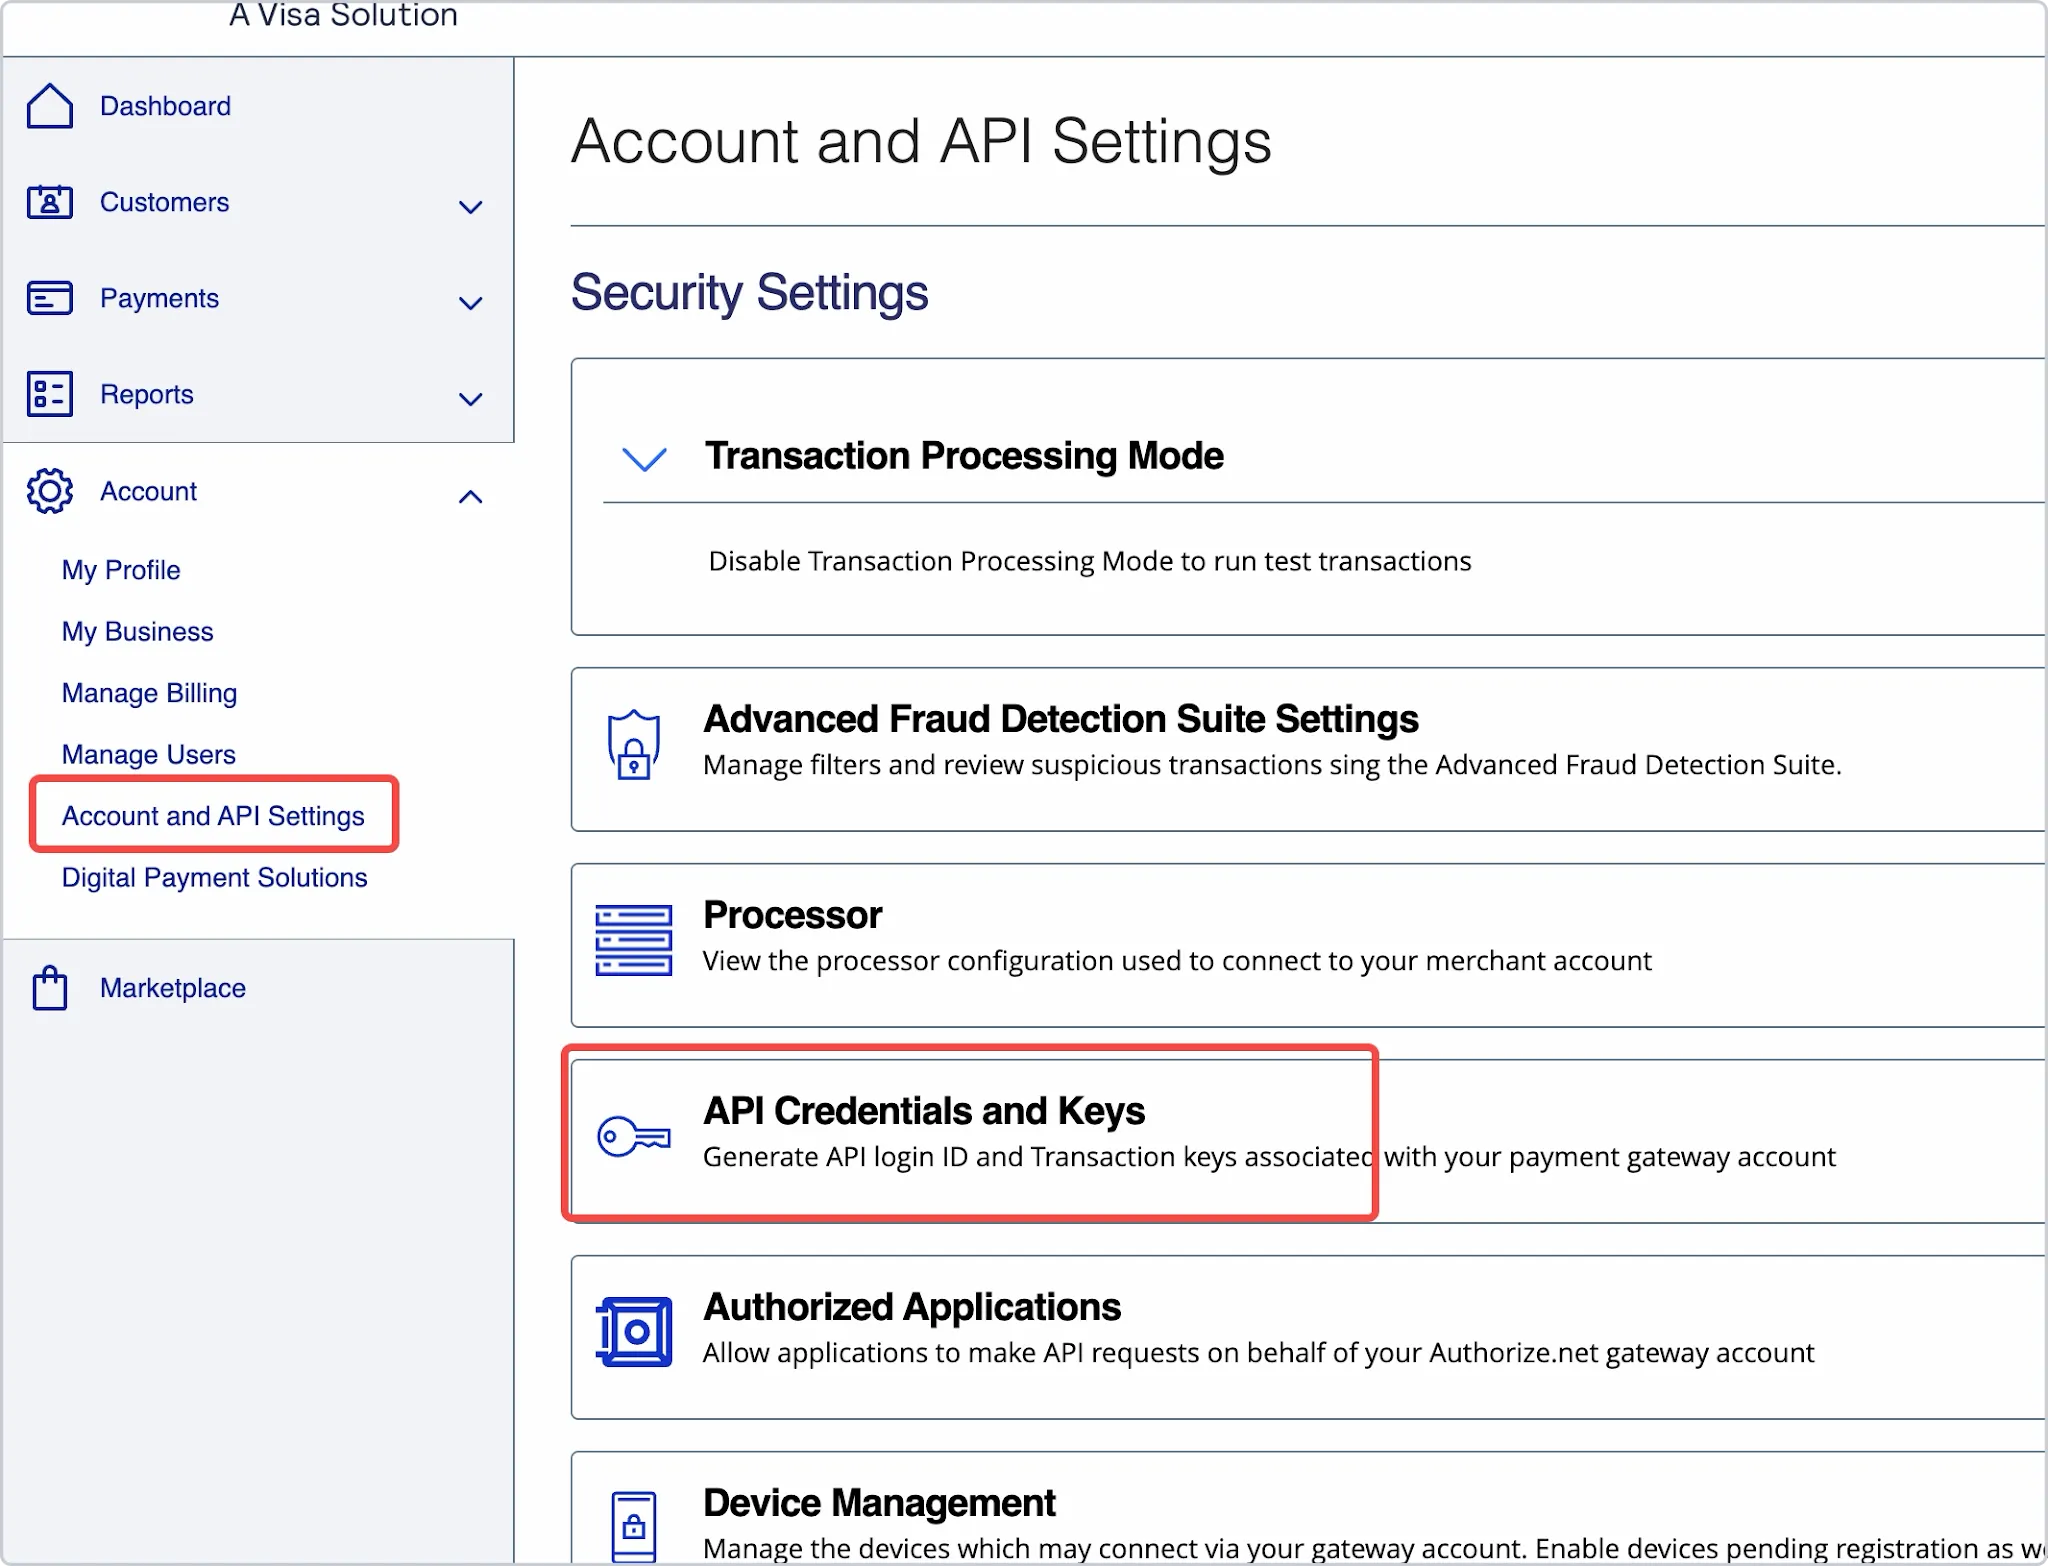
- To generate one, log in to Authorize.net and go to Account → Account and API Settings → API Credentials and Keys. Under Signature Key, click GENERATE NEW SIGNATURE KEY and enter the verification code sent to your email or phone.
Note
You don't need to share this key with Shoplazza or enter it in Shoplazza. Please keep it safe and secure.
2. Save your account in Shoplazza again
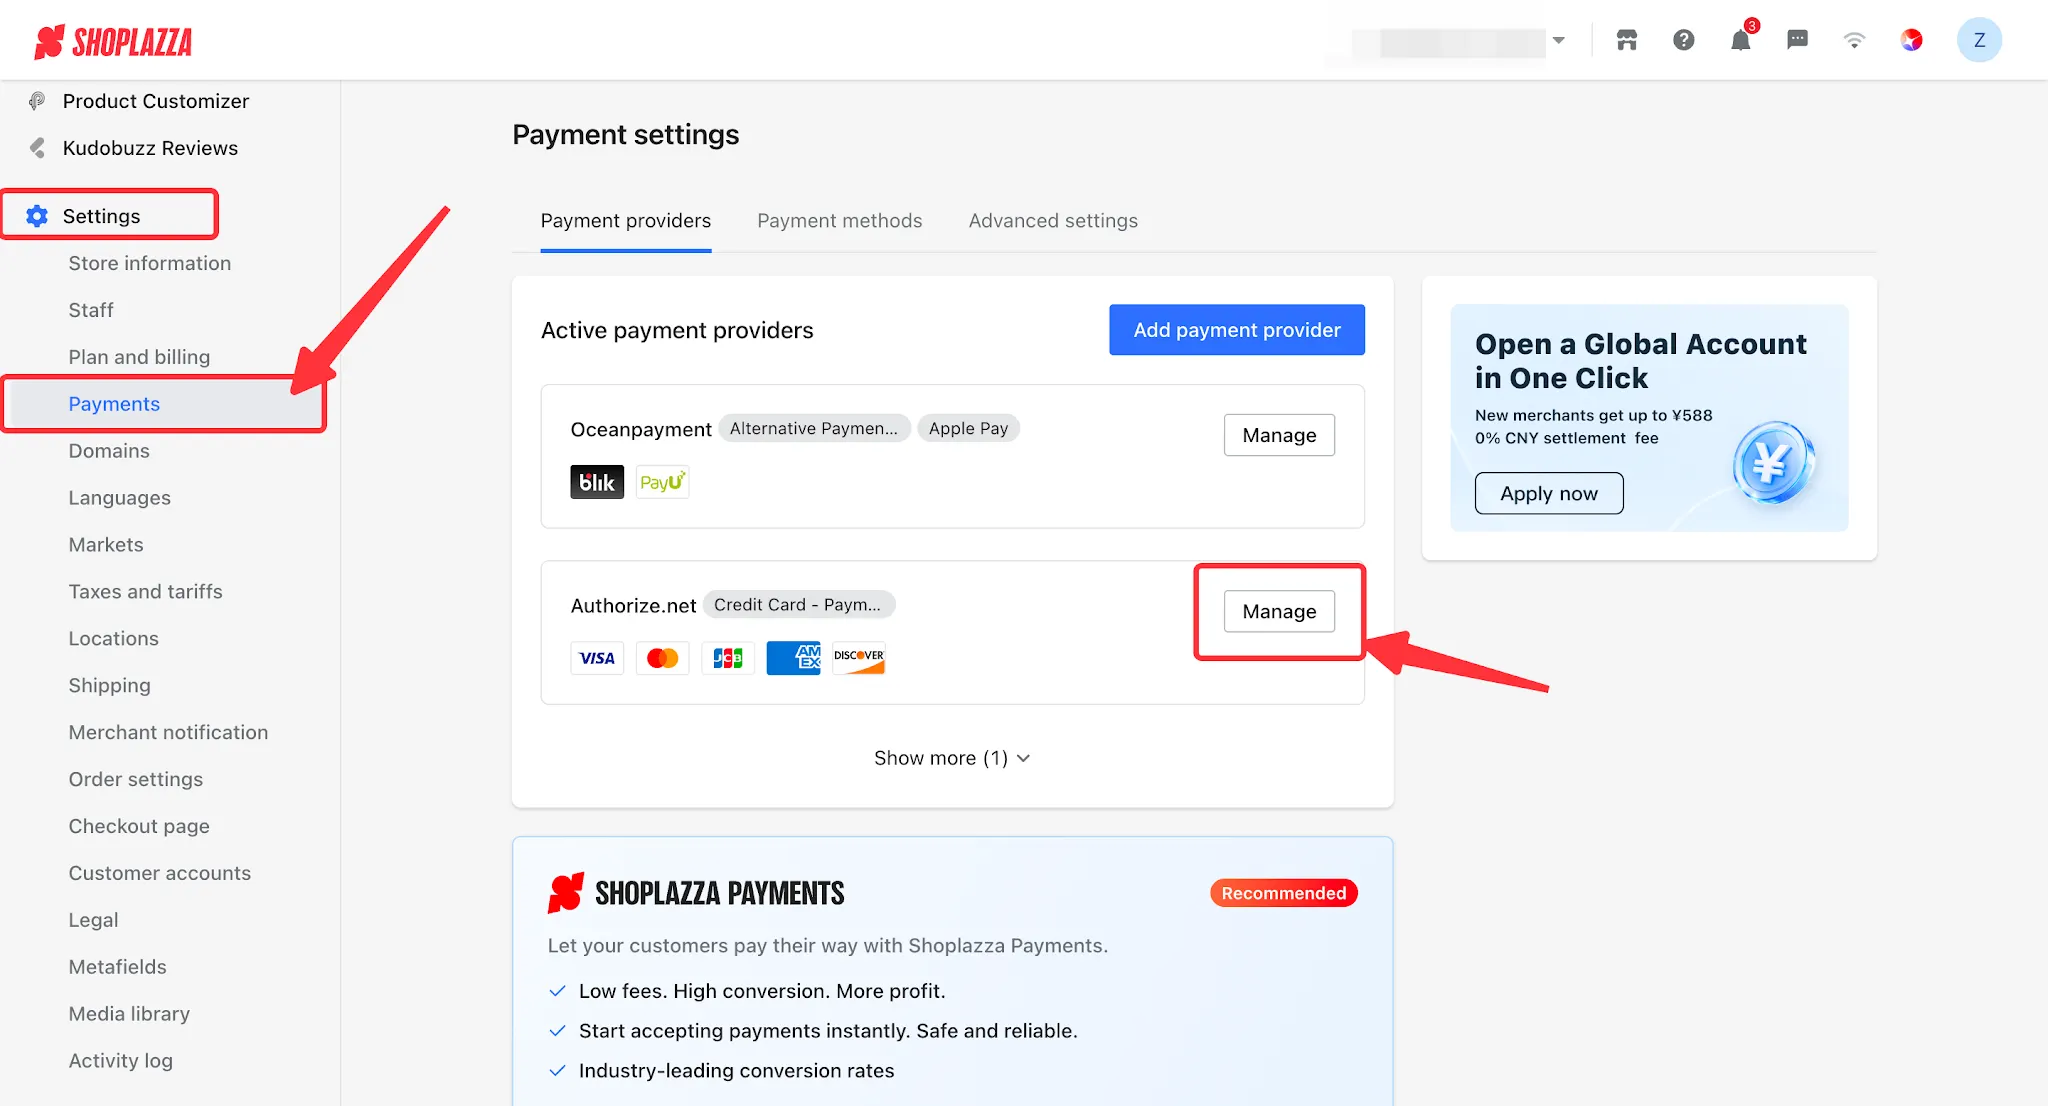
After generating the key, go to Settings > Payments > Authorize.net in your Shoplazza admin and click Activate or Save again. The webhook will be created automatically.
Tips
No further action is usually needed. To confirm the webhook was created, see step 3.
3. Check that the webhook was created
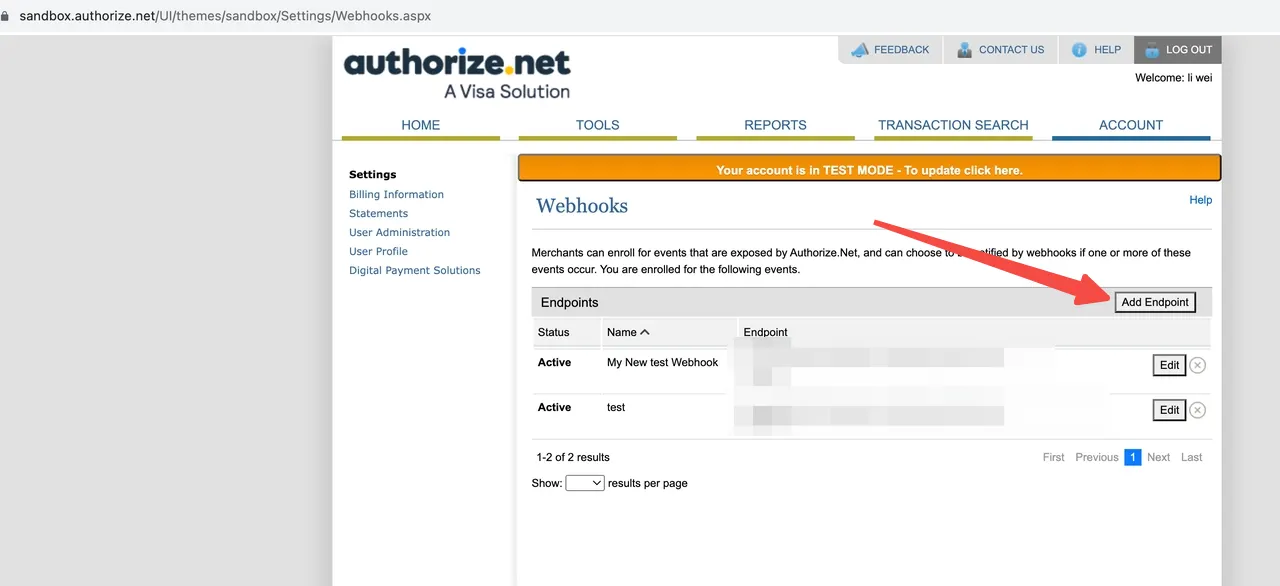
Log in to Authorize.net , go to Account > Settings, and click Webhooks (sandbox screenshot below).
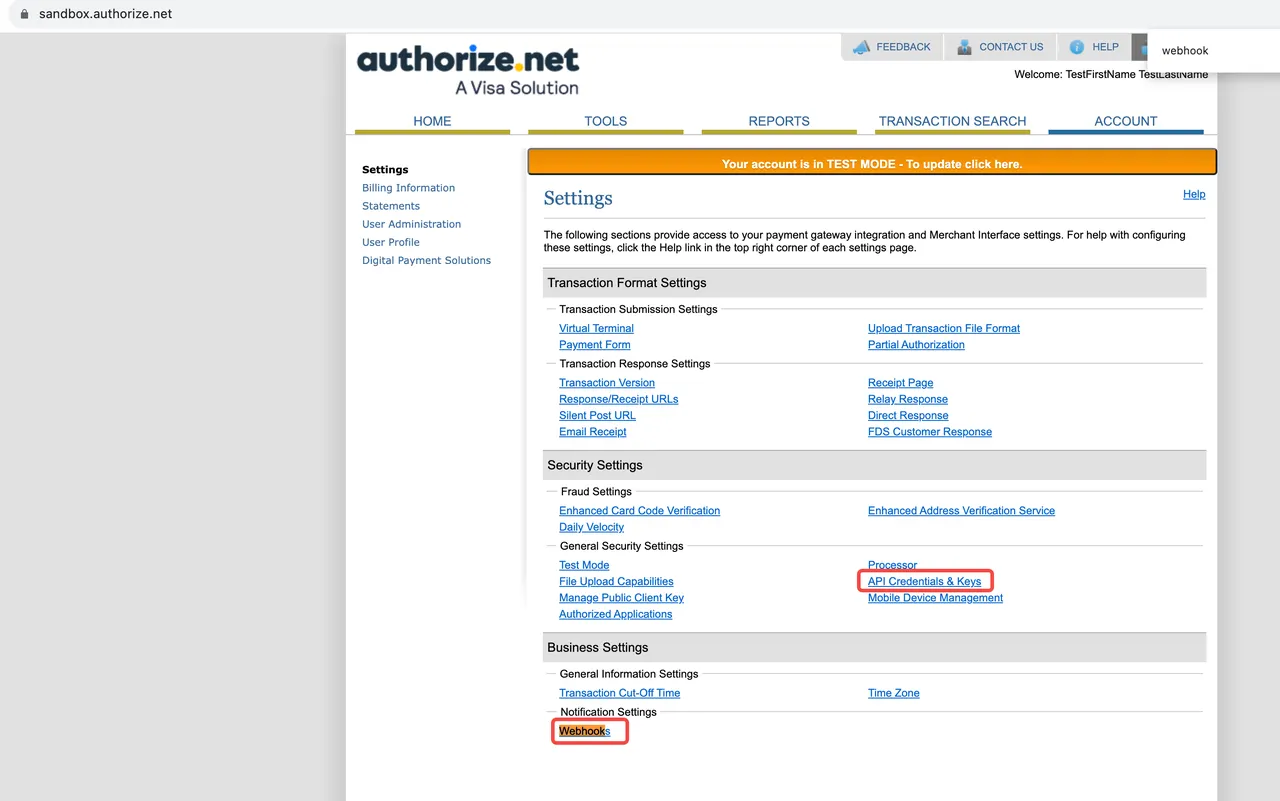
On the Webhooks page, check whether the following endpoint exists:
https://callback.shoplazza.com/api/payment/authorizenet-callback
Tips
If it doesn't exist, add it manually as described in step 4.
If it exists, click Edit and make sure all 6 events below are selected. Select any missing events and save.
- net.authorize.payment.authcapture.created
- net.authorize.payment.authorization.created
- net.authorize.payment.capture.created
- net.authorize.payment.fraud.approved
- net.authorize.payment.fraud.declined
- net.authorize.payment.fraud.held
4. Add the webhook manually
On the Webhooks page, click Add Endpoint, enter the following, and save:
- Name: shoplazza webhook
- Endpoint URL: https://callback.shoplazza.com/api/payment/authorizenet-callback
- Status: Active
- Events: select the 6 events listed in step 3

Comments
Please sign in to leave a comment.