
This document provides a comprehensive overview of the core configuration features in the Seel Worry-Free Purchase merchant dashboard, helping you quickly understand the operations and settings for each section.
Note
The Seel Shipping Protection service currently supports the following regions: the United States, Canada, New Zealand, Australia, Germany, France, the United Kingdom, Spain, Italy, the Netherlands, Belgium, Austria, Portugal, Ireland, Hungary, Greece, the Czech Republic, Poland, Lithuania, Sweden, Puerto Rico, Finland, Denmark, Norway, and Iceland.
Home
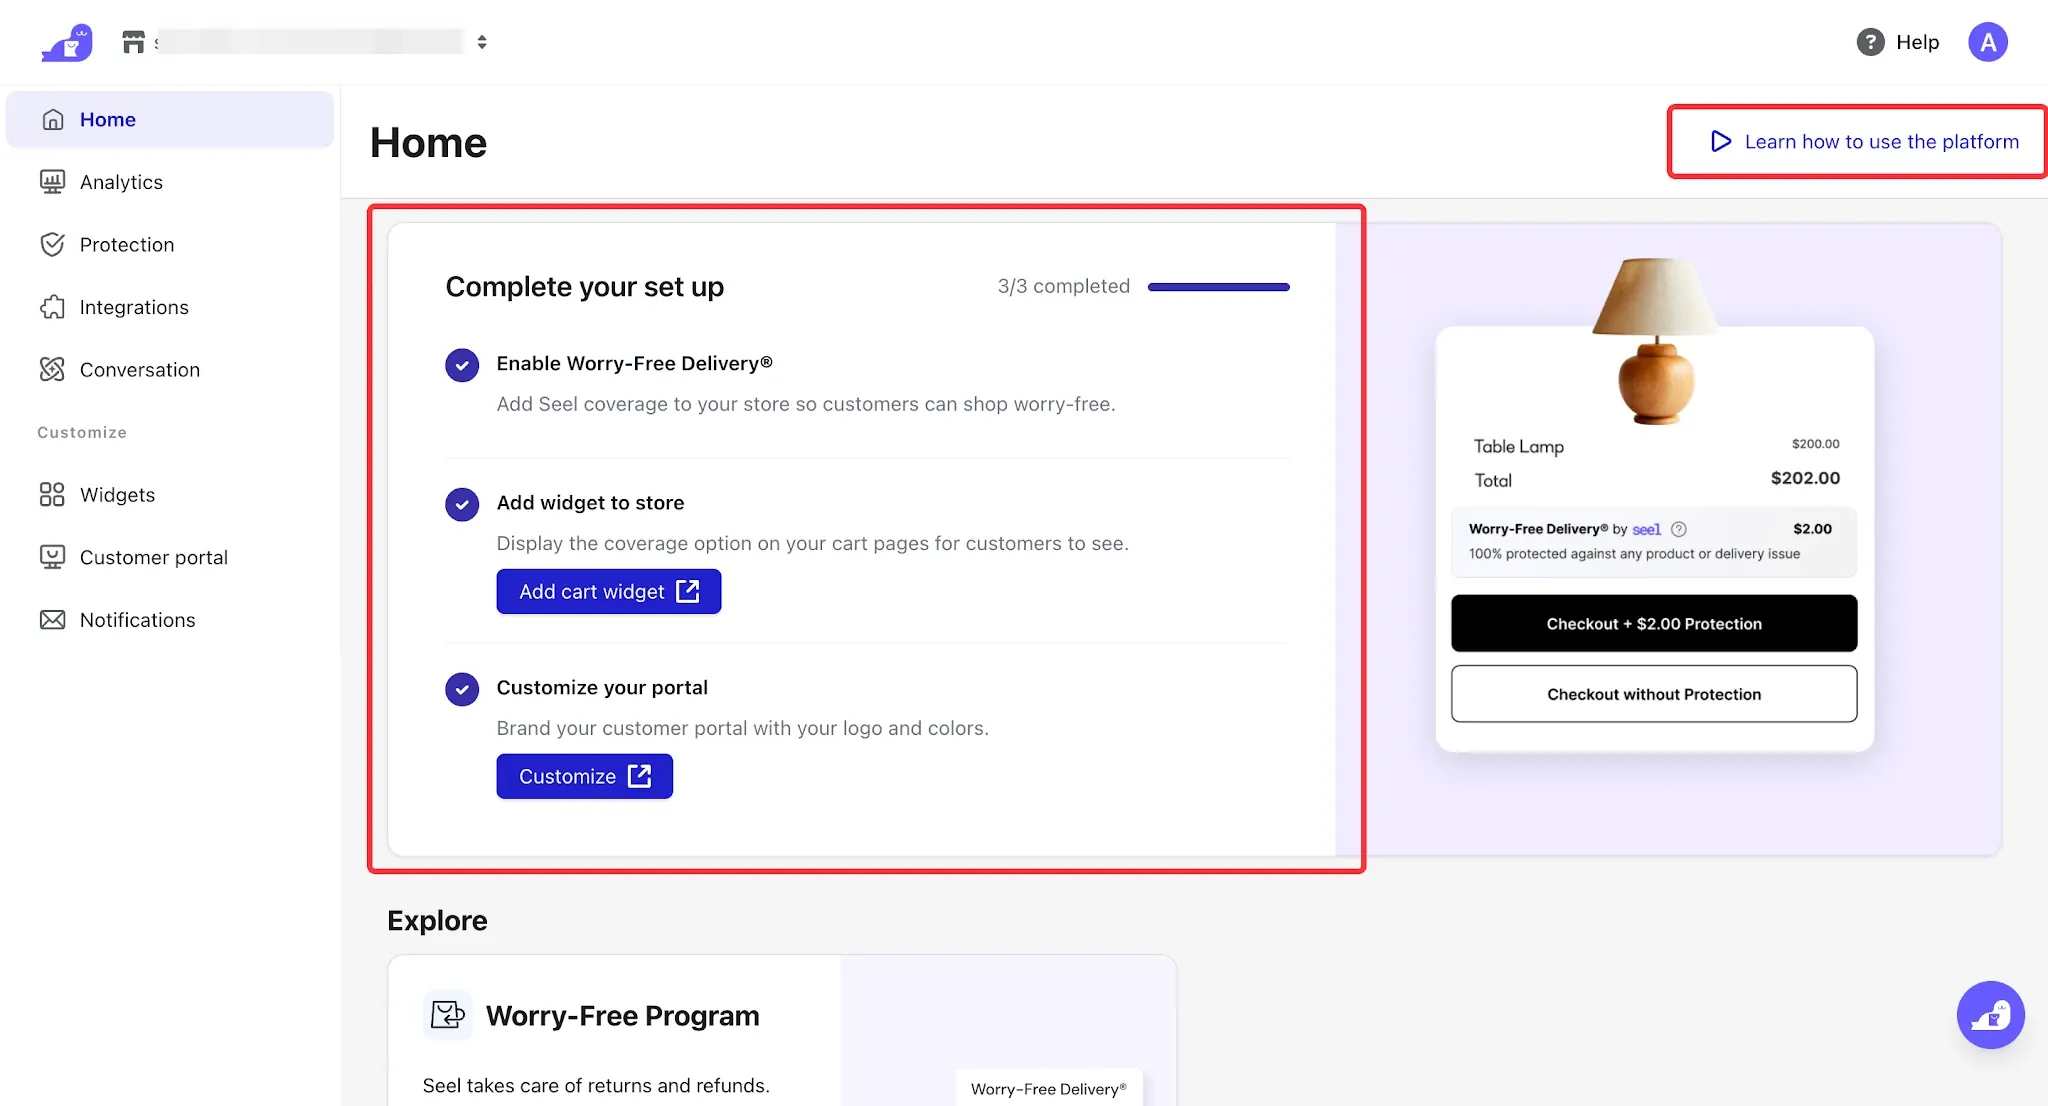
The Home page displays the basic configuration progress of Seel Worry-Free Purchase. Click Learn how to use the platform to view additional step-by-step instructions.
Protection
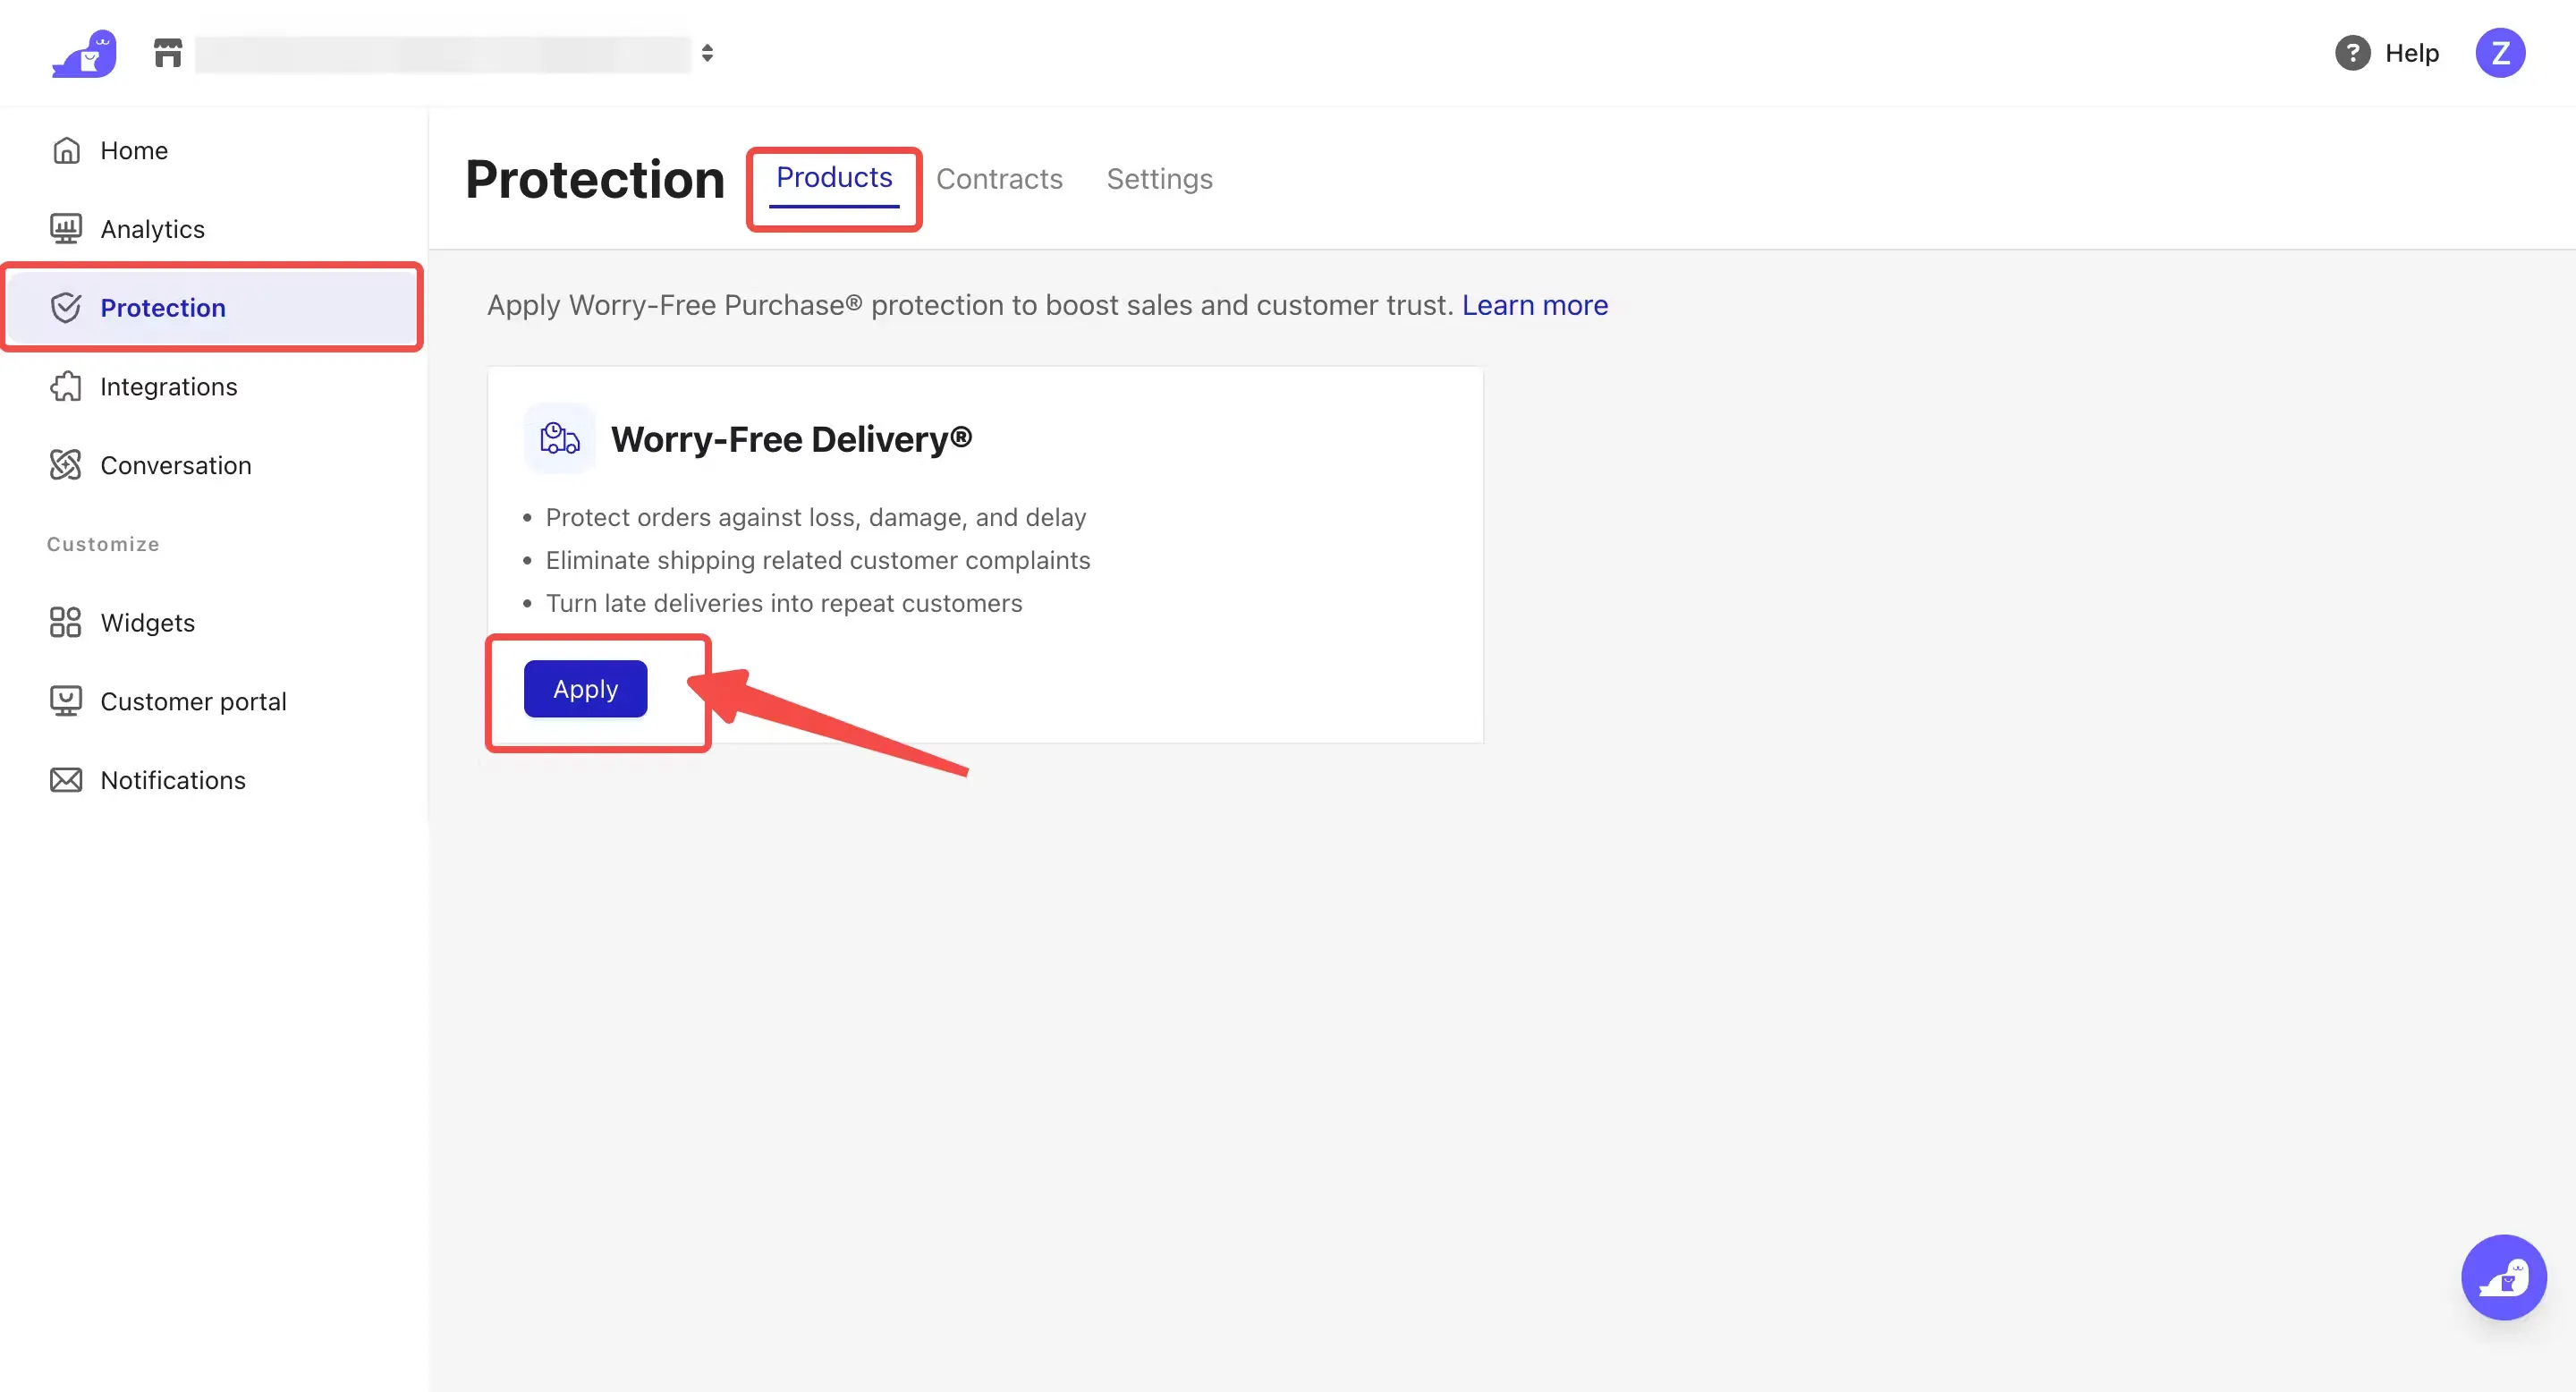
In the Protection section, you can apply for the Seel Shipping Protection service, view policy information, and configure Seel shipping mode.
To access the Protection section:
Click Products to apply for Seel Products. For detailed instructions, please refer to Seel Worry-Free Purchase | Installation Guide.
Note
Before officially using the Seel Shipping Protection service, please make sure that your application has been completed and approved.
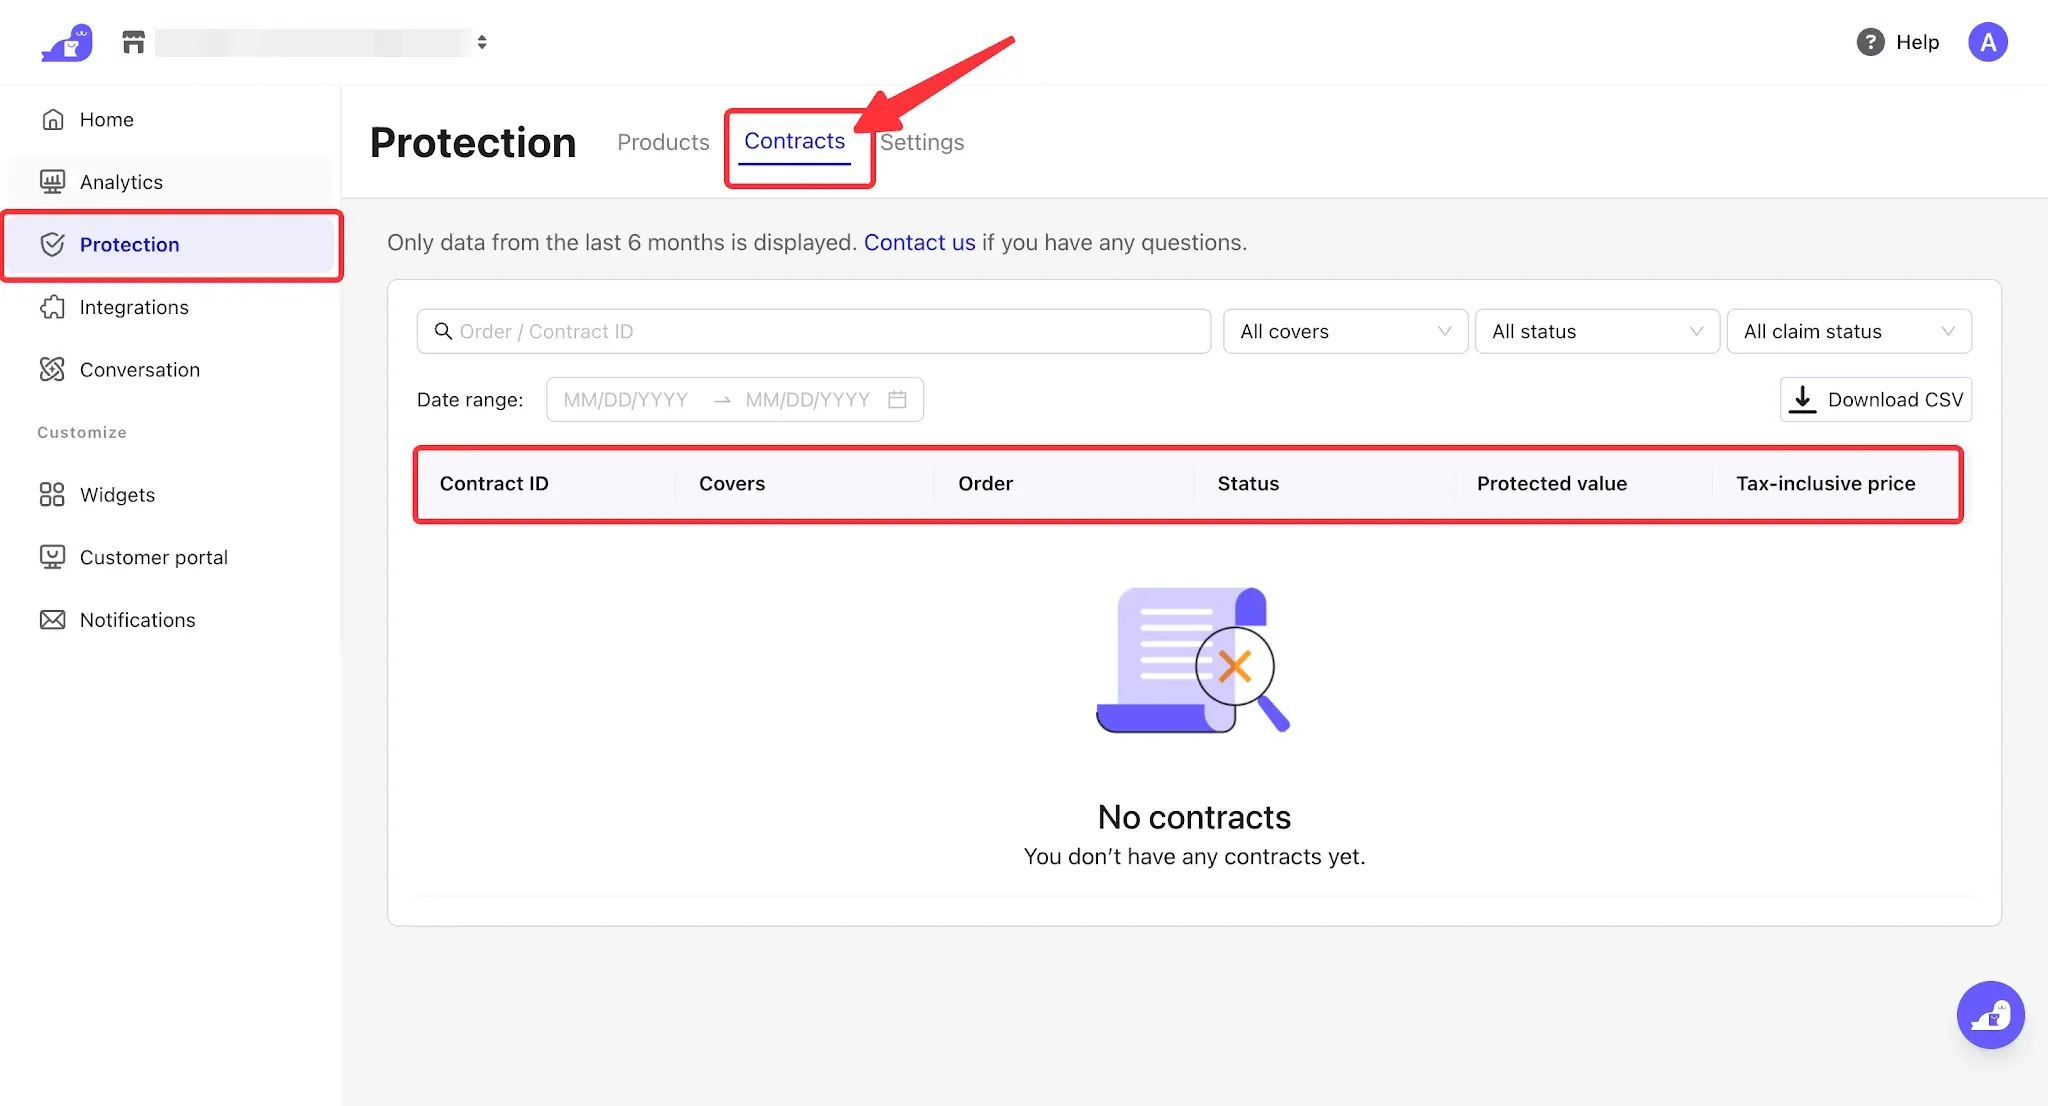
- Contracts allow you to view detailed information about protected orders.
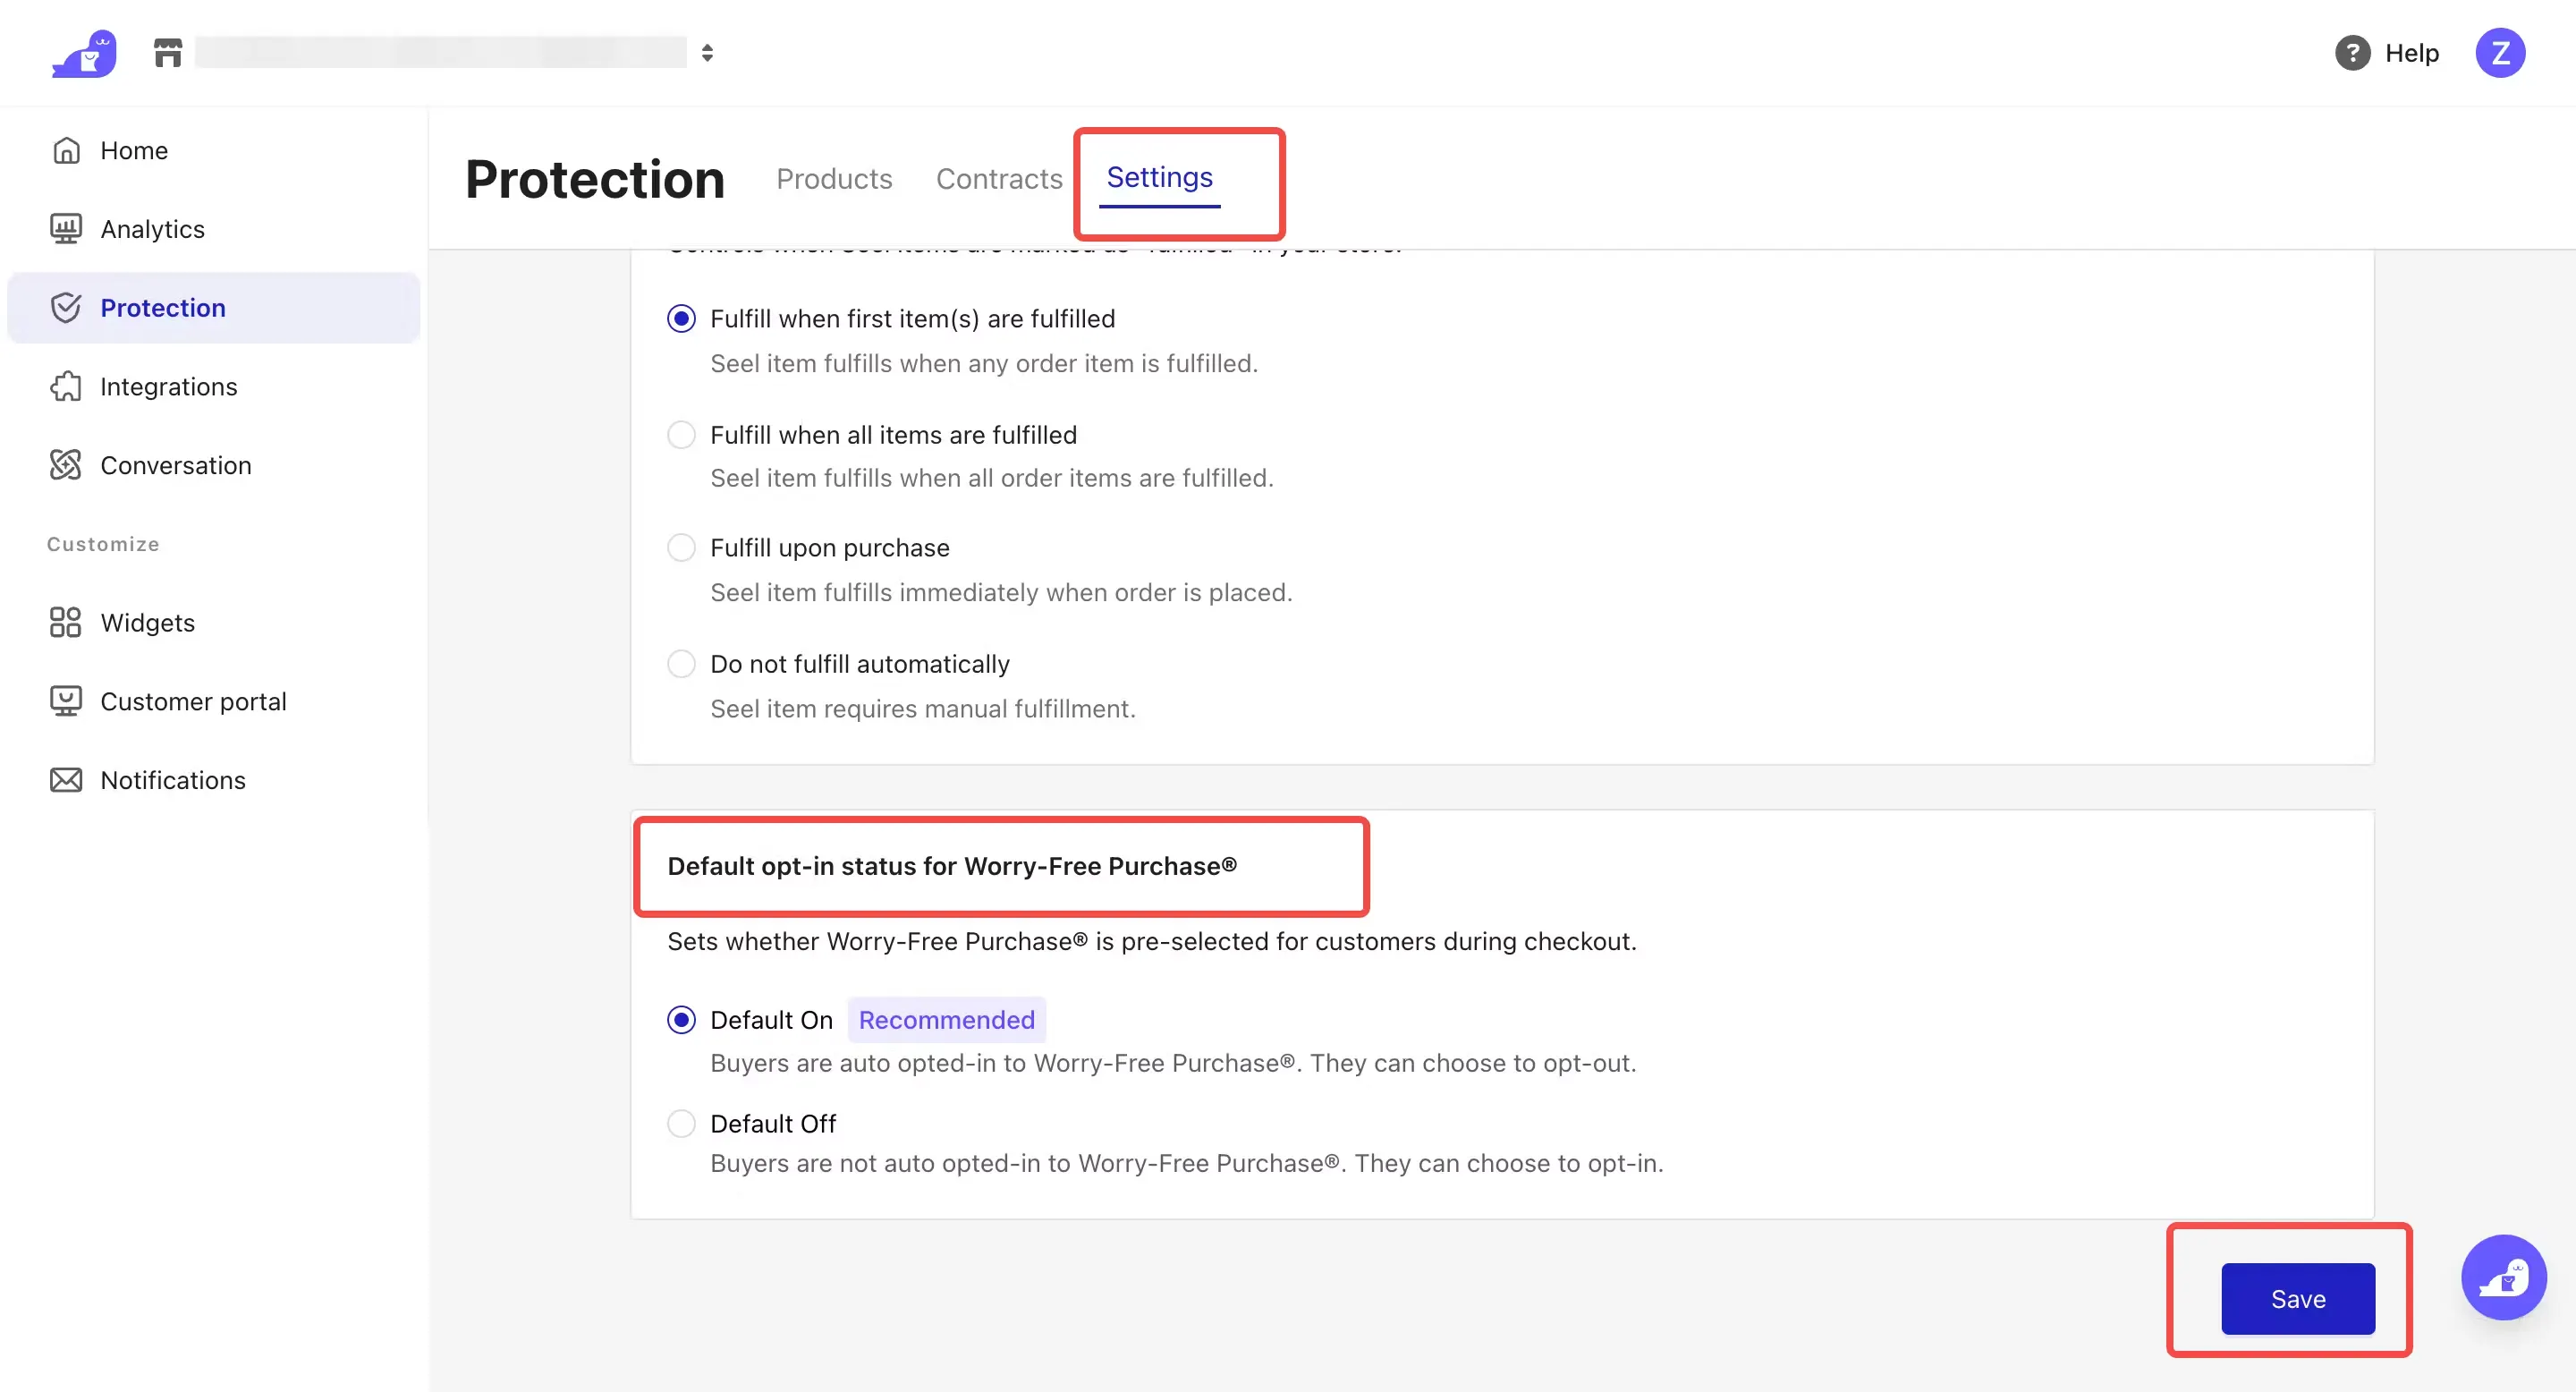
- Settings allows you to configure Seel’s shipping mode and enable/disable the shipping protection service.
Seel Item Fulfillment
In most cases, you can choose to have Seel fulfilled and shipped together with the first item in the order.
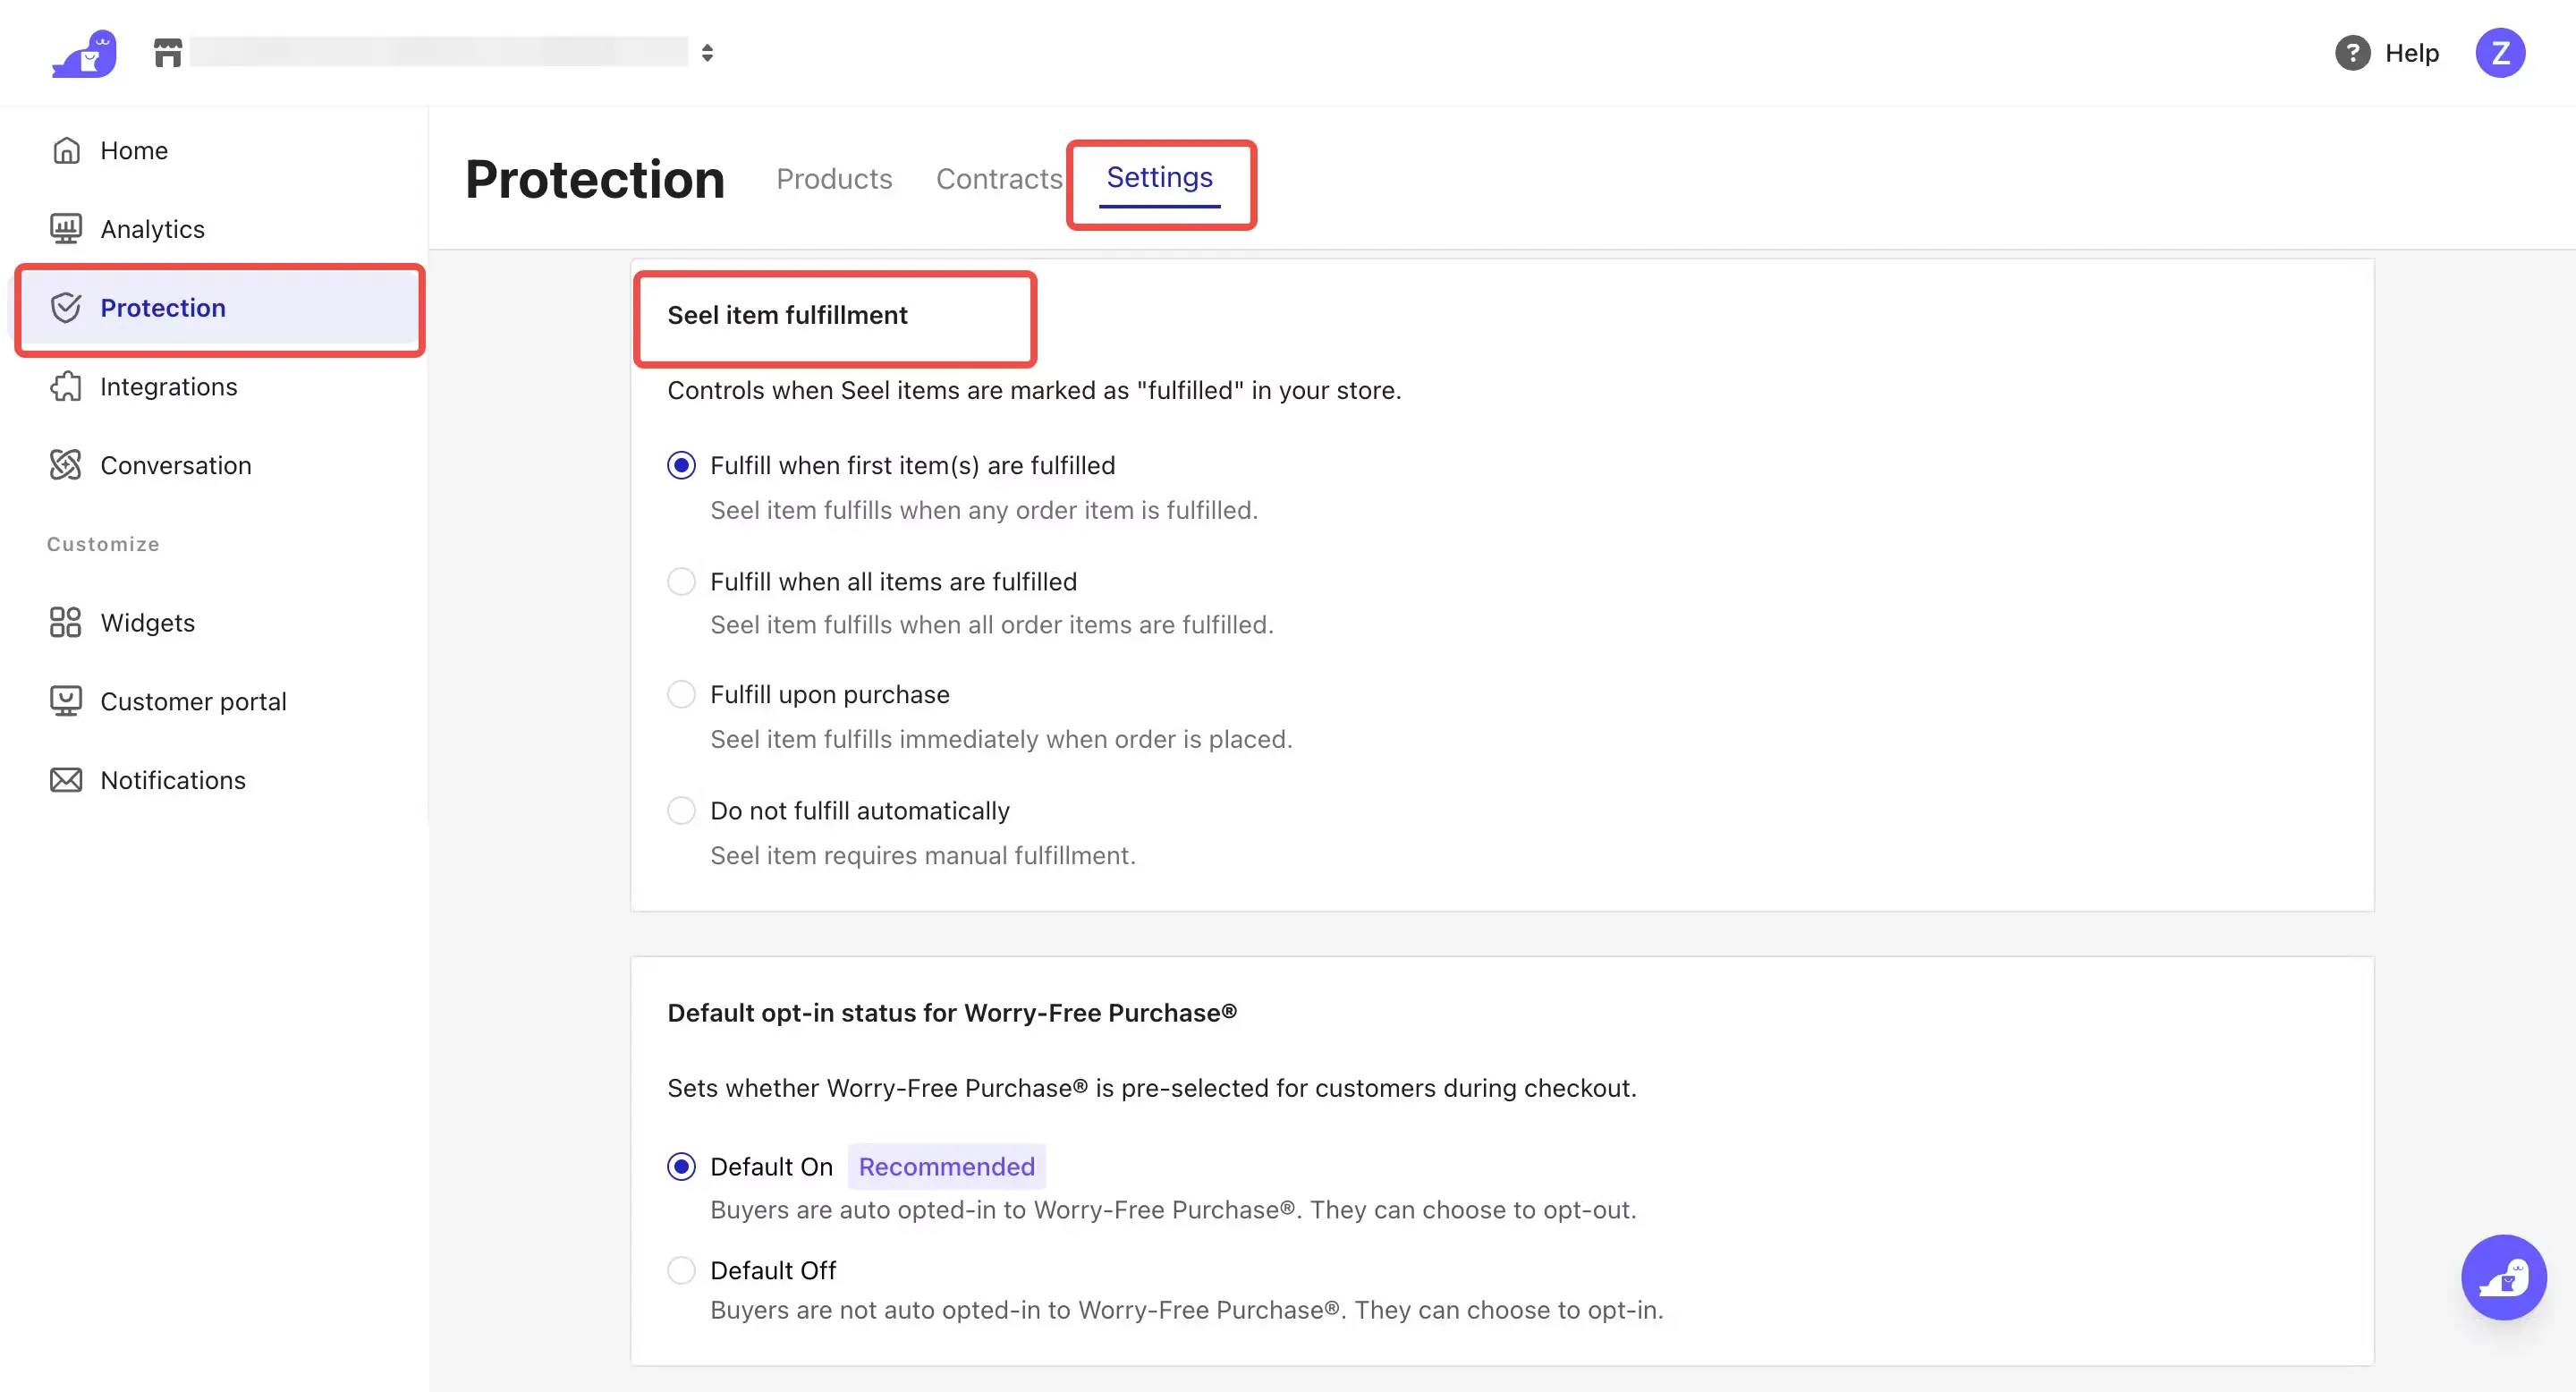
Default opt-in status for Worry-Free Purchase
You can choose to enable or disable it by default. After completing the settings, click Save.
Widget
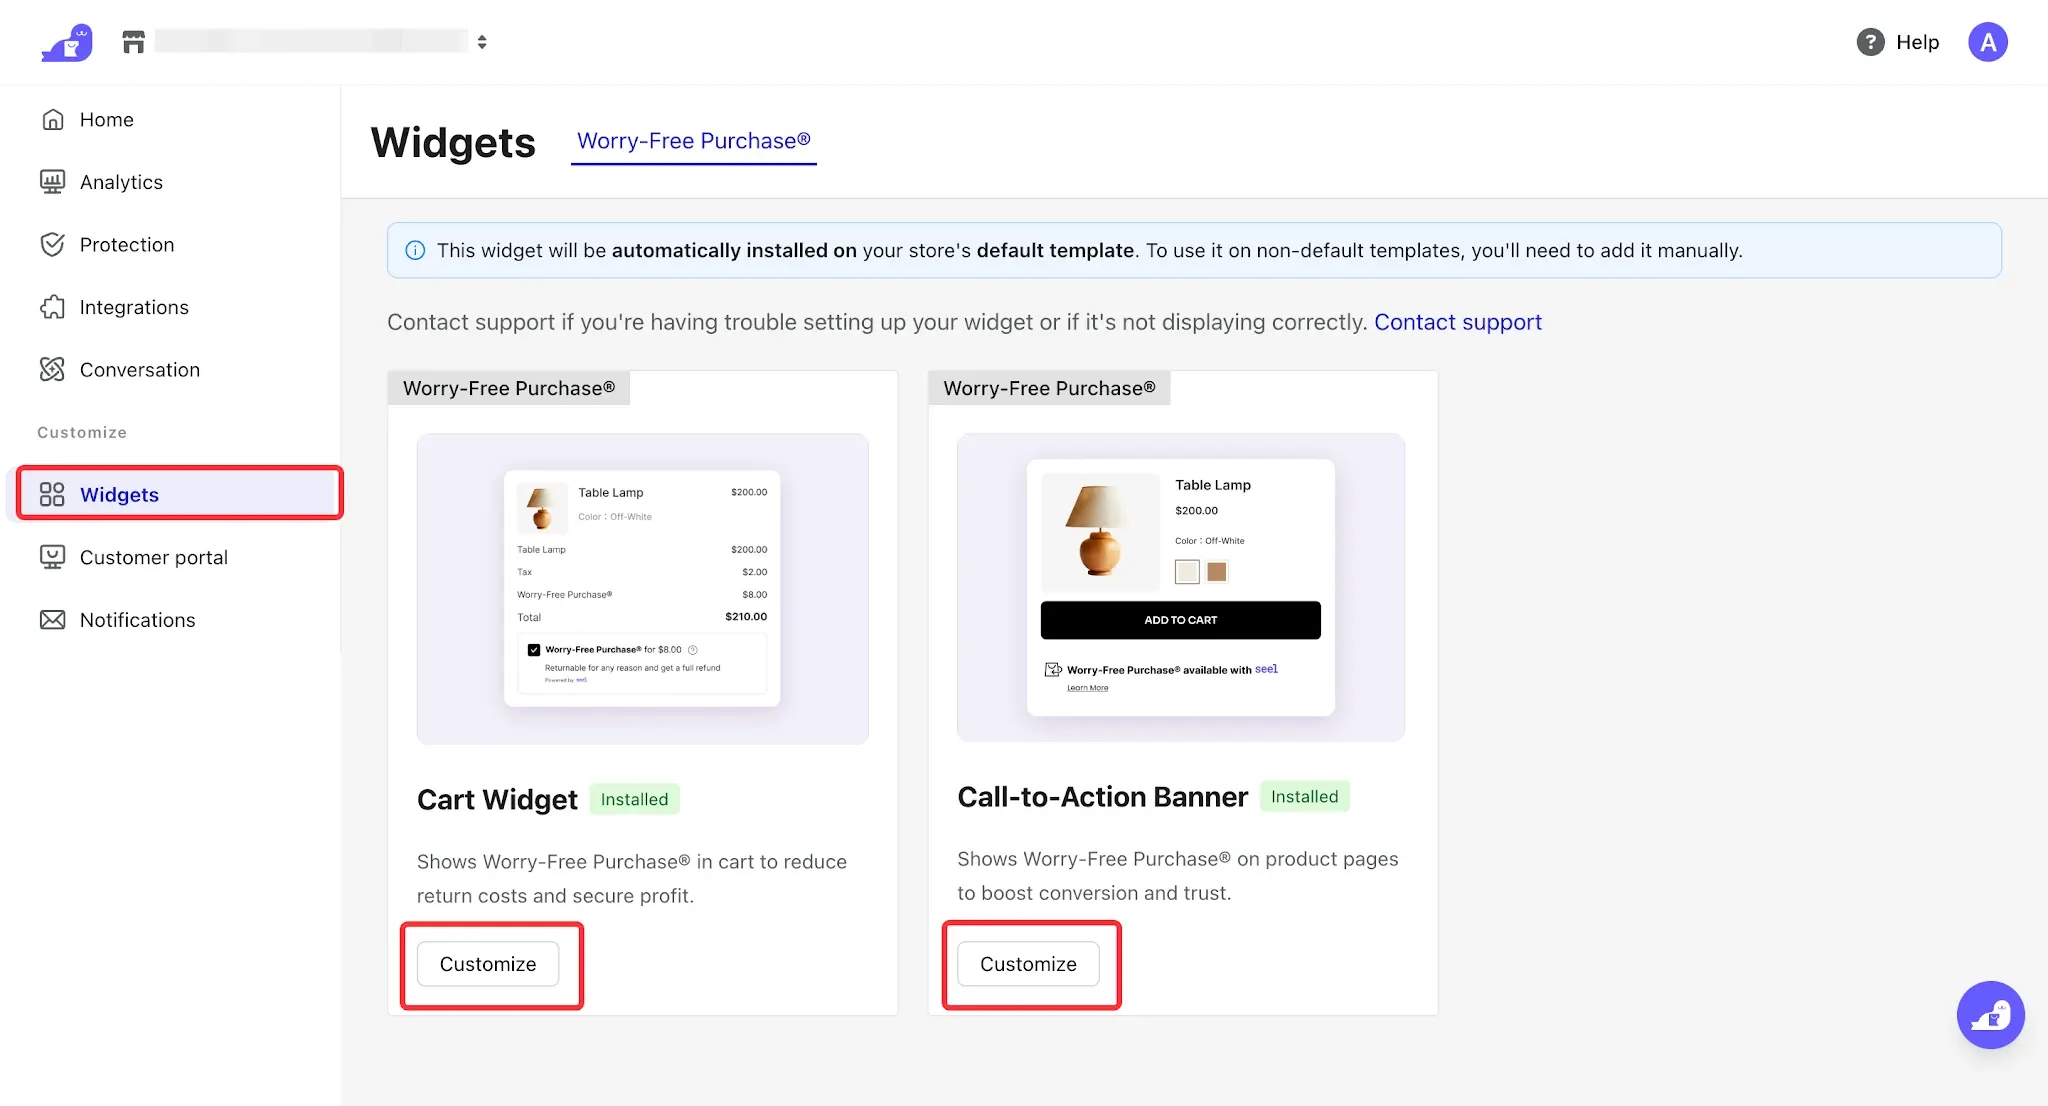
This section allows you to configure the Seel Shipping Protection widgets displayed on the storefront.
Two types of widgets are supported: Cart widget and Product page Banner. Go to the Widgets section in the Seel dashboard, select the widget type you want to configure, and click the Customize button.
Cart Widget
It is recommended to install the Seel widget on the Cart page to achieve better conversion performance.
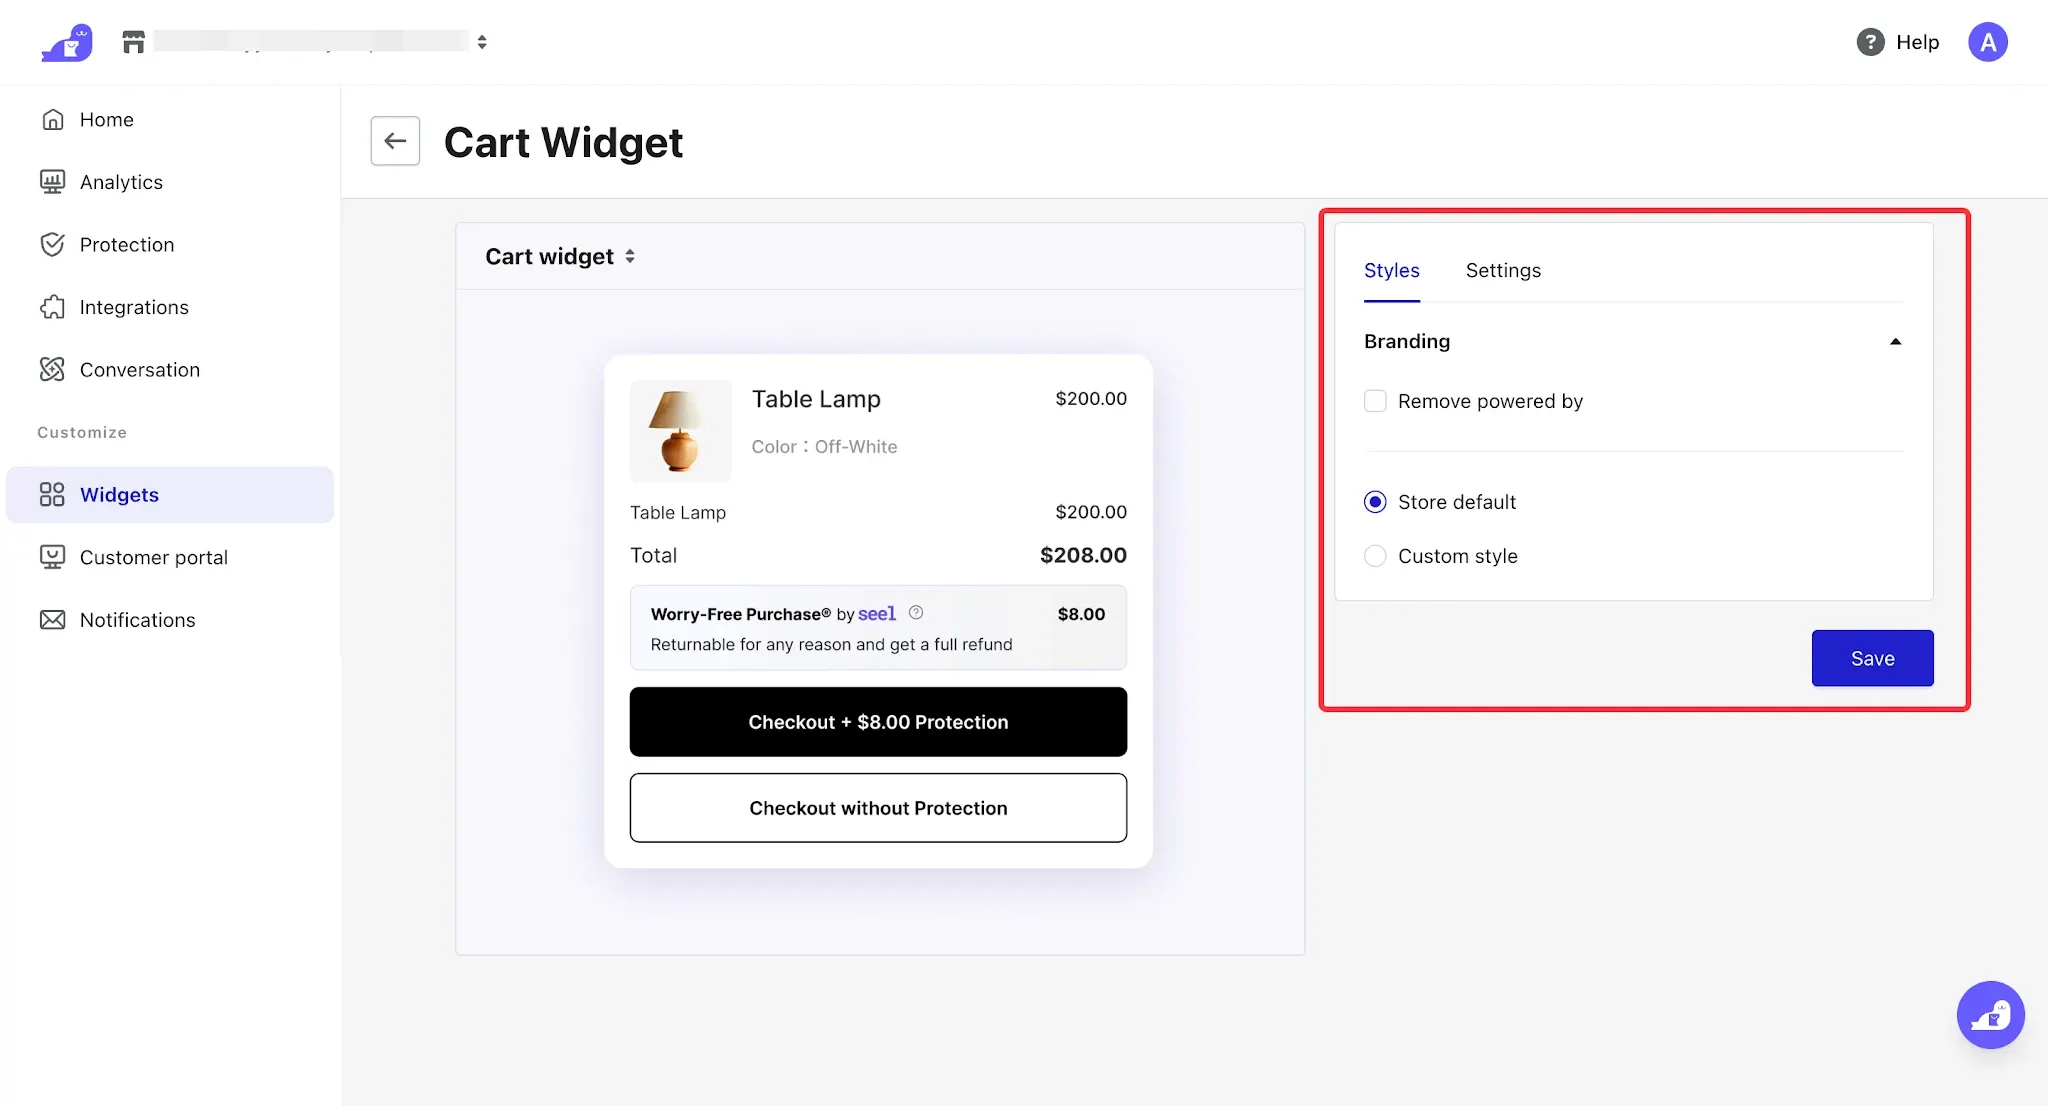
In Styles, you can configure the widget appearance:
- Branding: Choose whether to display or remove the "Powered by Seel" label.
- Store default: Uses the default style and automatically adapts to your store theme.
- Custom style: Customize colors, fonts, and other settings to better match your brand identity.
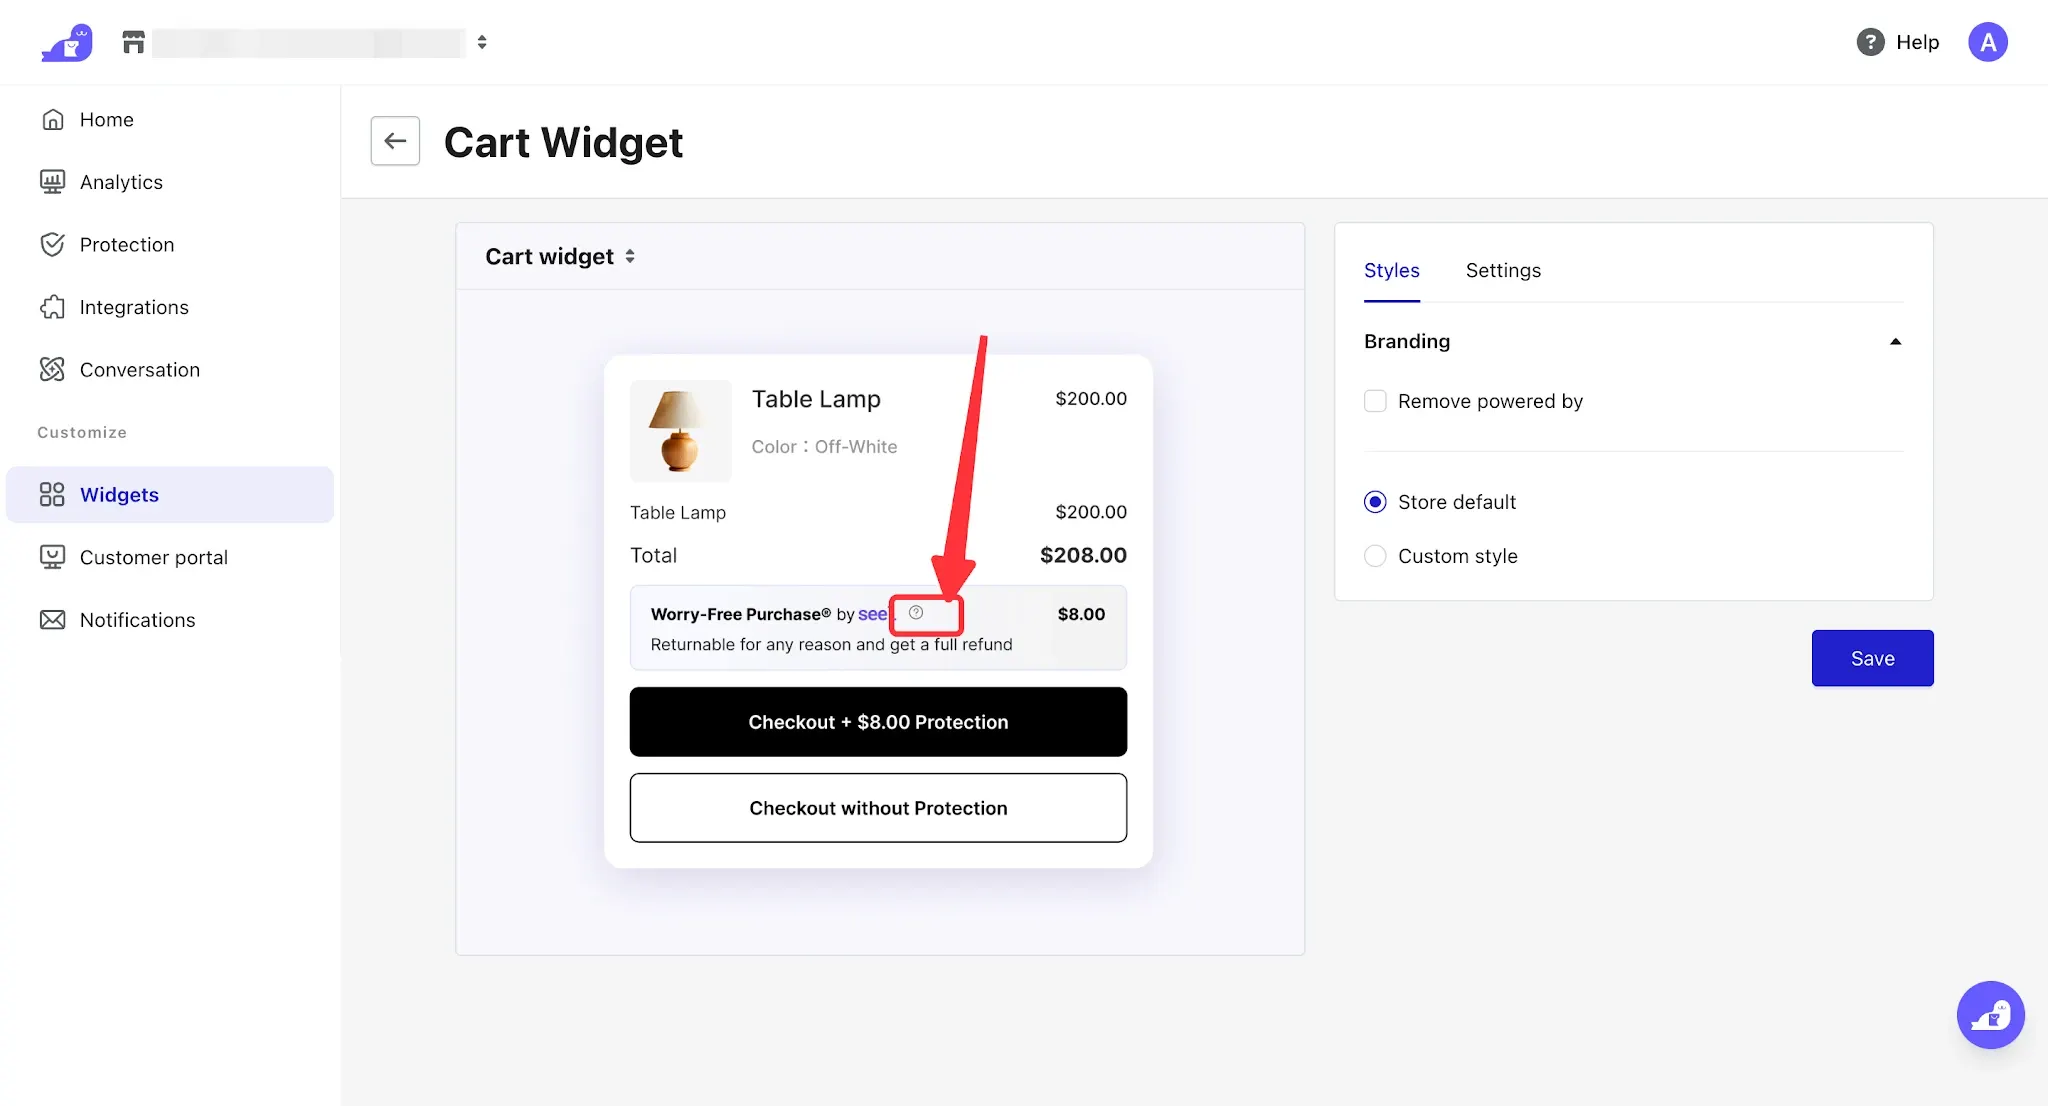
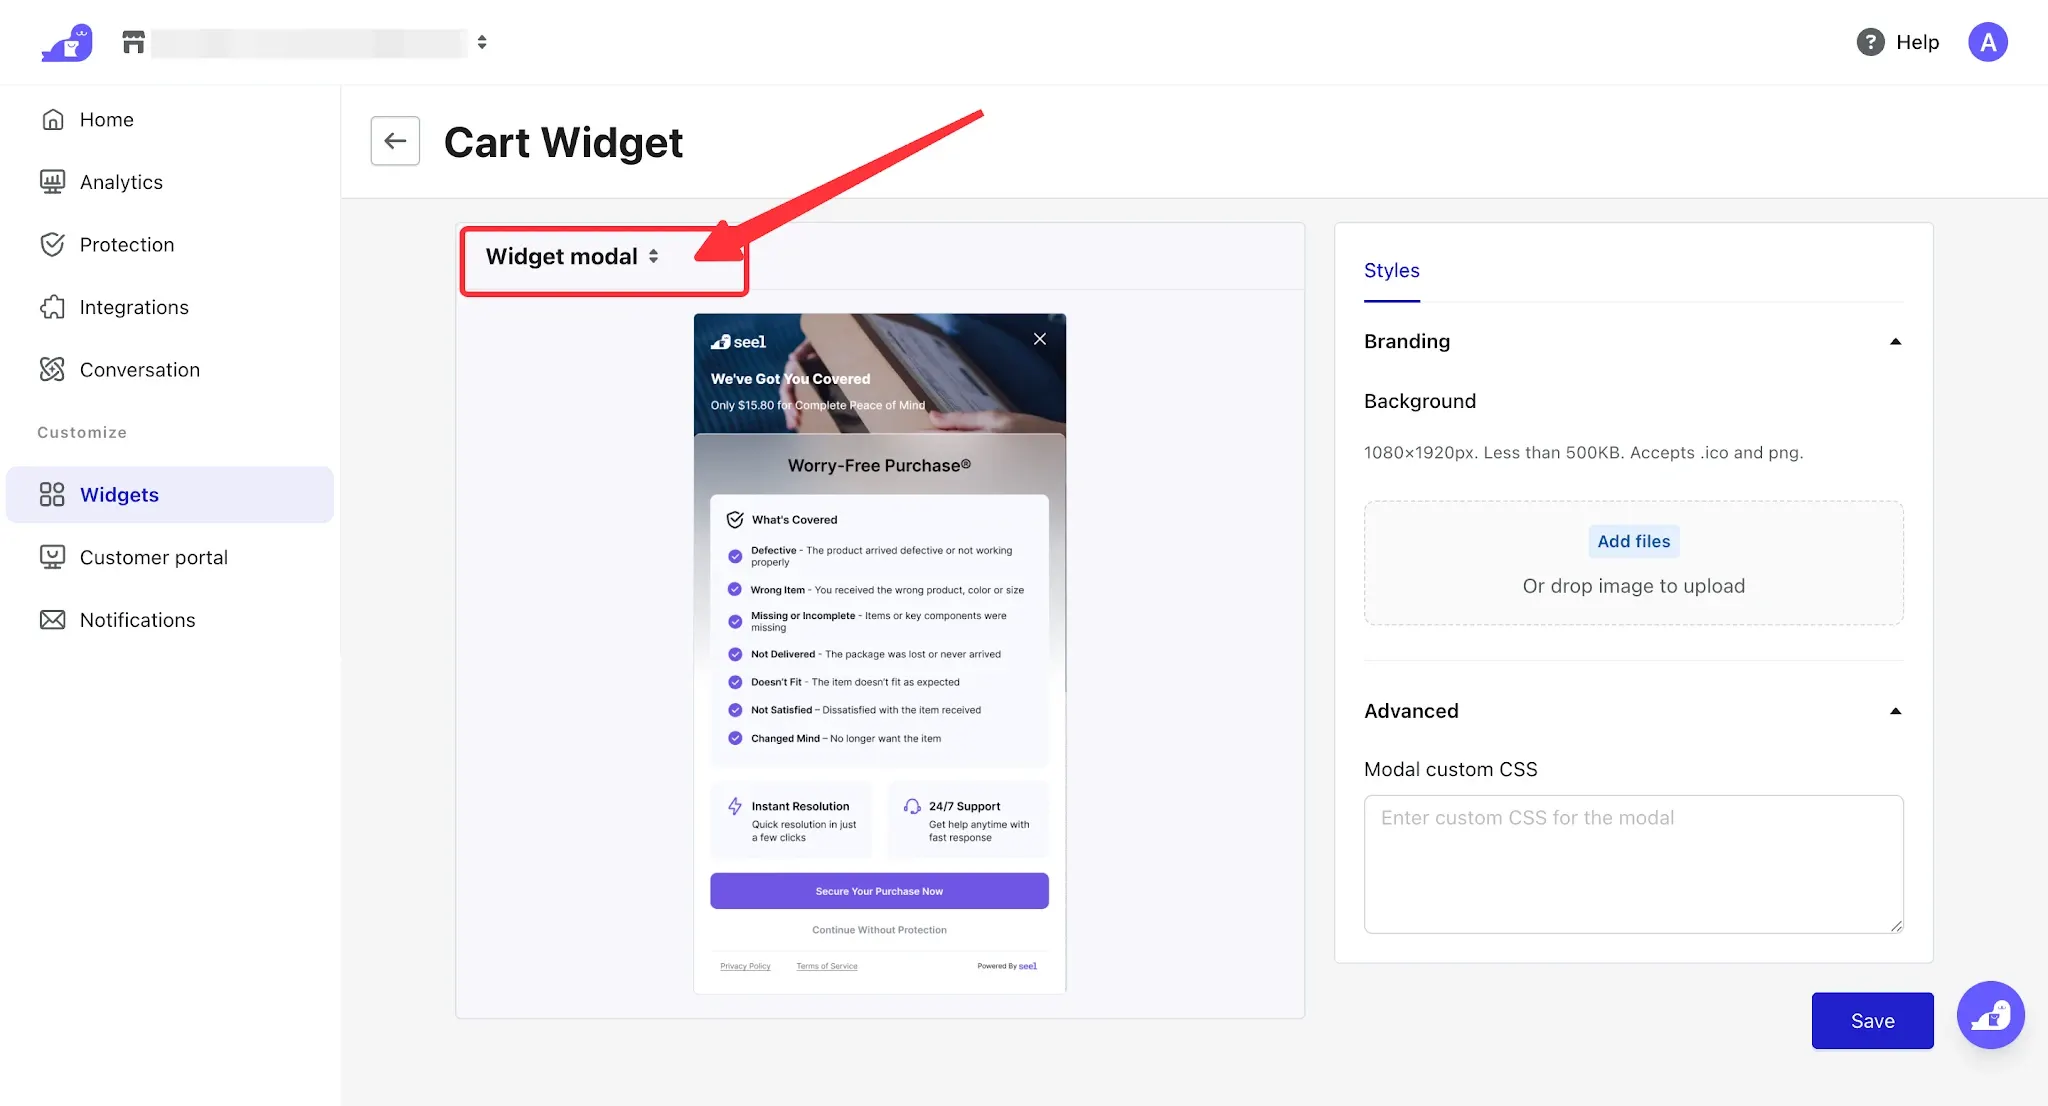
- When customers click the question mark on the Seel Cart widget, the Seel pop-up window will be displayed. Click the top-left corner to switch to Widget Modal and configure the pop-up window style.
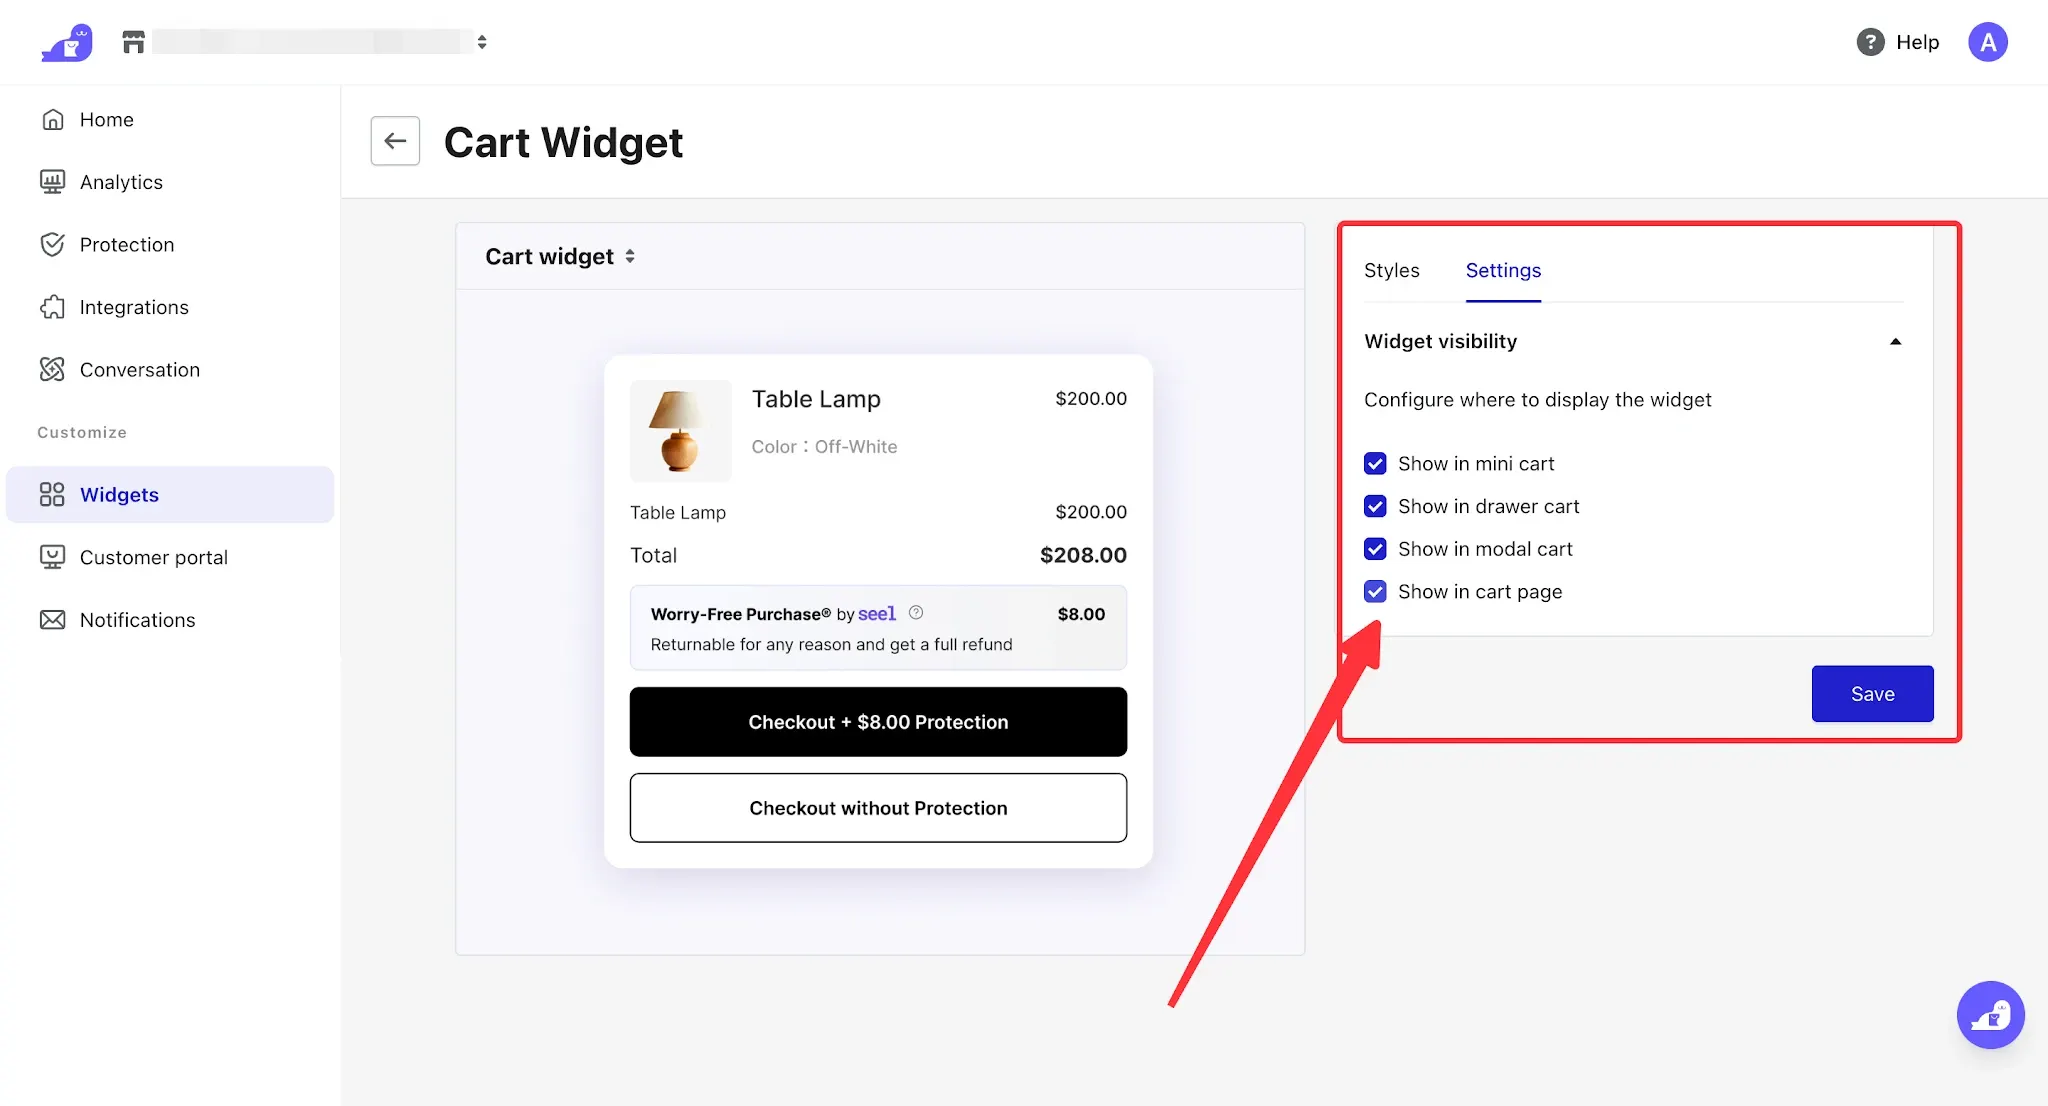
- Click Settings to configure the specific position where the Cart widget will be displayed.
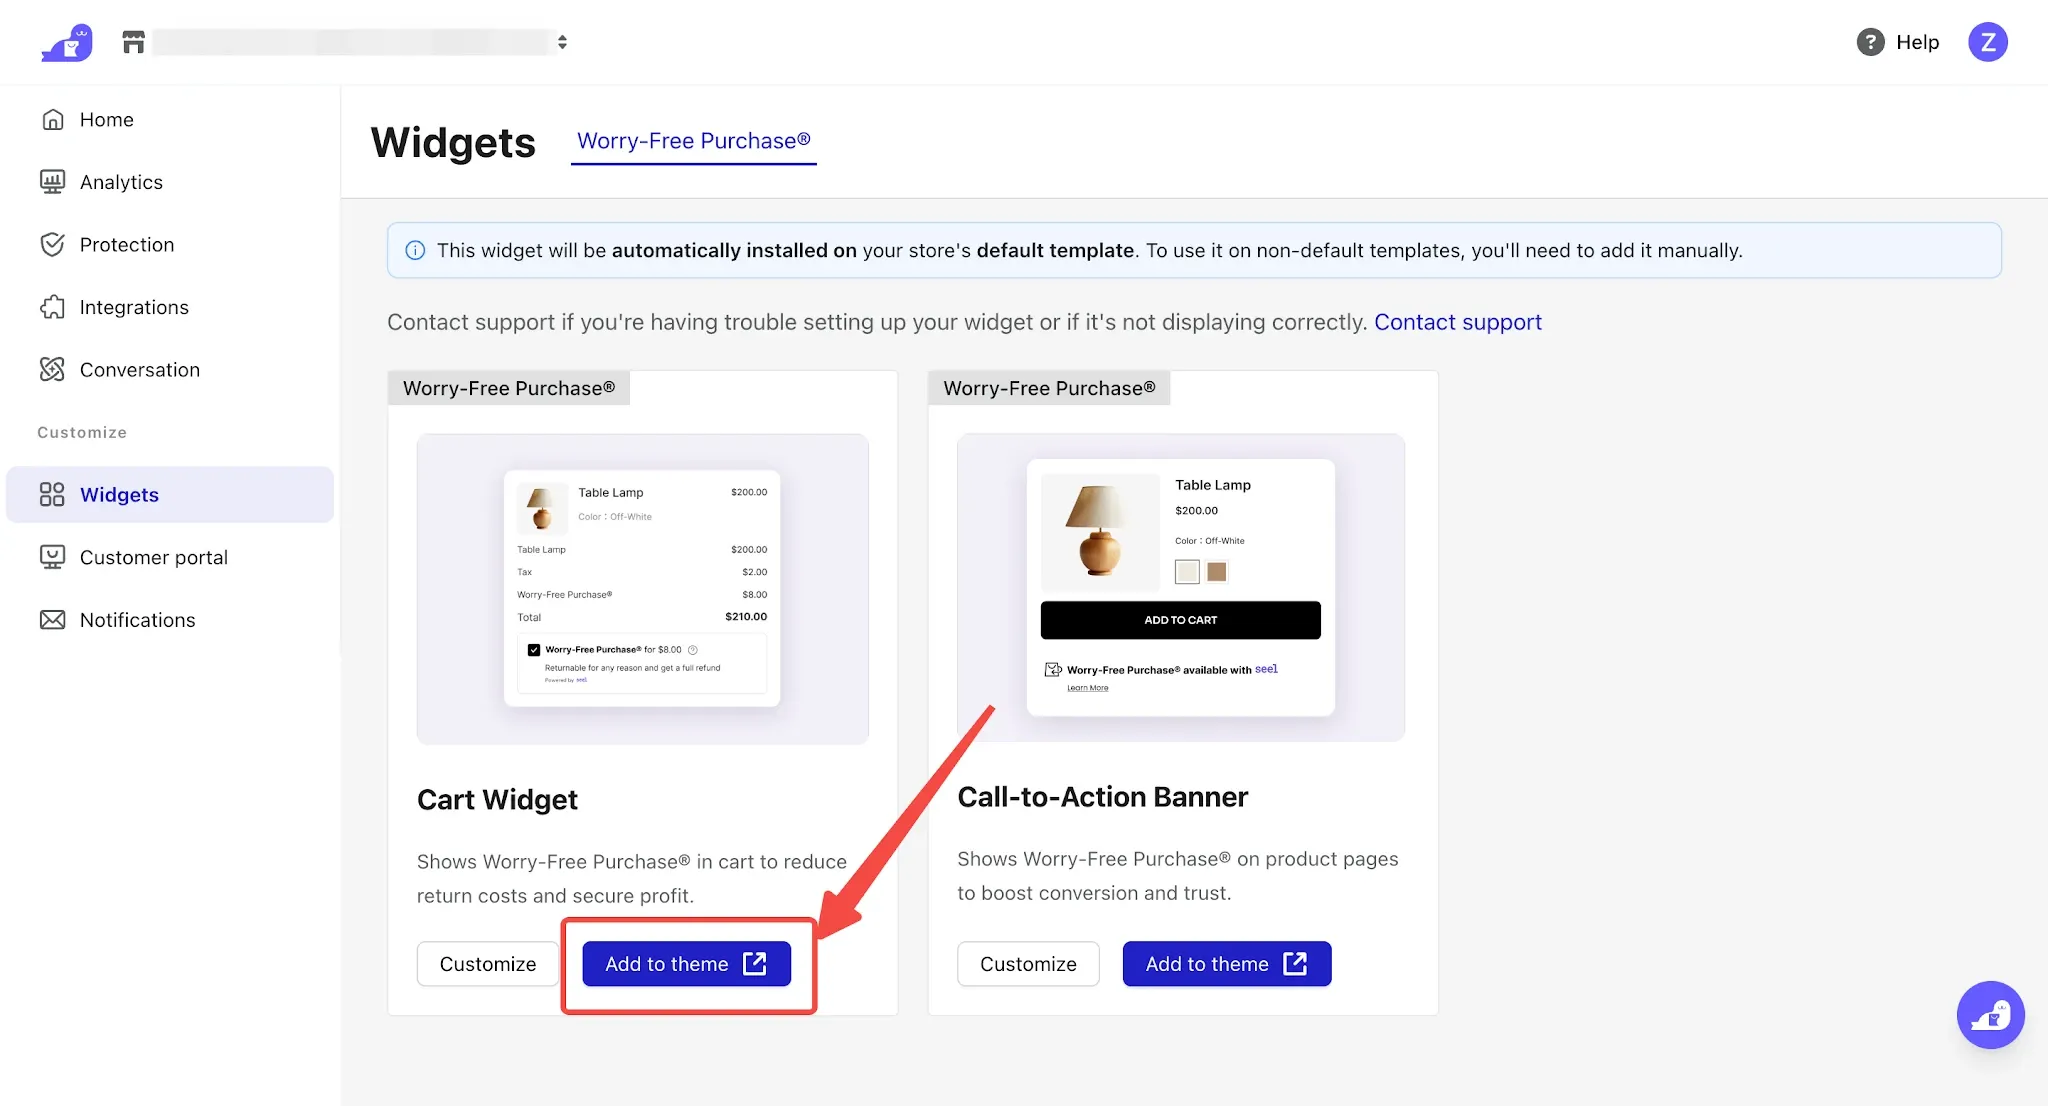
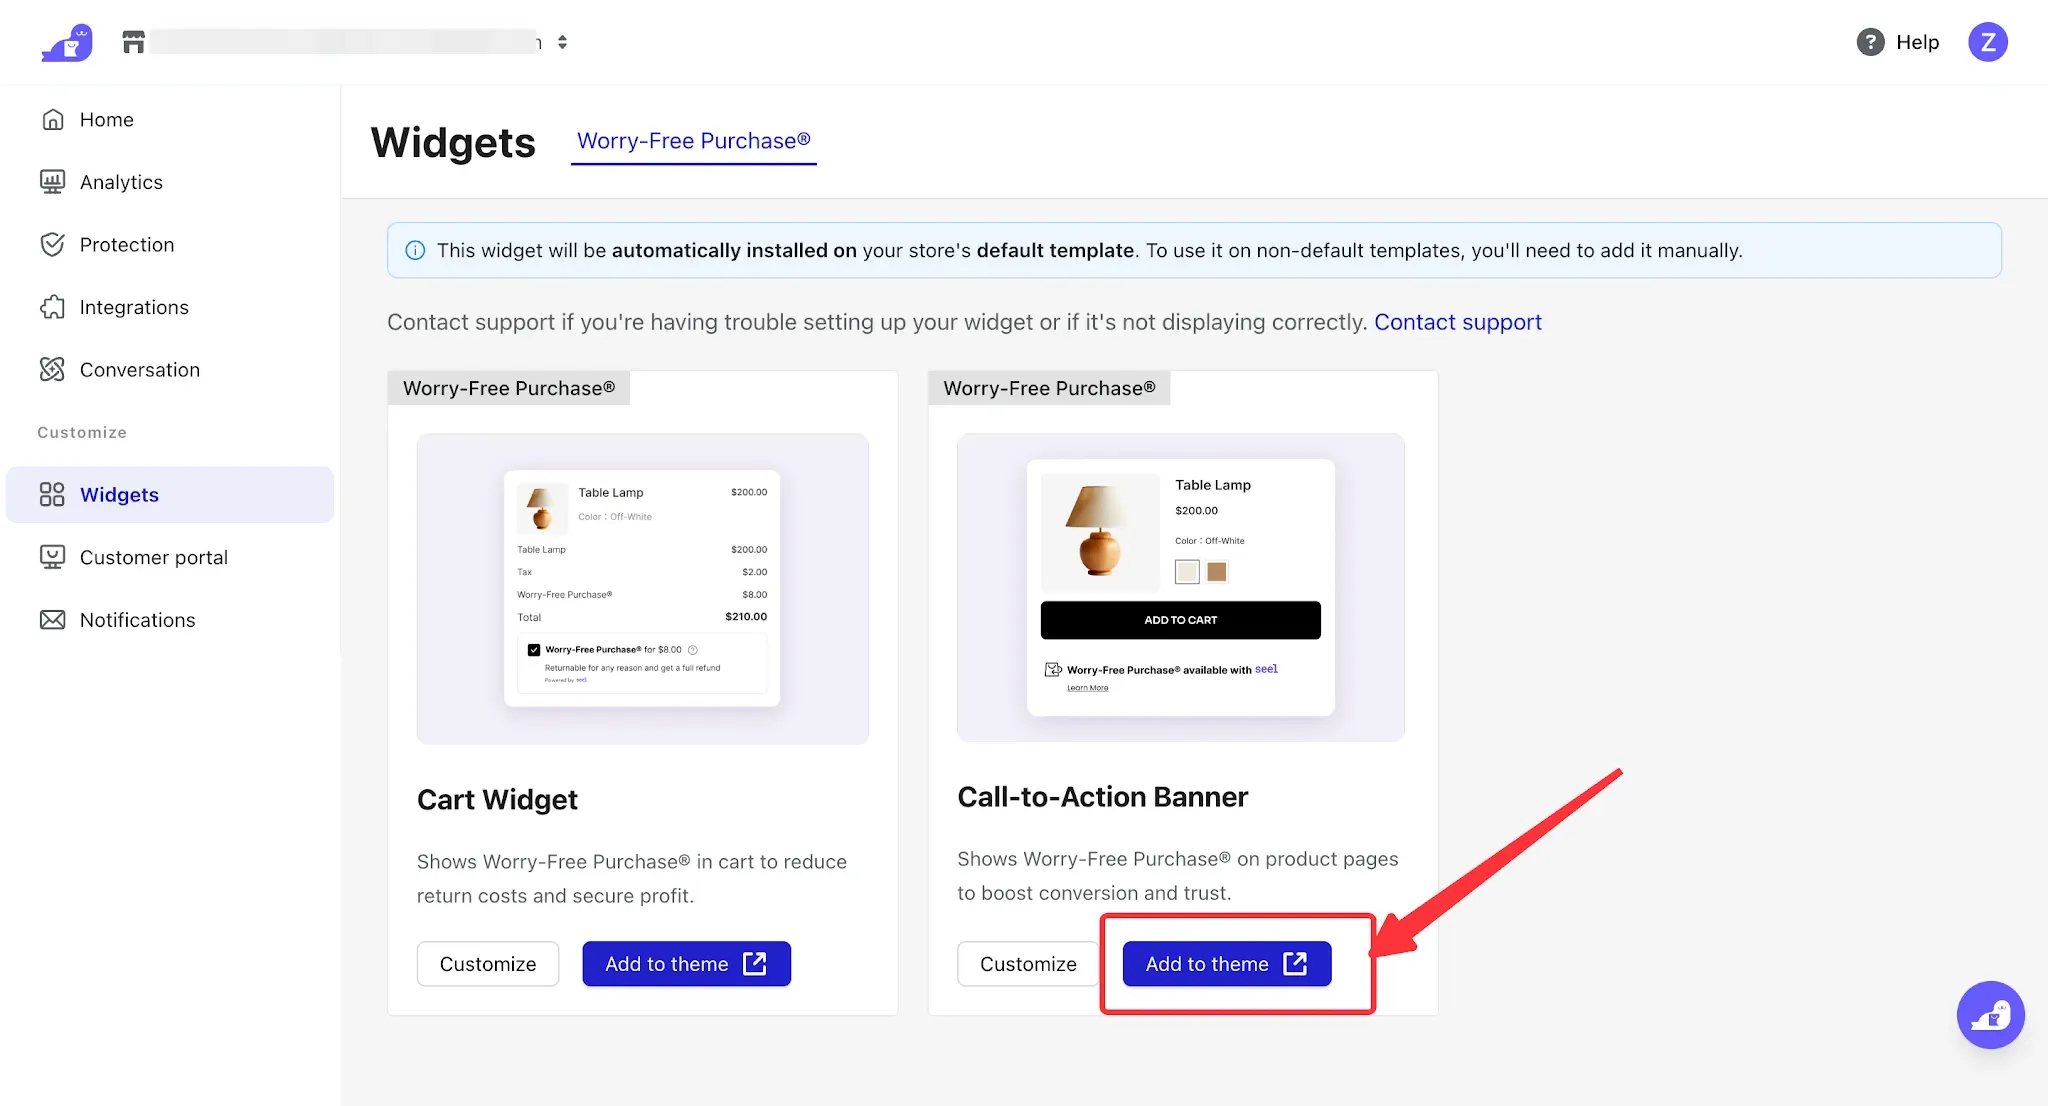
- After completing the configuration, return to the previous page and click Add to theme to add the widget card to the theme and reuse the configured style.
Call-to-Action Banner
- Adding a banner to the product detail page can help enhance customers'purchase confidence. Here, you can configure the banner style according to your store's needs.
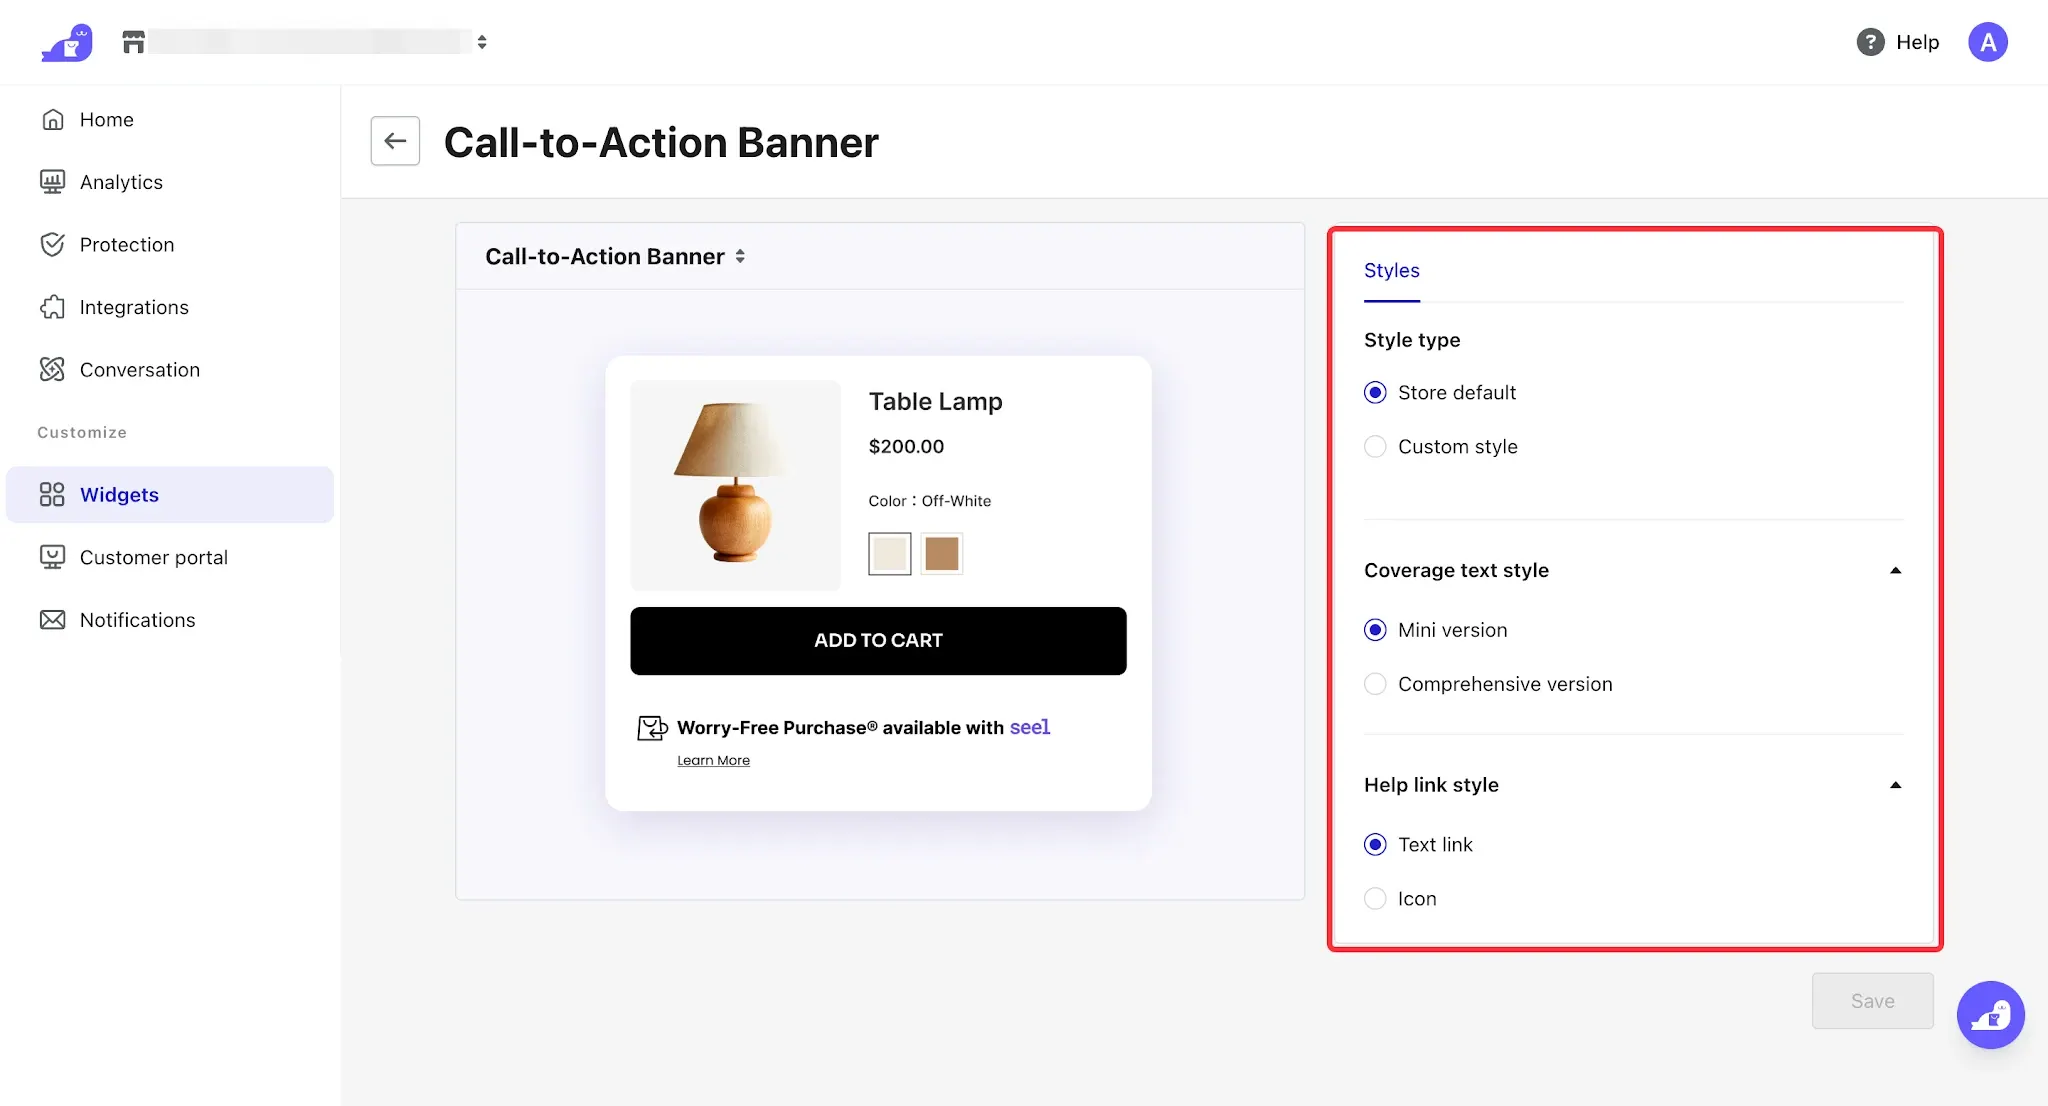
- Click Learn more in the top-left corner to configure whether clicking the question mark on the Seel Banner widget opens a pop-up window or redirects to a specific URL.
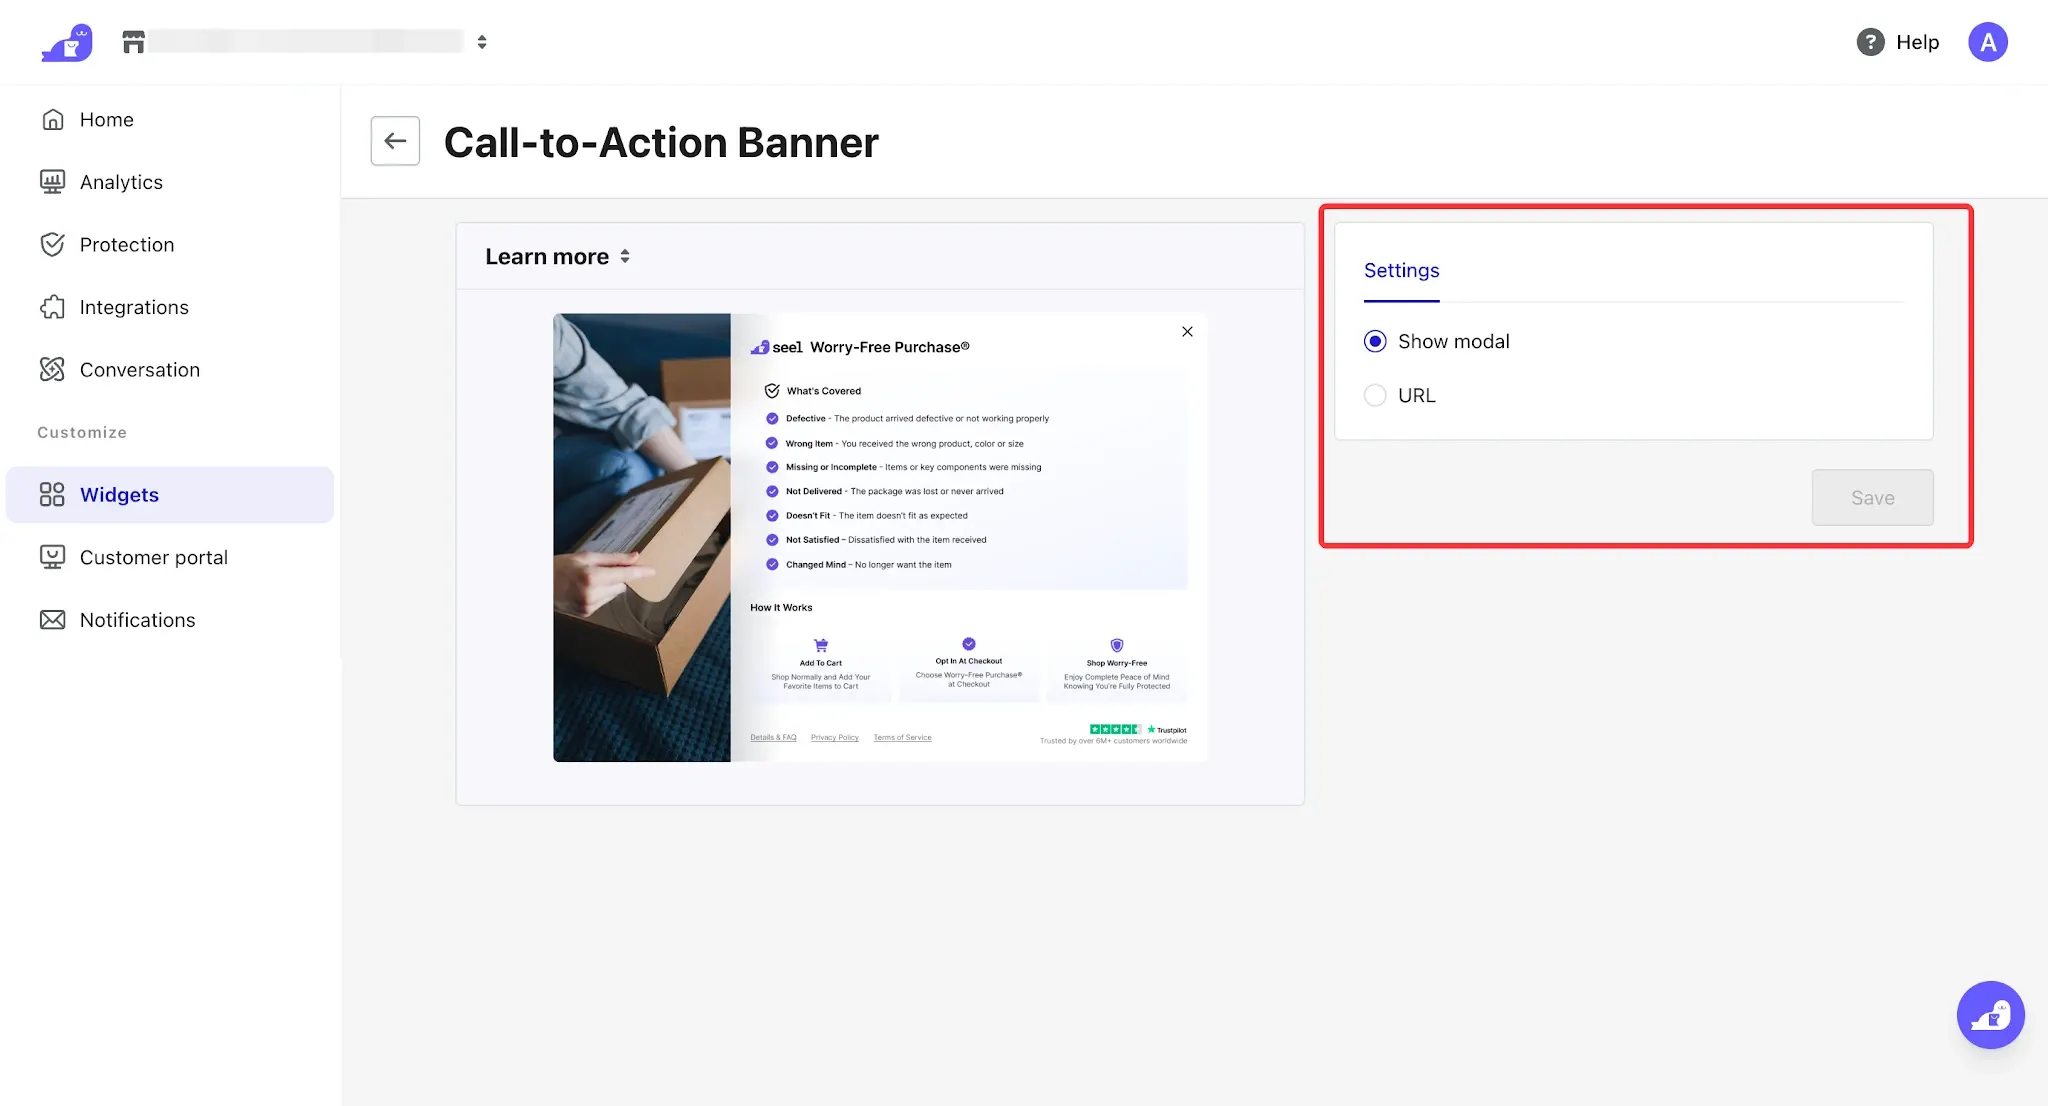
- After completing the setup, return to the previous page and click Add to theme to add the widget card to the theme and reuse the configured style.
Customer Portal
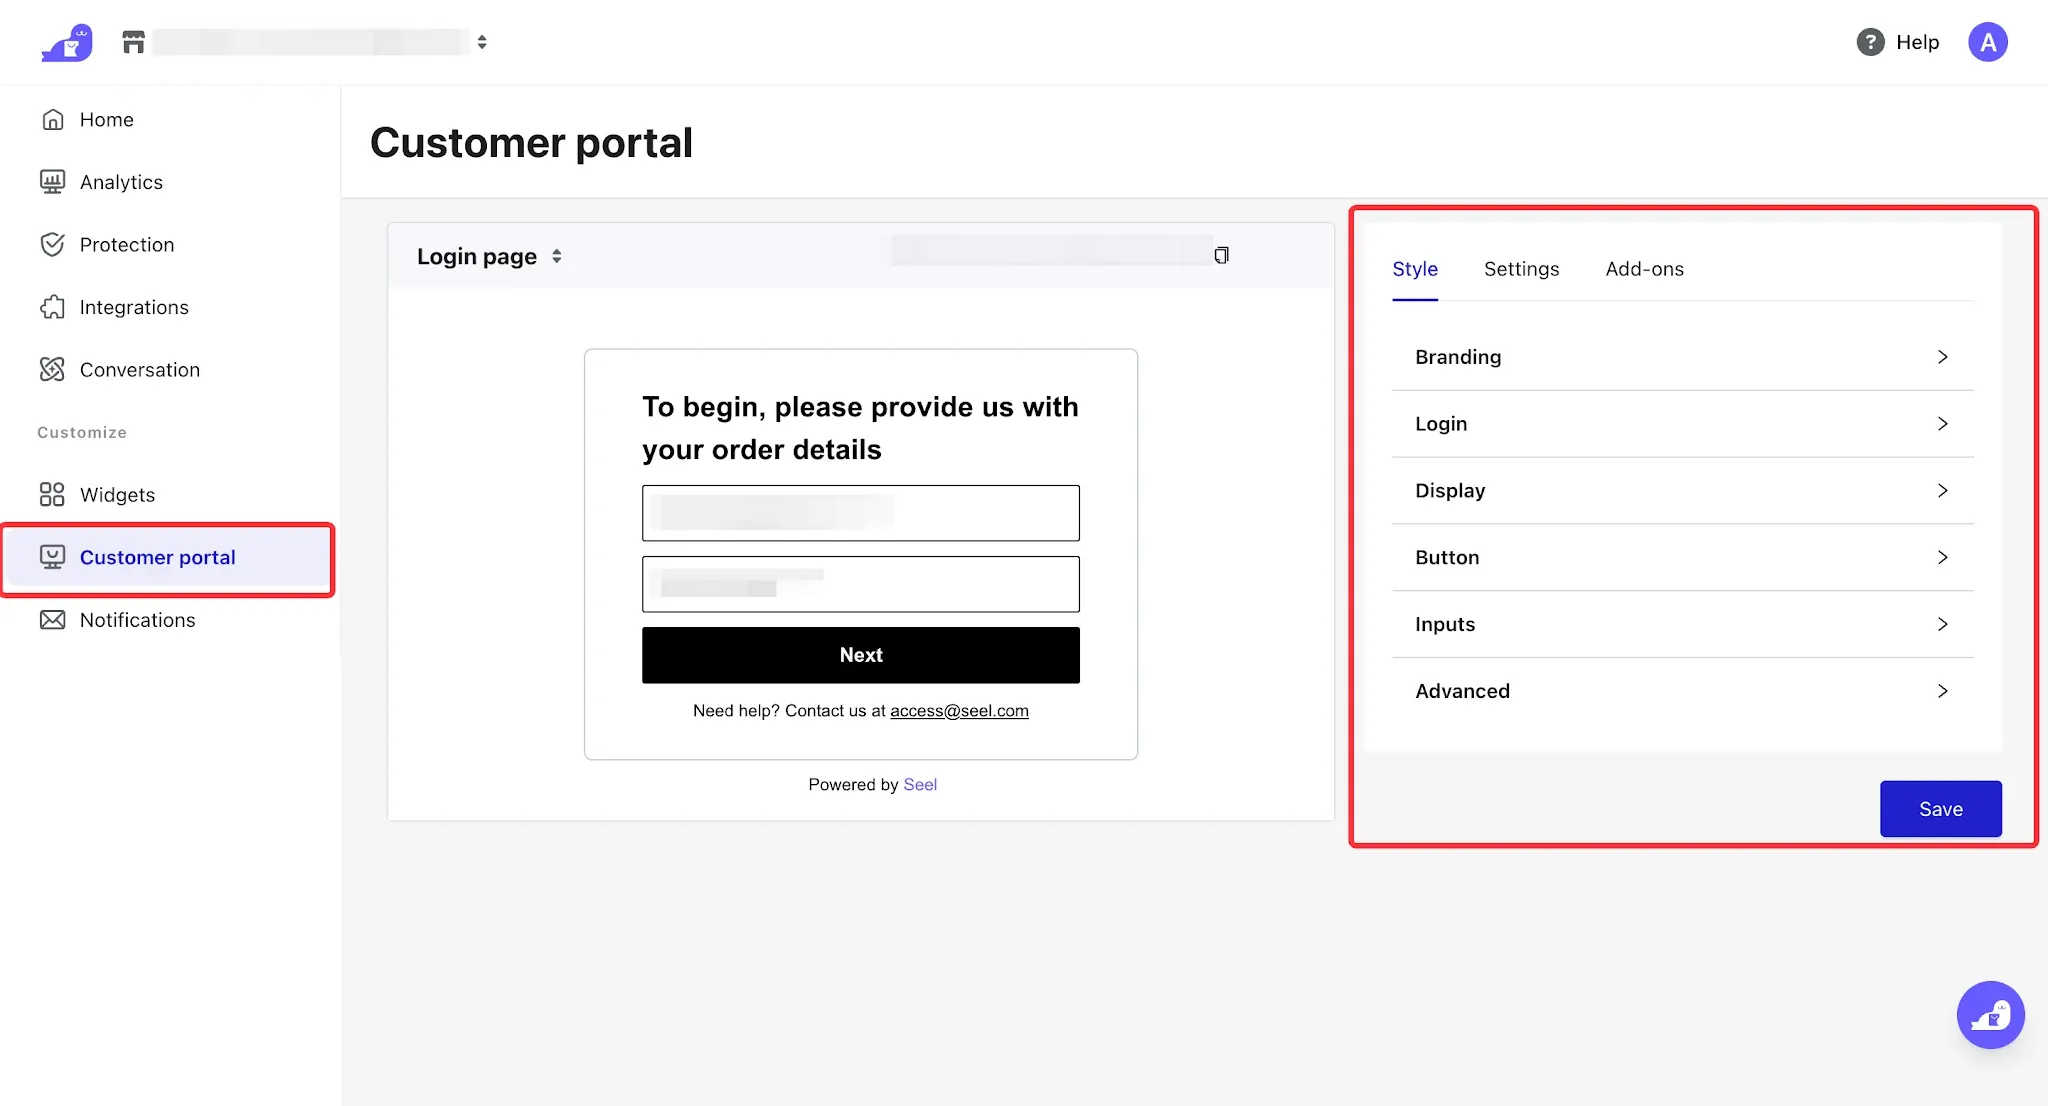
Customer Portal allows you to set up a dedicated claims center entrance. A variety of customization options are available on the right side of the page.
Tip
After placing an order, customers will receive the corresponding insurance policy email, which includes the entrance to the Claims Center. You can also send the Claims Center link directly to customers for login.
In Style, you can customize the following settings as needed:
- Branding: Upload your brand logo and favicon to maintain a consistent store visual identity.
- Login: Configure the background and layout of the login page.
- Display: Configure font styles and default font colors.
- Button: Customize button background, font, and border colors.
- Inputs: Adjust input field background, font, and border colors.
- Advanced: Use custom CSS code to further customize the styles.
After making the adjustments, click Save to save the changes.
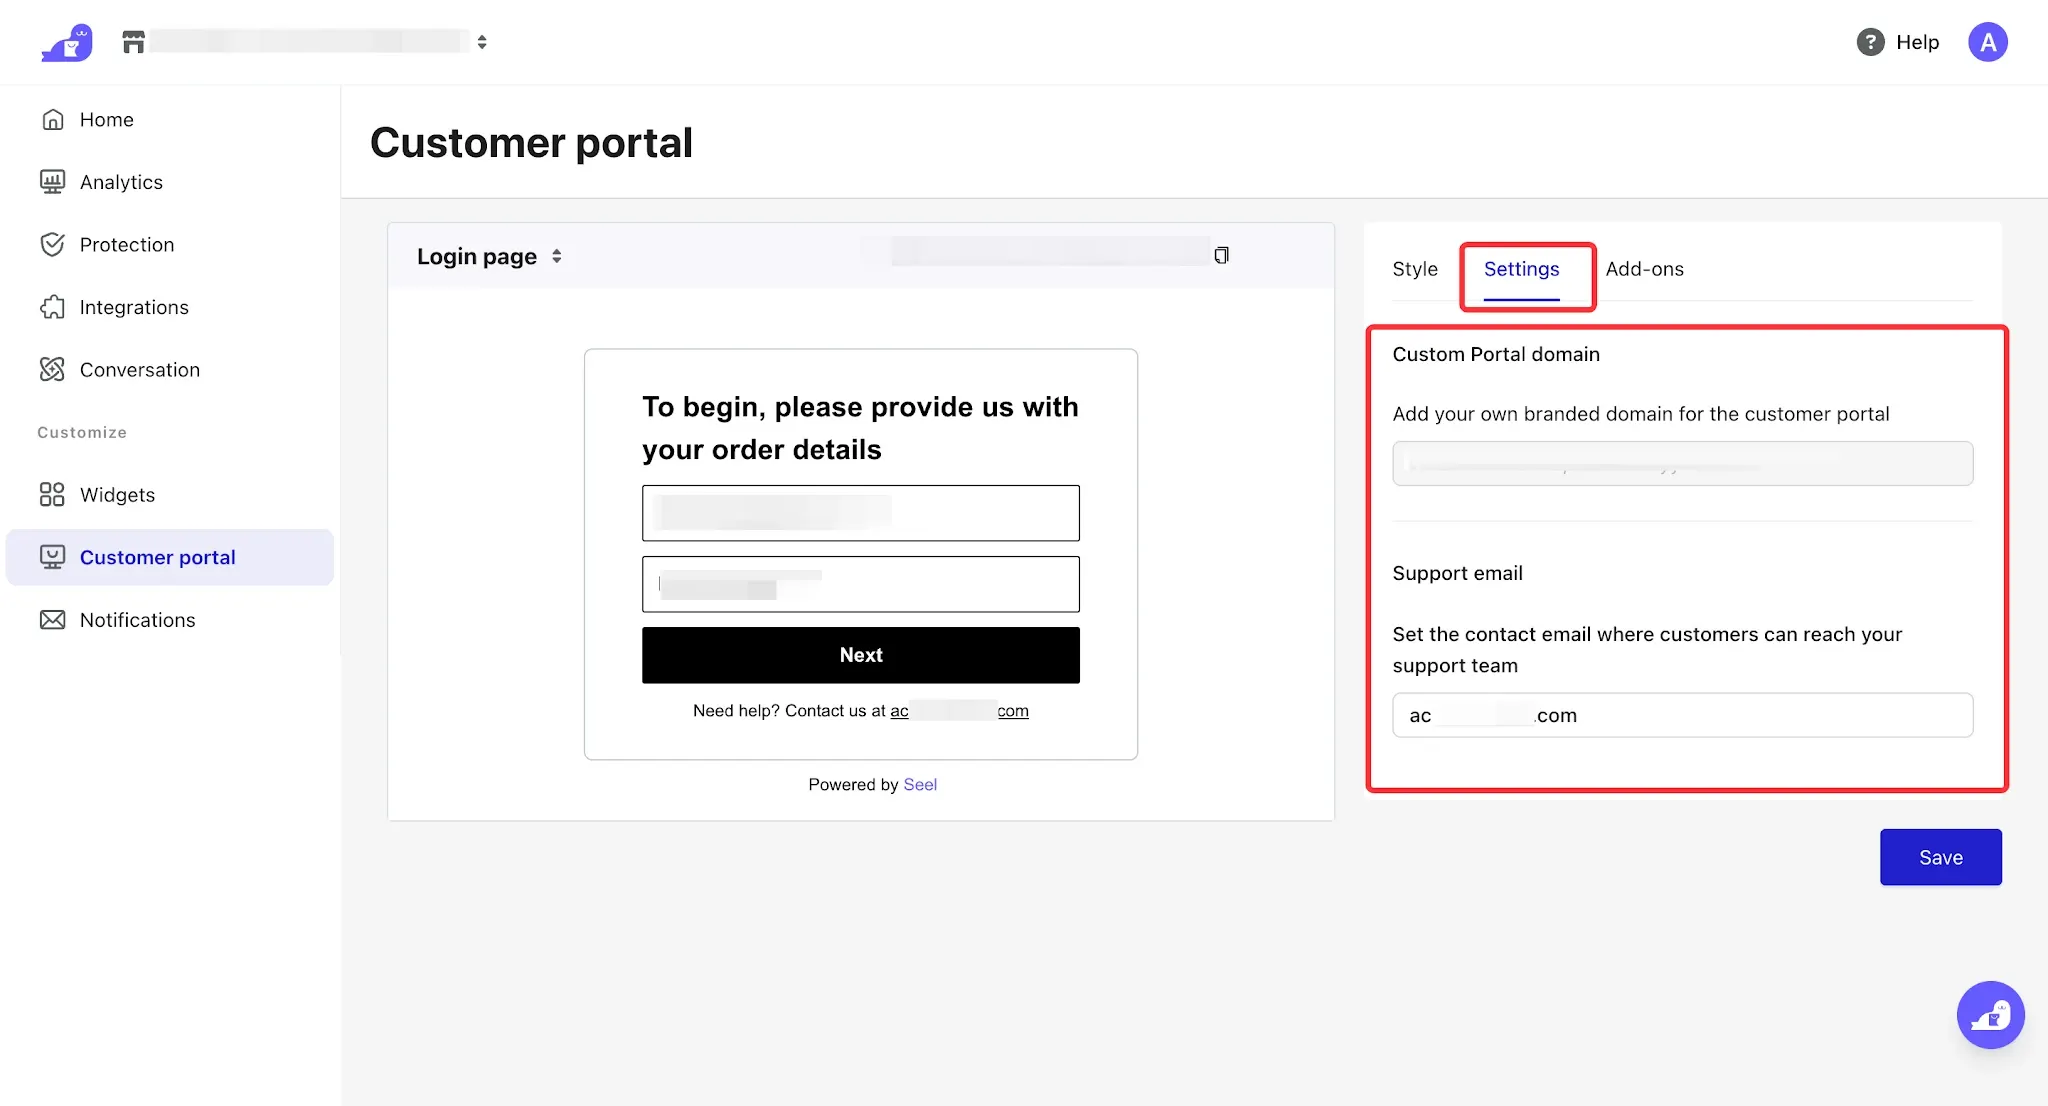
- Go to the Settings page to configure the Claims Center domain and support contact email information.
Note
The current Custom Portal domain uses the store’s default domain and does not support modification.
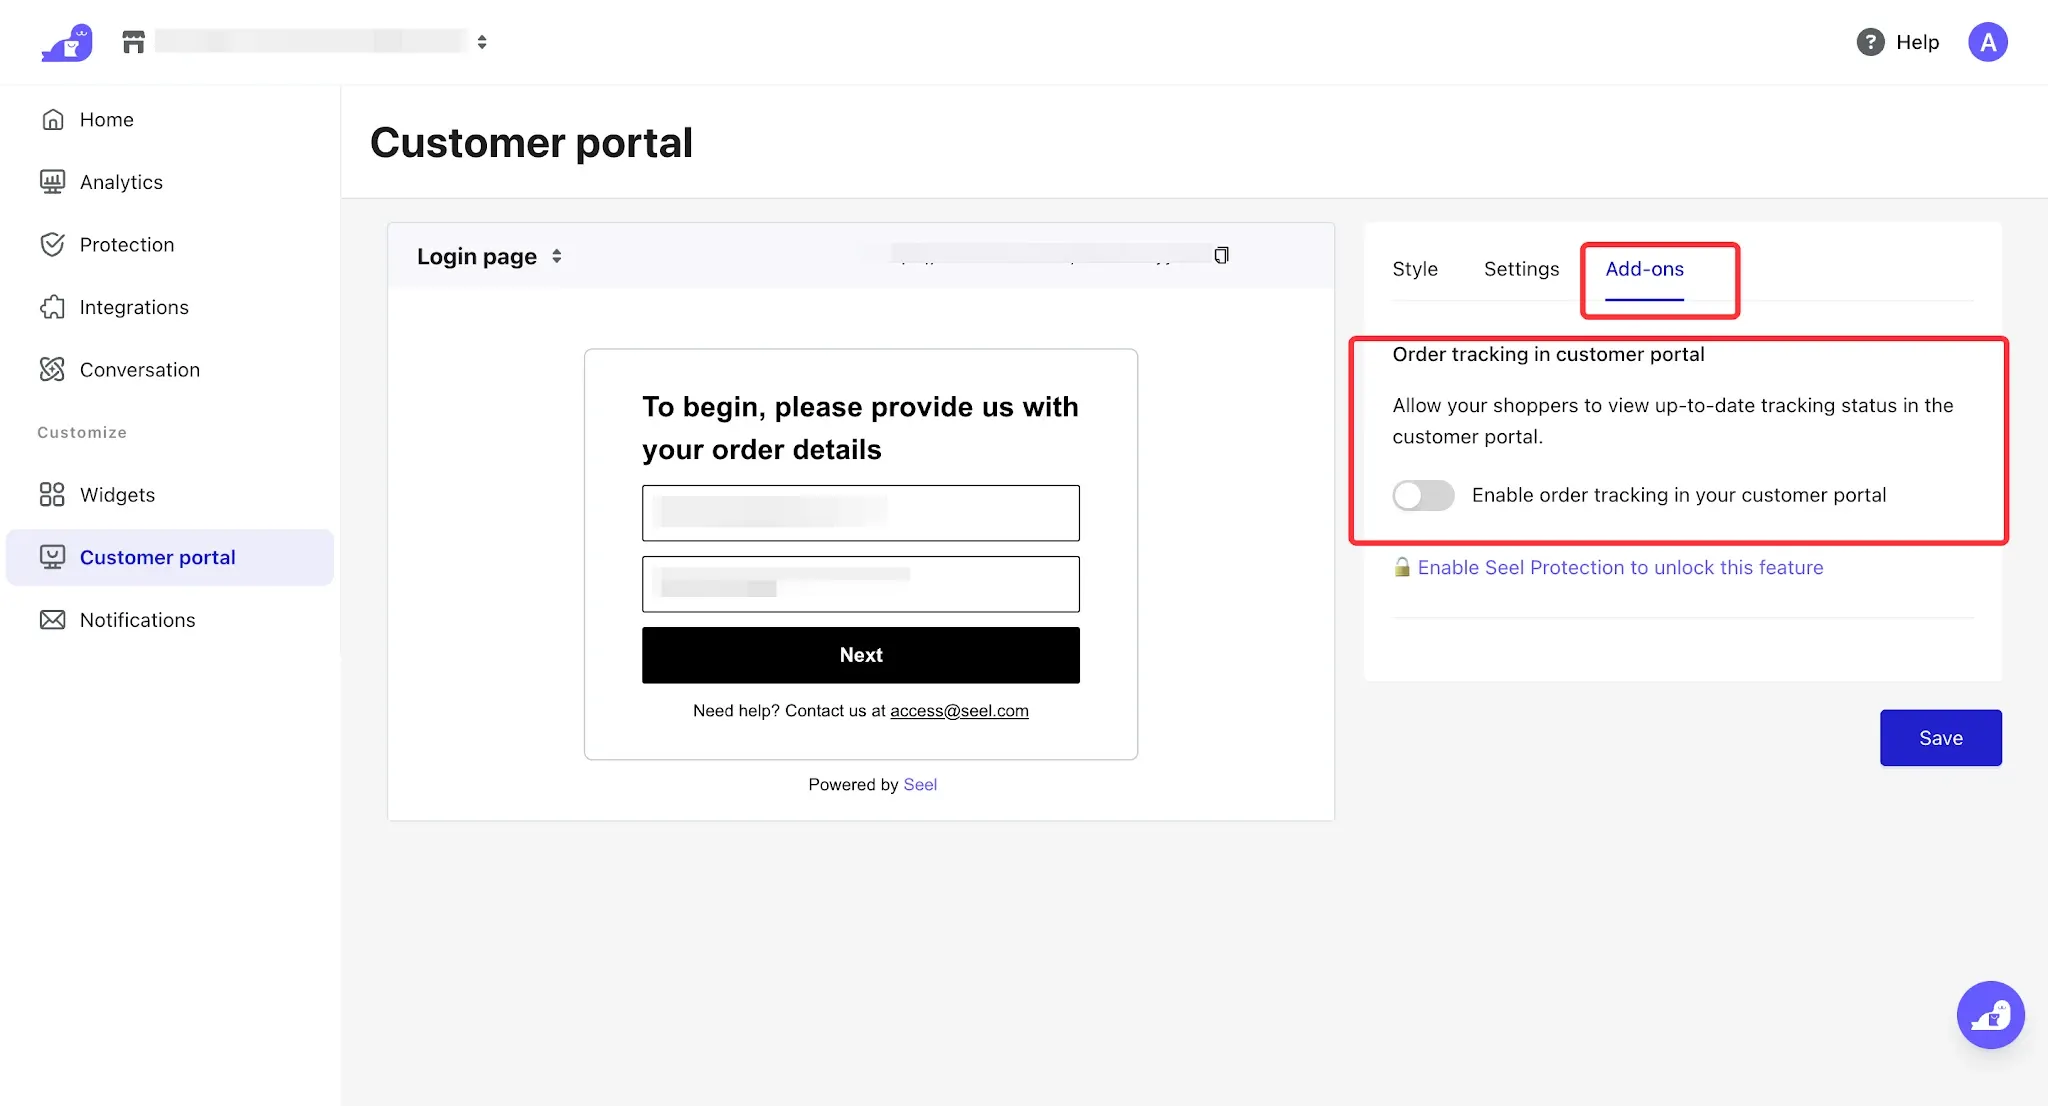
- Add-ons allow you to enable the order tracking feature for customers in the Claims Center.
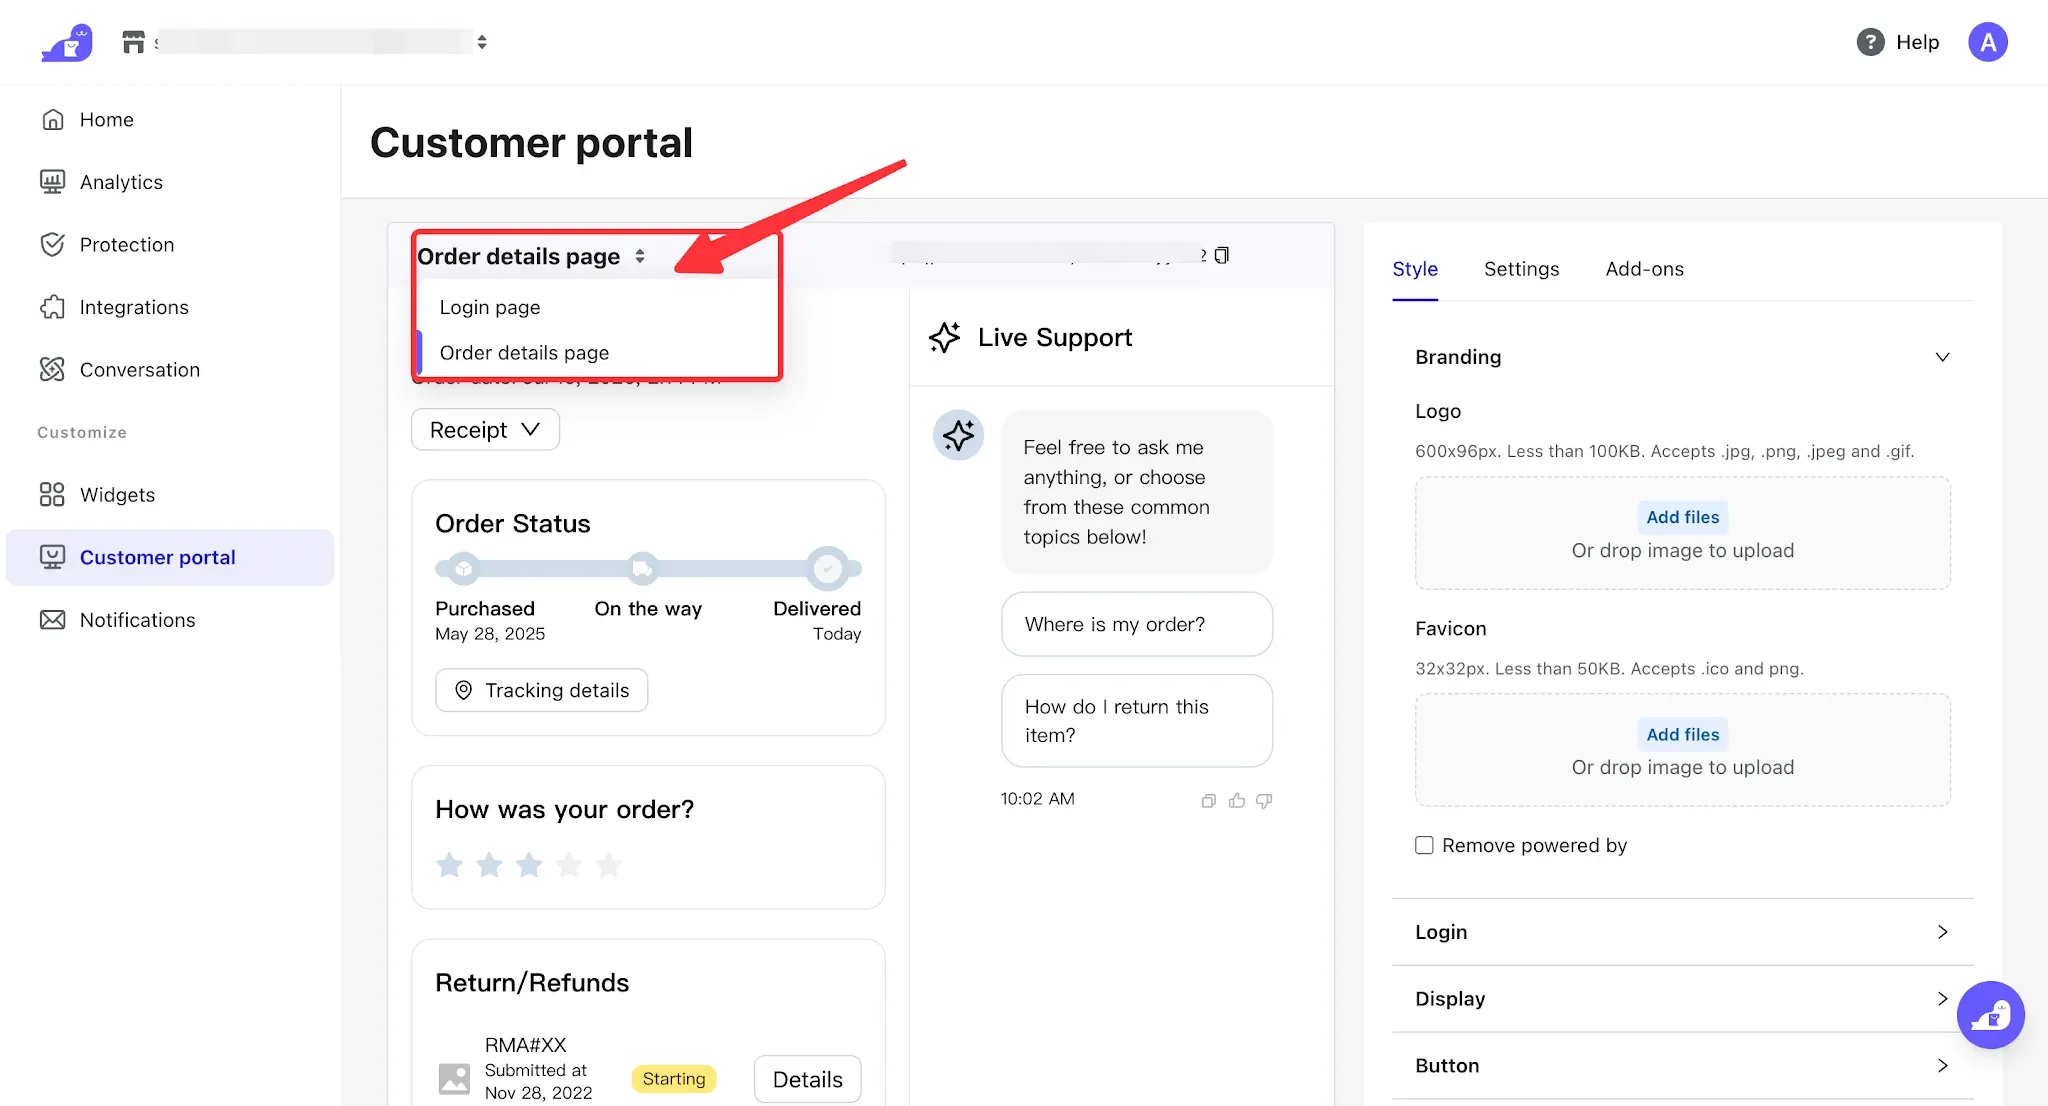
- Click the top-left corner to switch to the Order Details Page interface and adjust the display style of the Claims Center homepage.
Billing
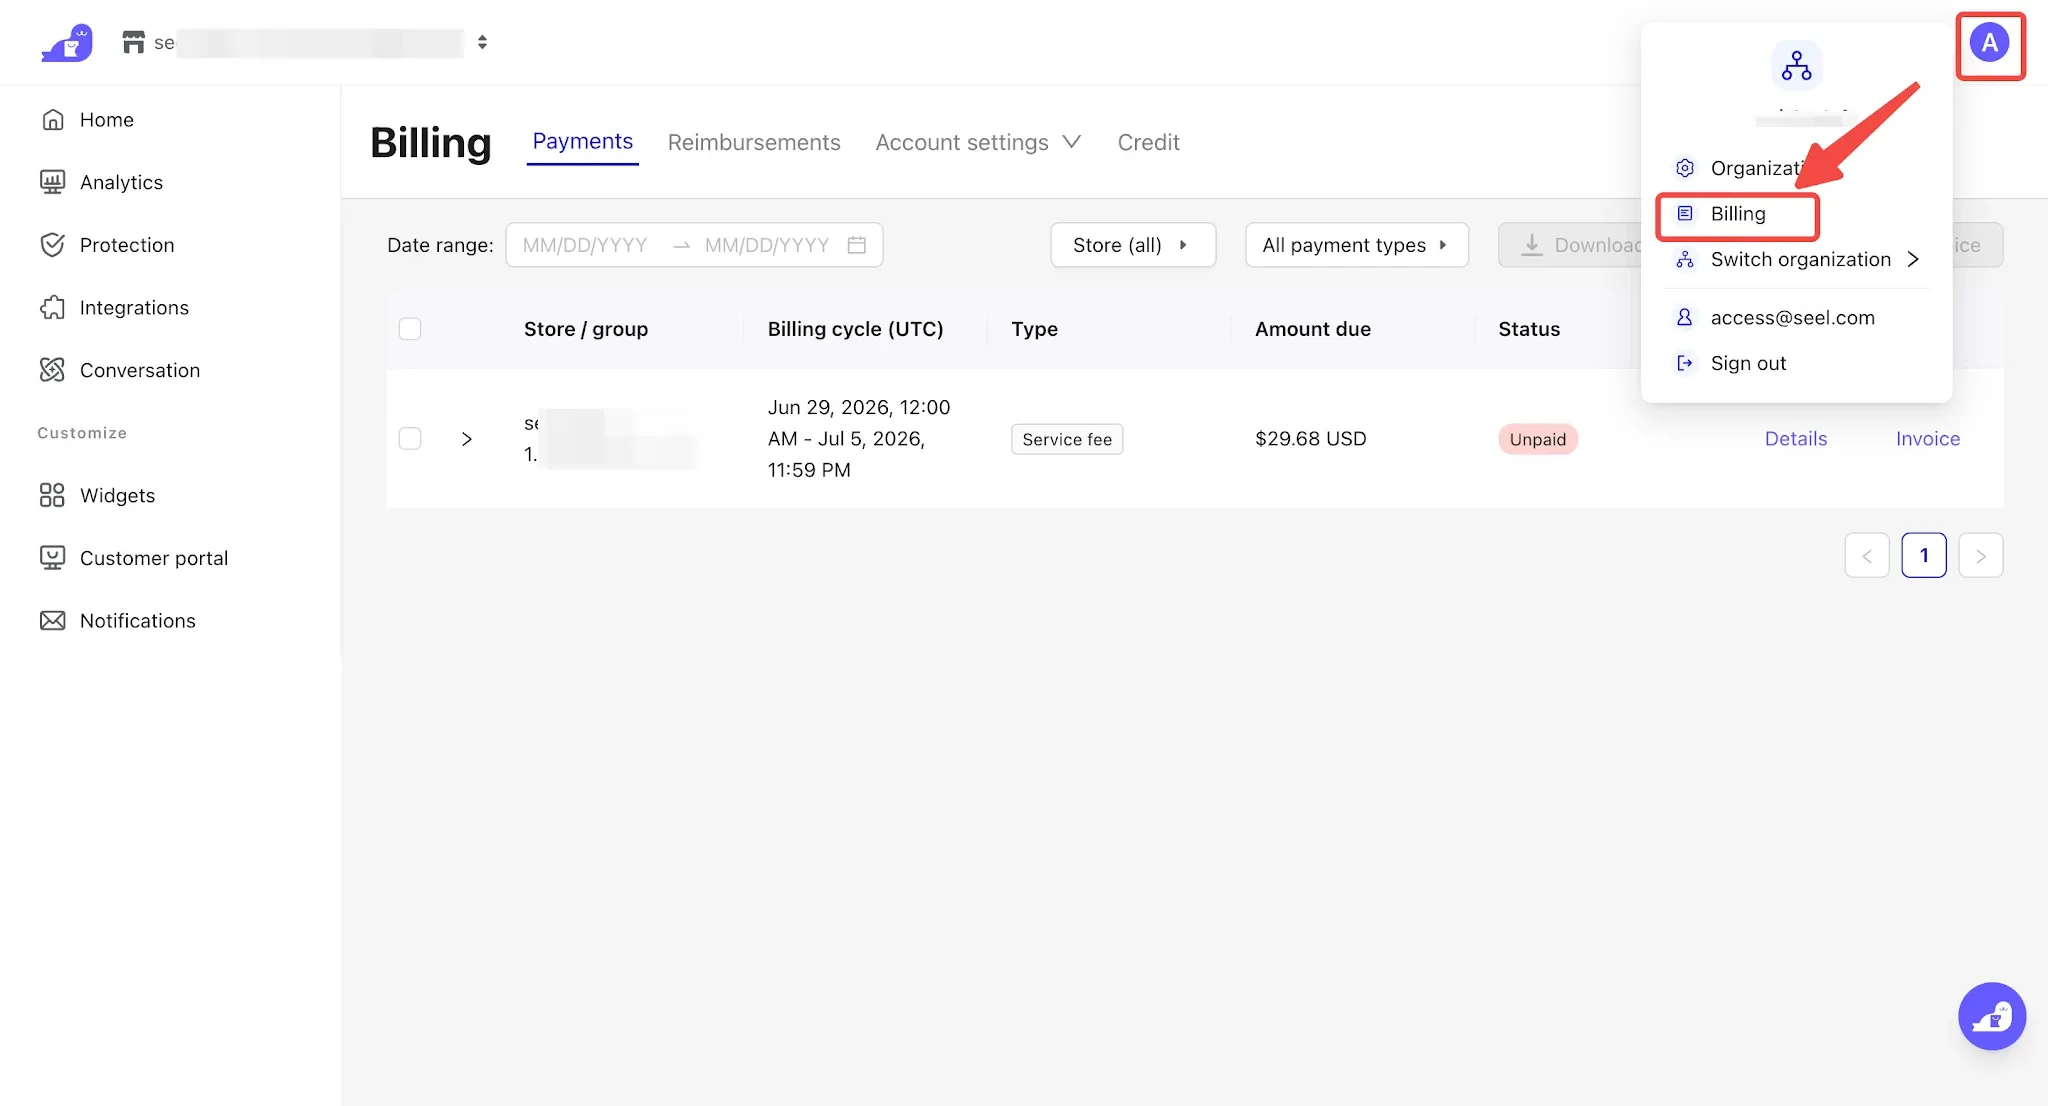
You can switch stores from the top-left corner, then click the account center in the top-right corner to view all billing records for the current store, as well as configure or switch payment methods.
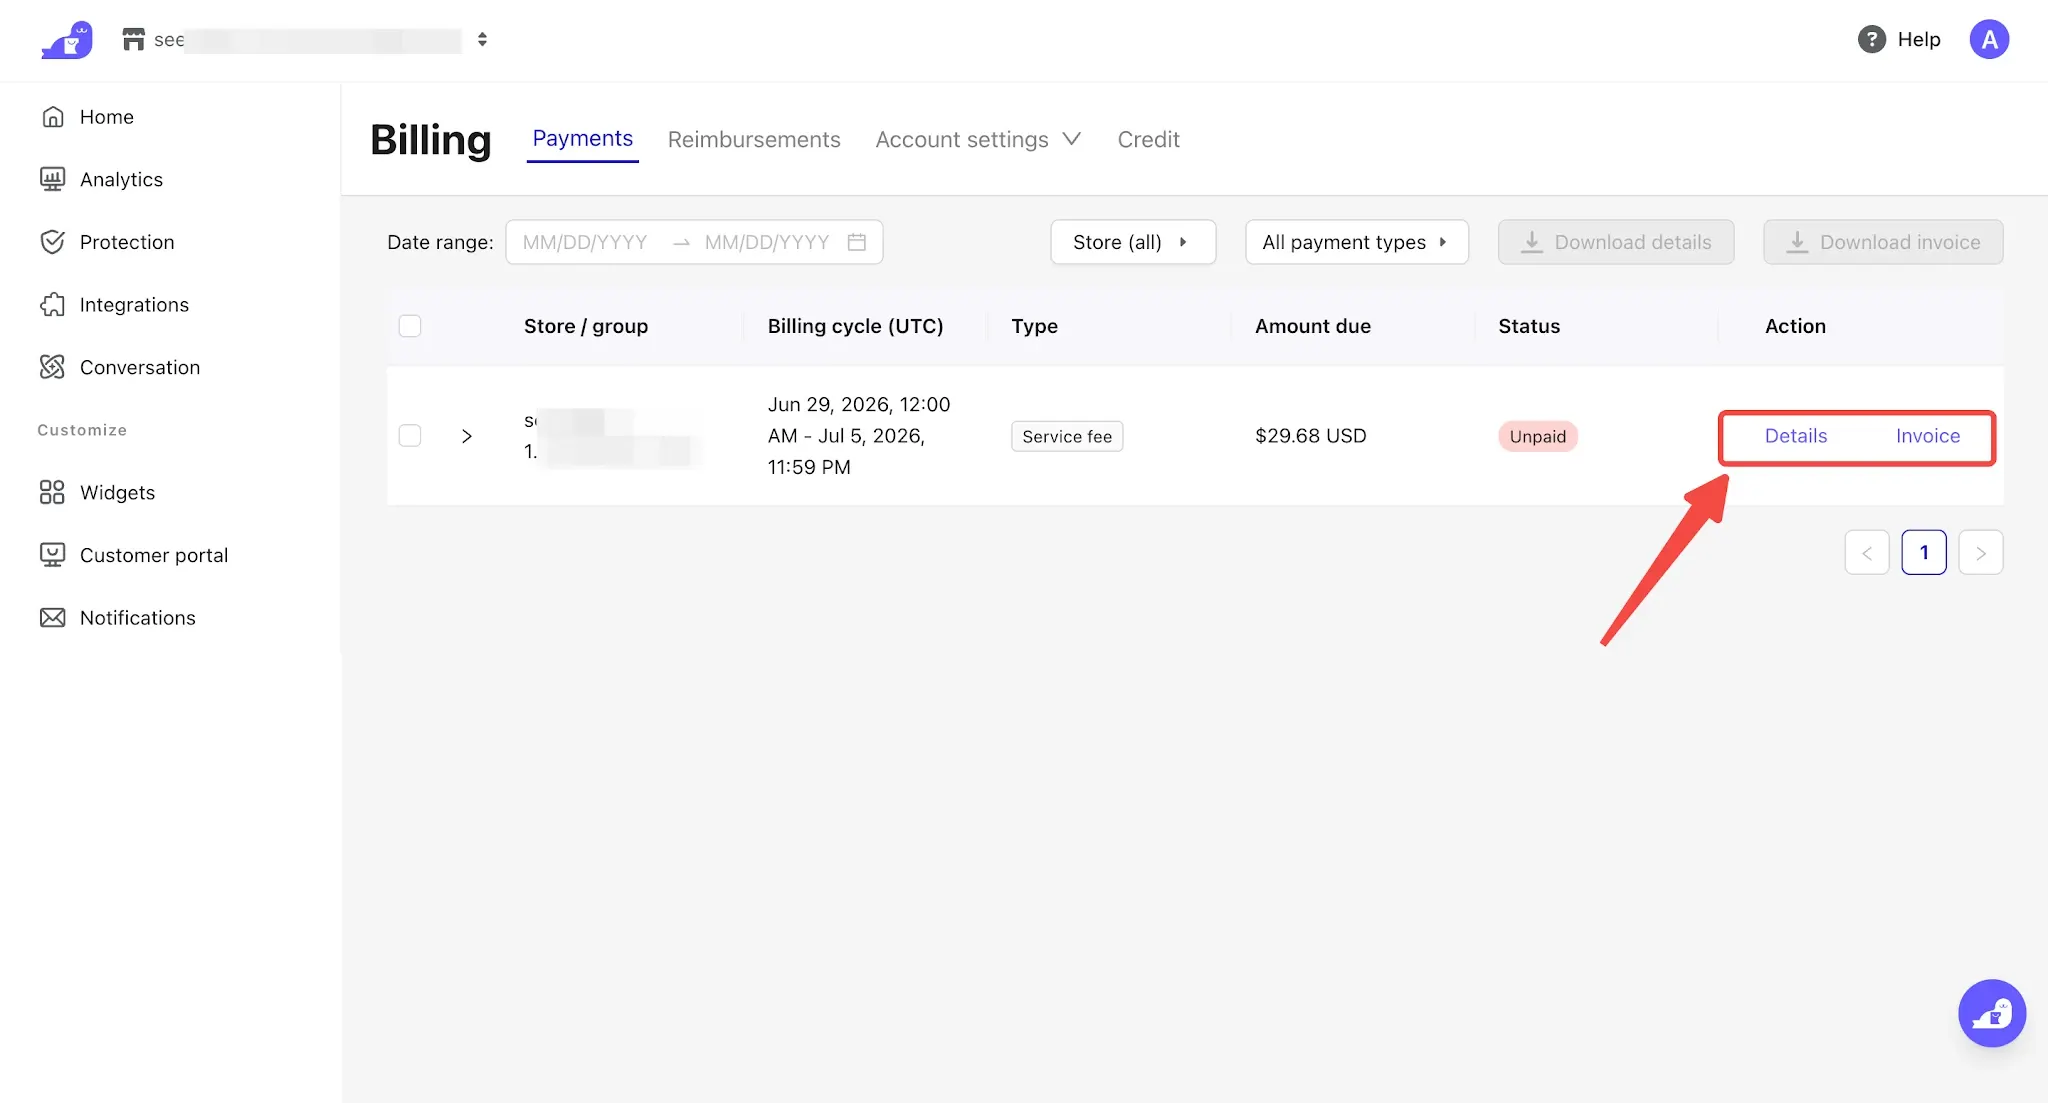
1. Payments:Displays the summary information for each billing cycle, including the amount payable to Seel and any refunded fees due to policy cancellations.
- You can filter and view the summary bills by selecting the date range, the corresponding store, and the fee type.
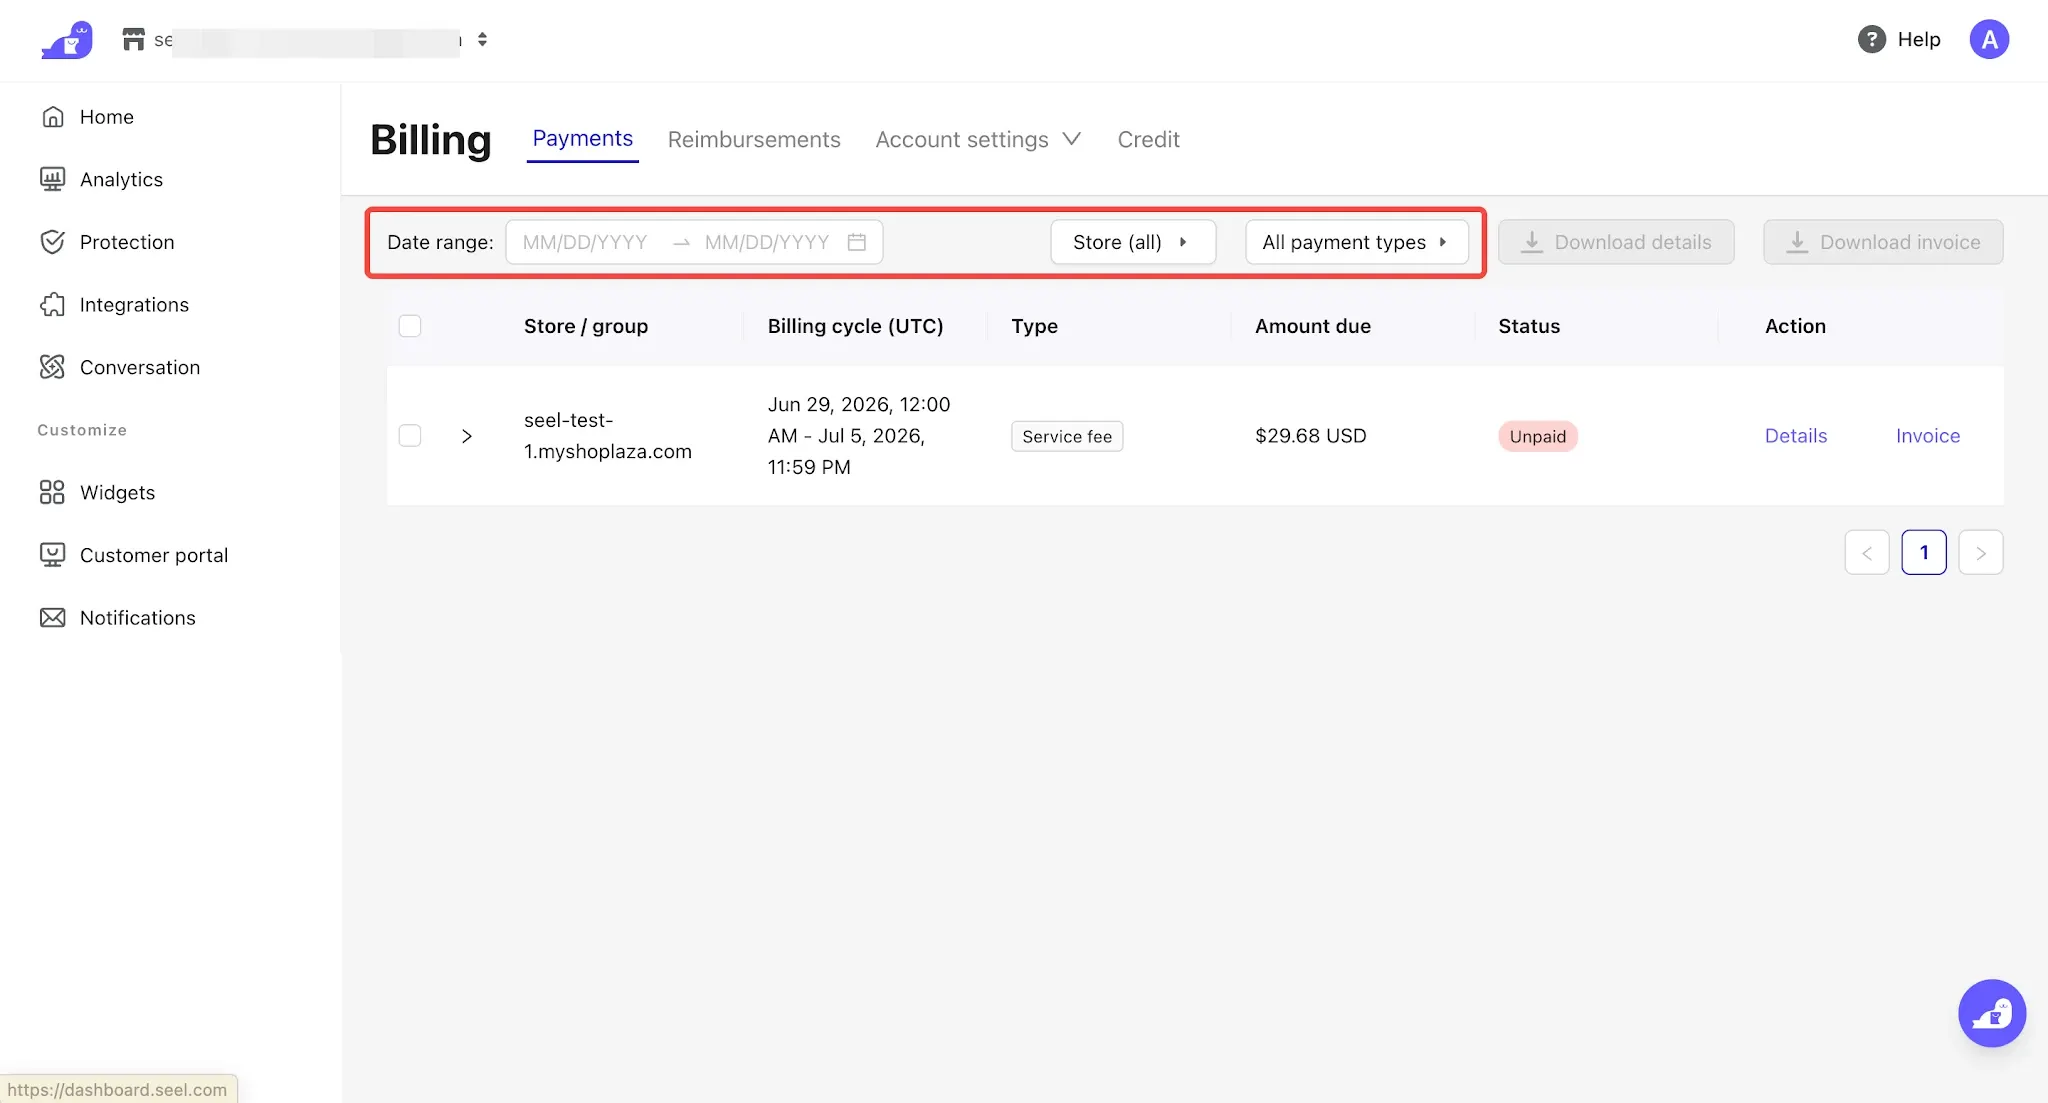
Status: Current billing information is divided into three statuses:
- Paid: Payment has been successfully completed to Seel. The payment date will be displayed next to the status.
- Unpaid: The payment has not yet been made to Seel.
- Processing: The bill is being processed, and Seel has not yet received the billing information.
Click Details and Invoice to download the billing details and invoice information.
Note
Seel will automatically initiate payment according to the payment method order you configured. If automatic payment fails, you can click Invoice in the corresponding bill to be redirected to the payment page and complete the payment manually.
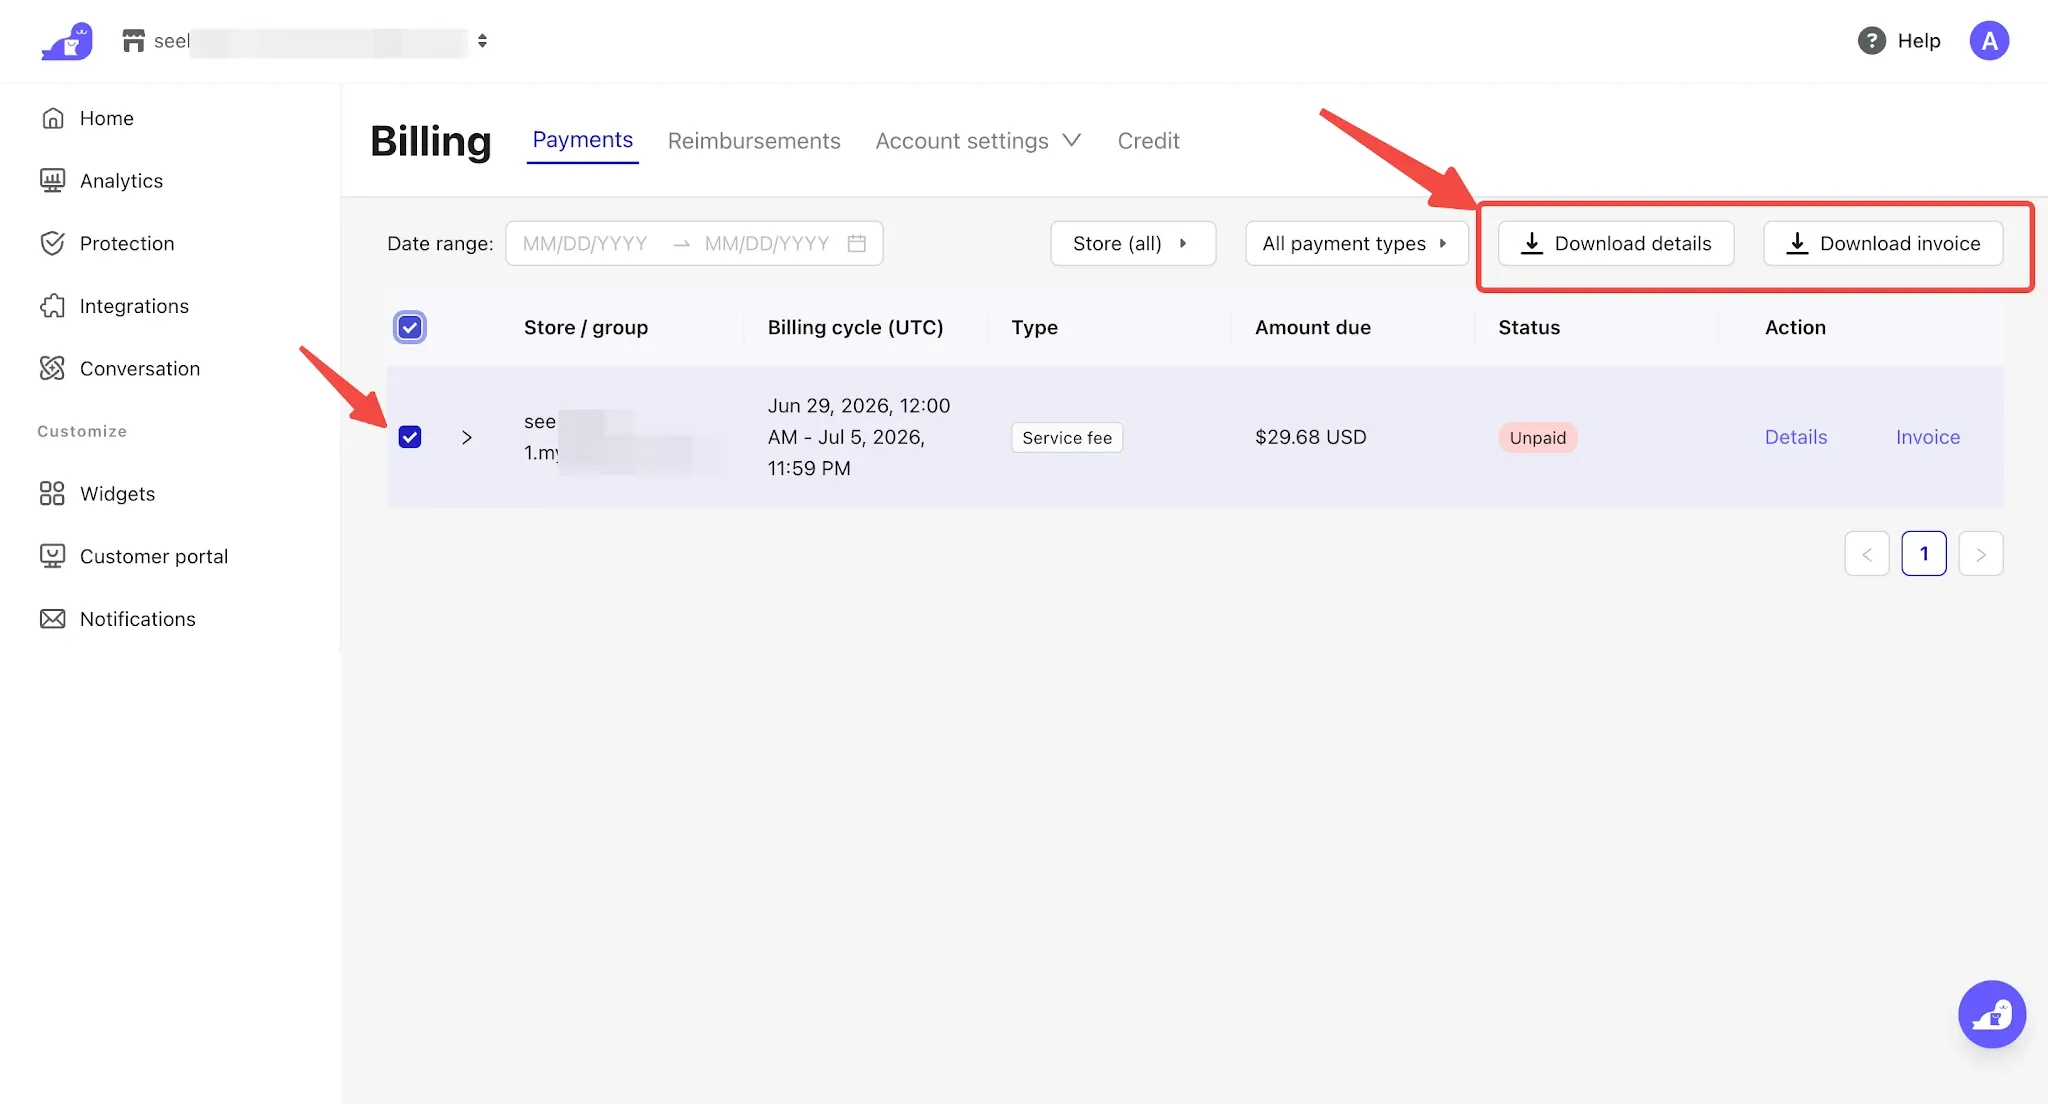
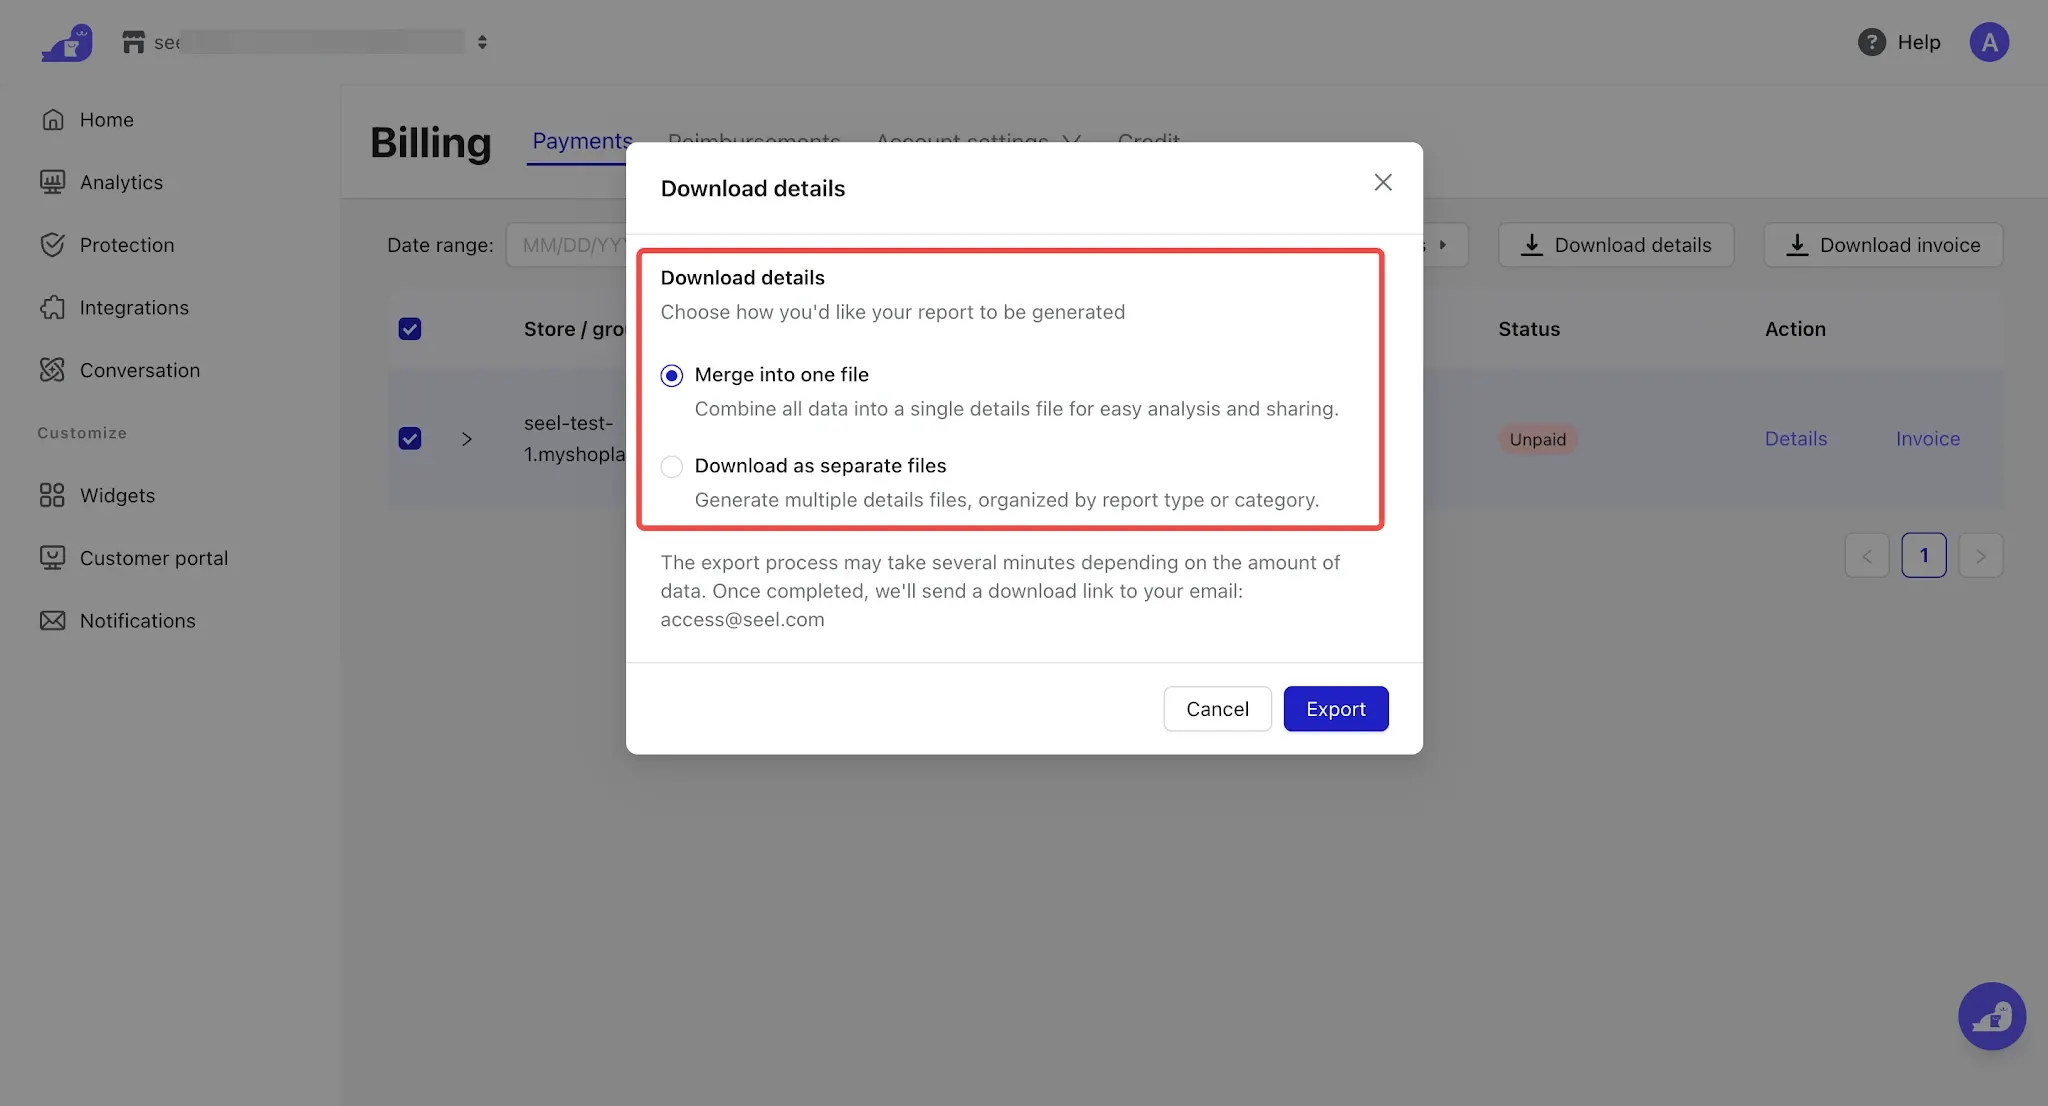
You can also select multiple target bills for batch download, with options to merge them into a single file or download them as separate files.
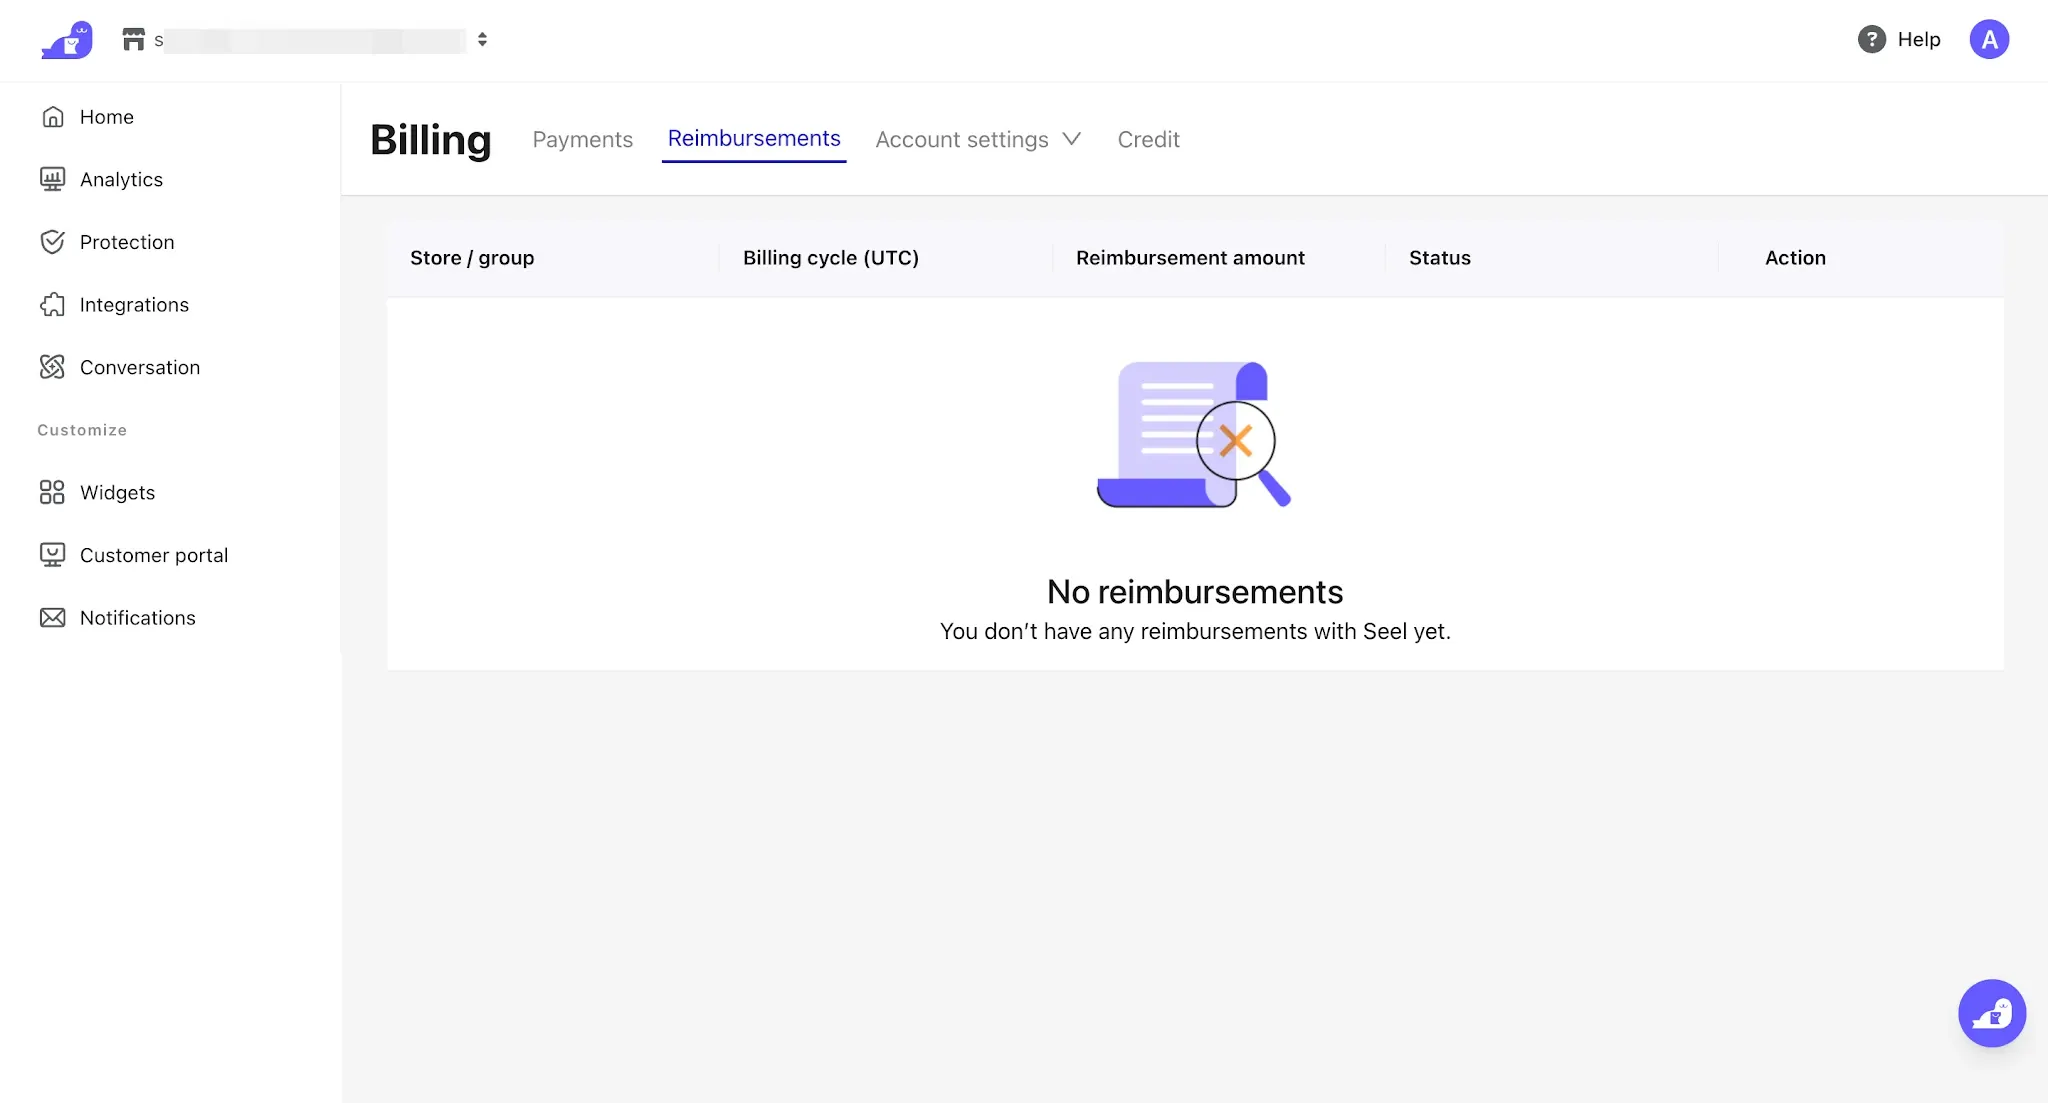
2. Reimbursements:This section displays the reconciliation statements for reimbursements issued by Seel to consumers. If you need to use this feature, it is recommended to contact Seel first and confirm the relevant information.
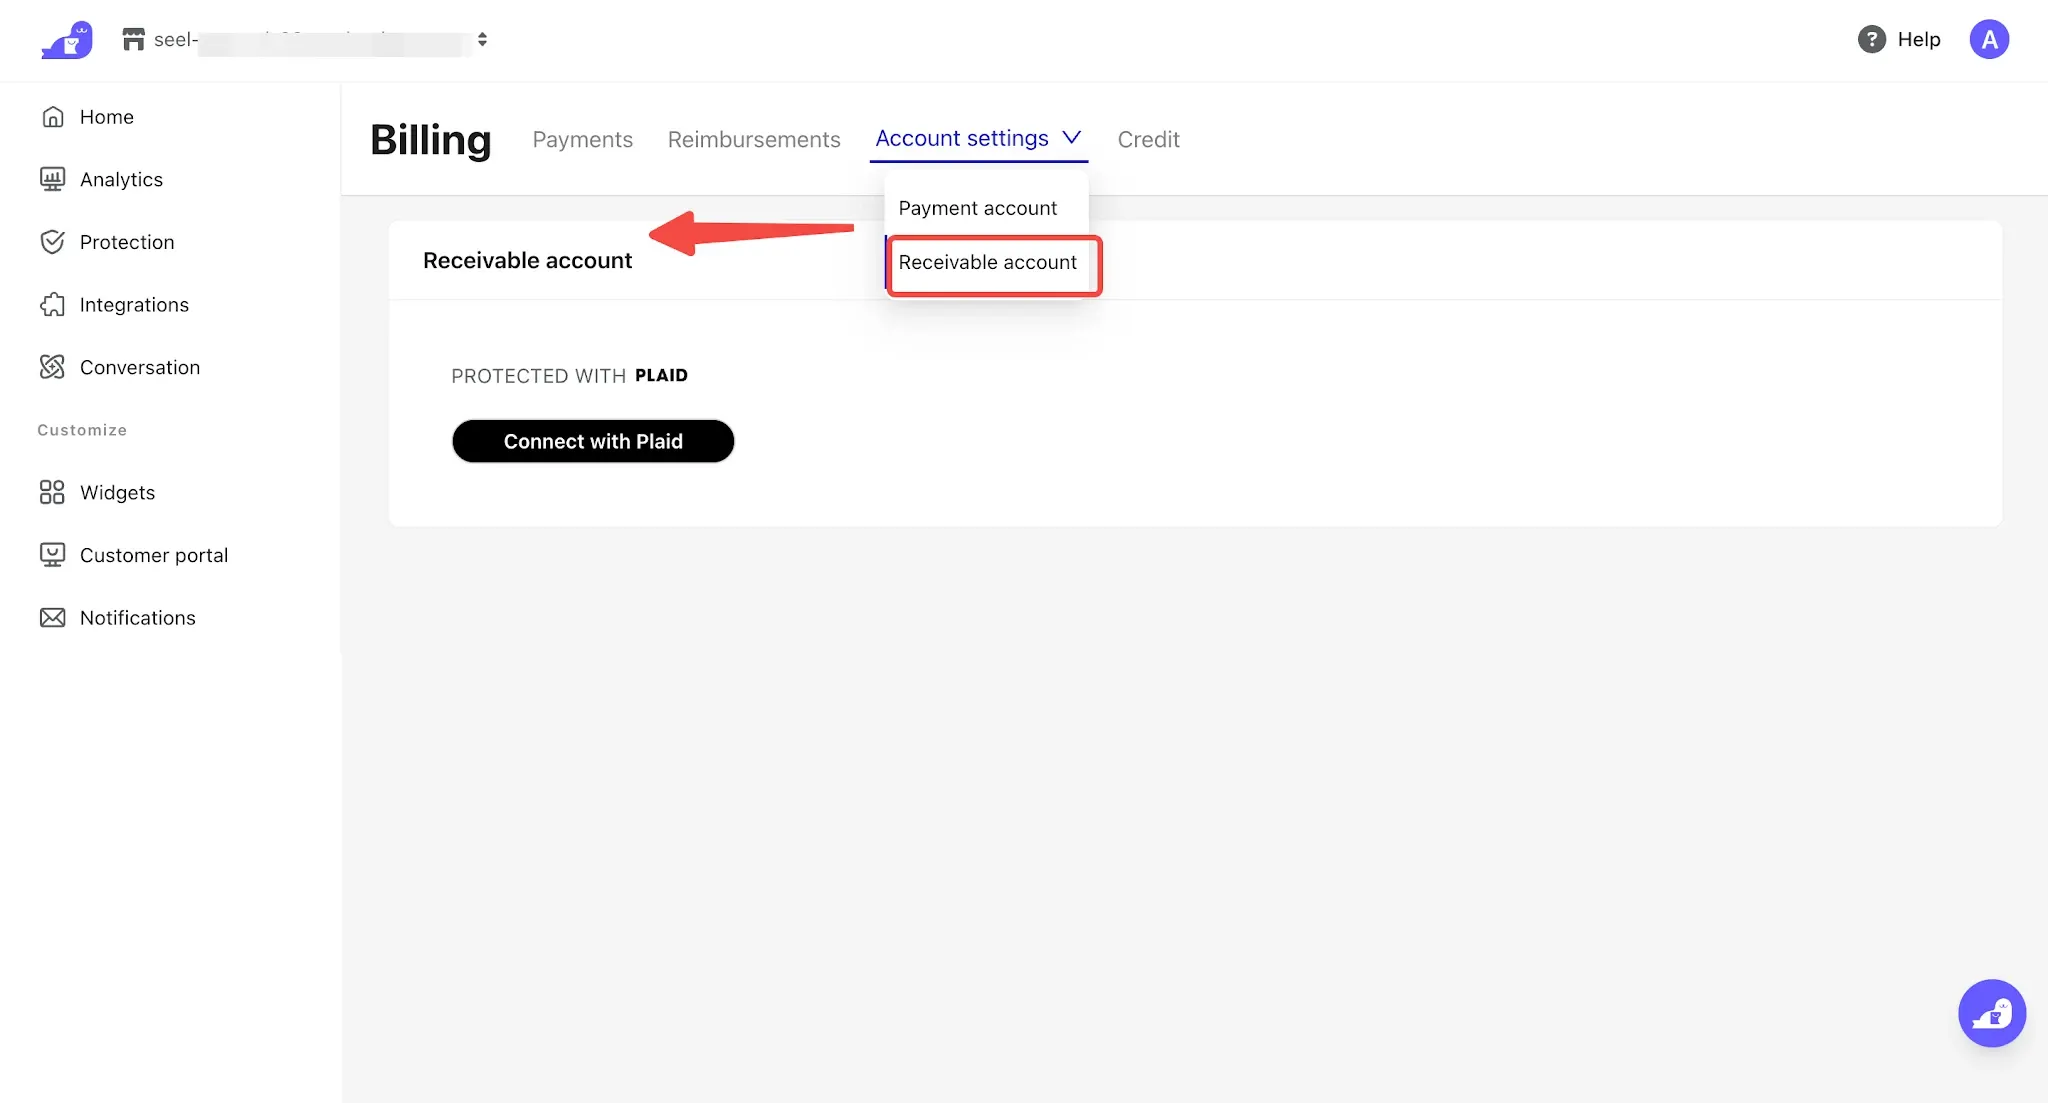
3. Account settings:You can configure payment methods and the account for receiving payments.
- Payment account
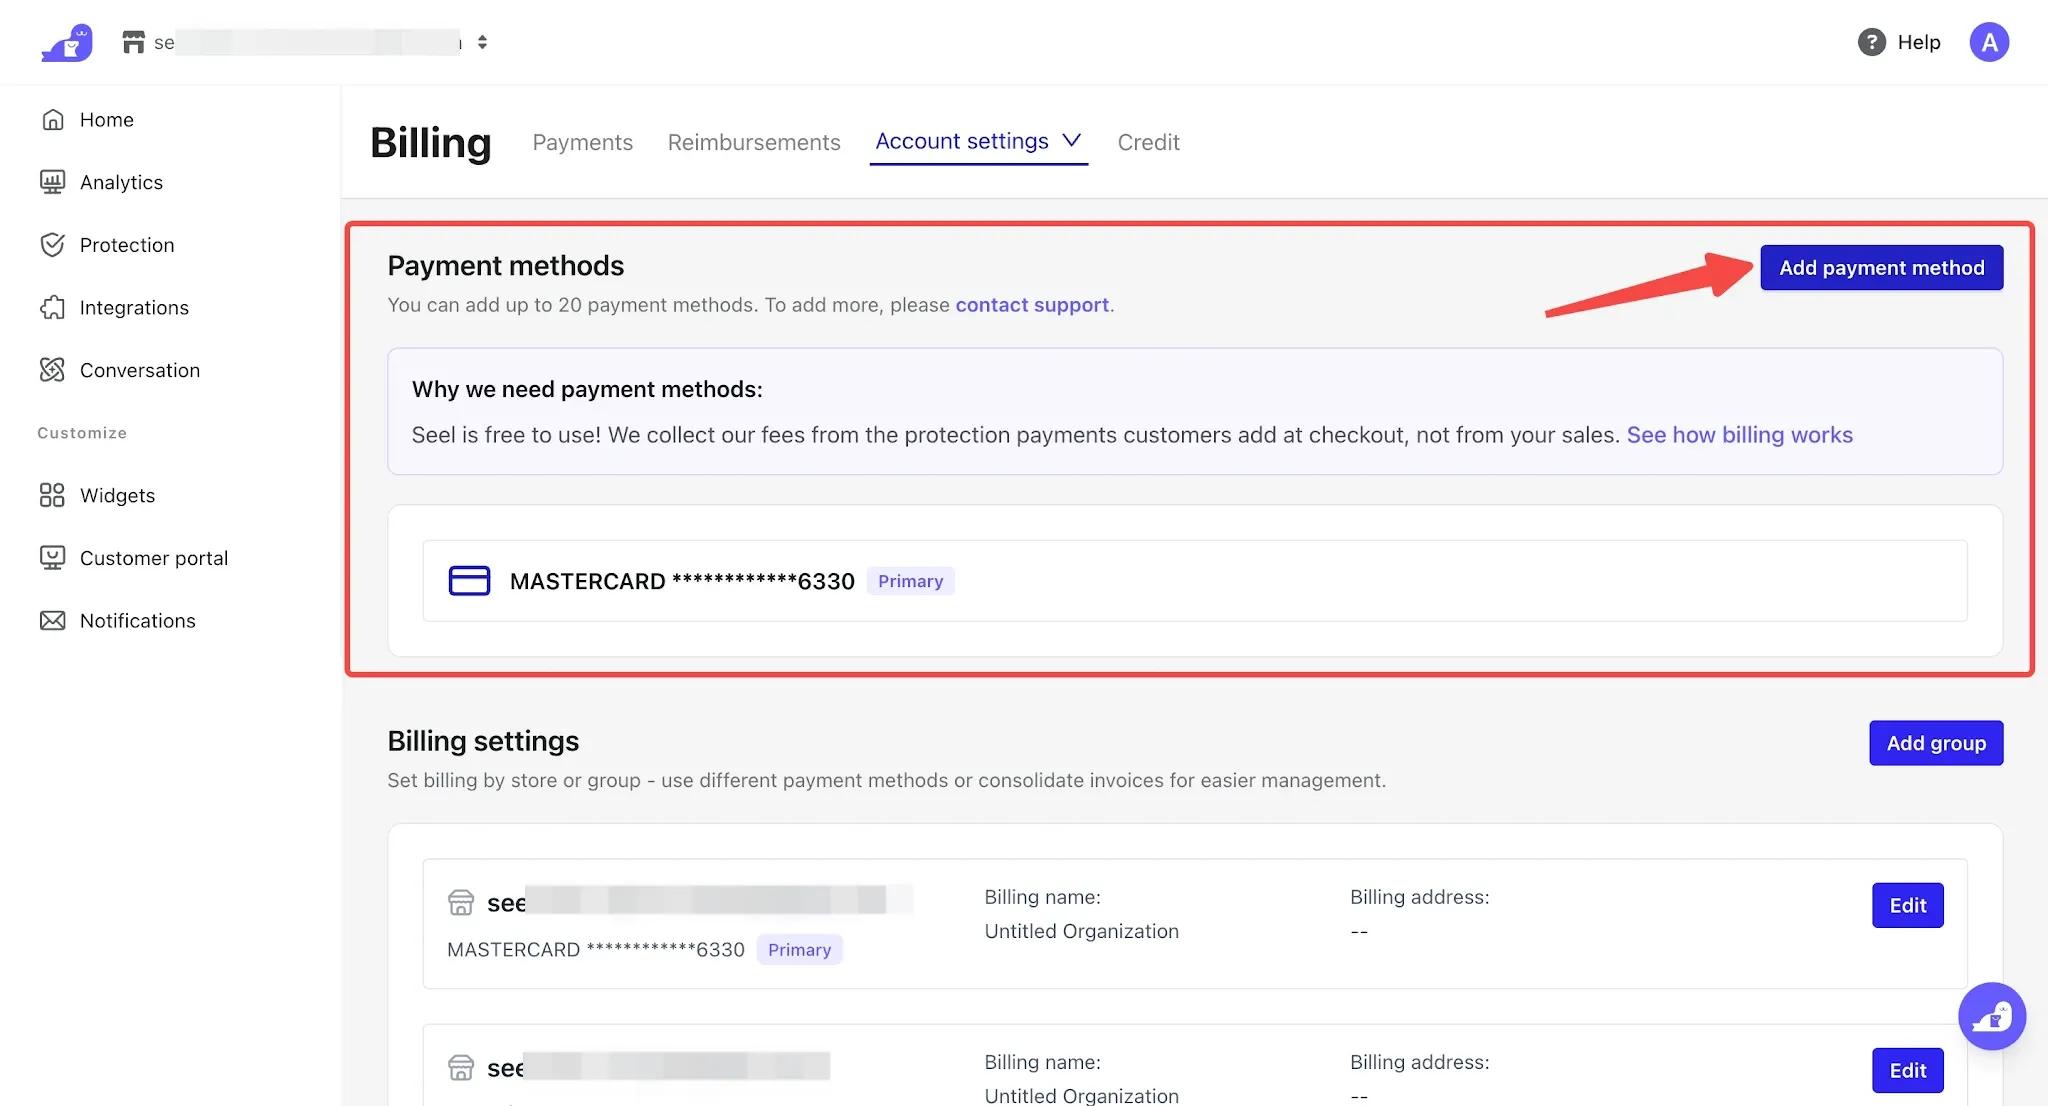
Payment methods: You can configure the payment methods used to make payments to Seel. To add multiple payment methods, click Add payment method. You can designate one payment method as the default (Primary) payment method. If the default payment method has insufficient balance or is unavailable due to restrictions, other payment methods will be used in sequence to complete the payment.
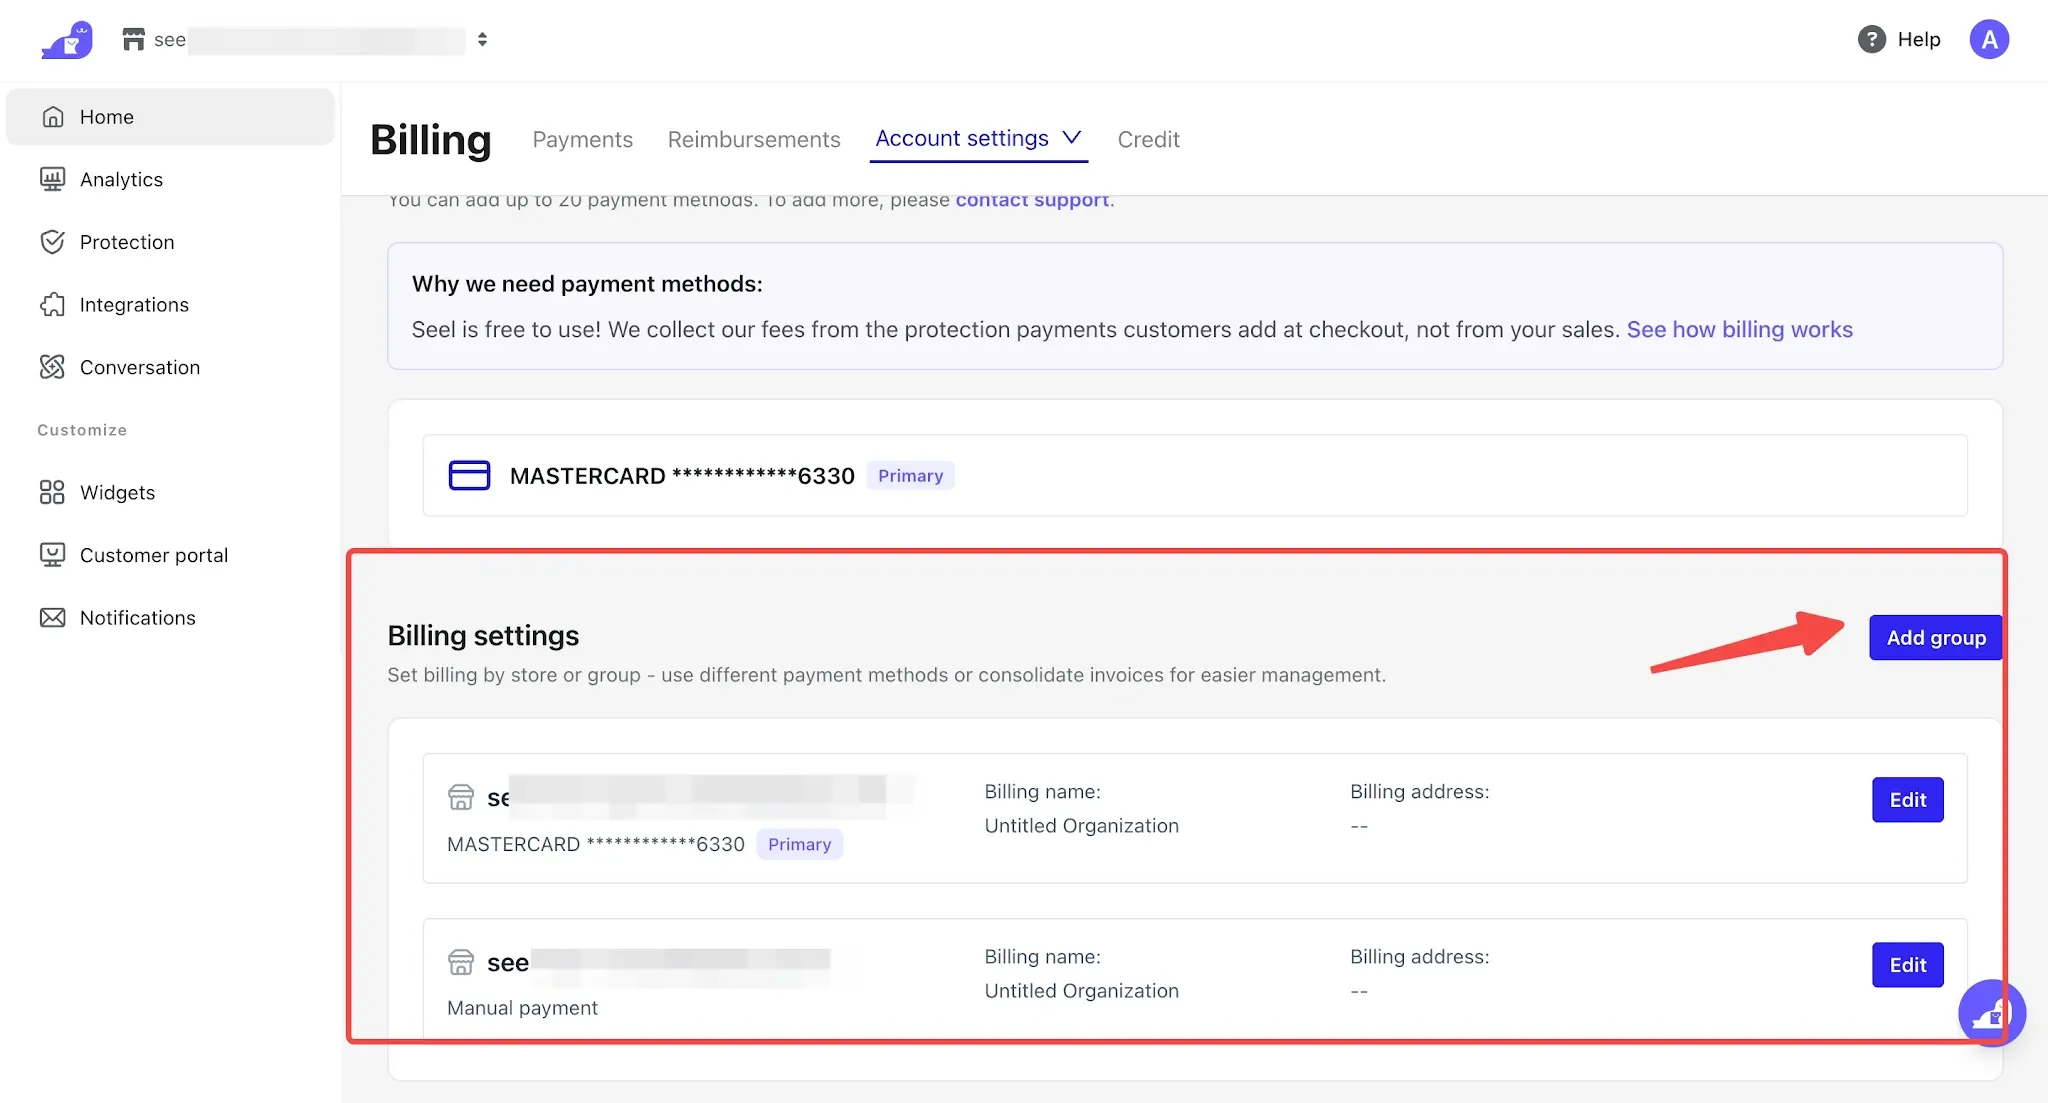
Billing settings: You can group stores with the same checkout method into the same Billing settings based on your business needs. This information will be synchronized and displayed on the Invoice, with the business entity information registered in your Organization shown by default. This module is mainly used for merchants to view insurance premium settlement invoices, and consumers cannot access this information.
Note
Only stores with the same checkout method, billing cycle, company information, payment card, and settlement currency can be linked to the same Billing settings.
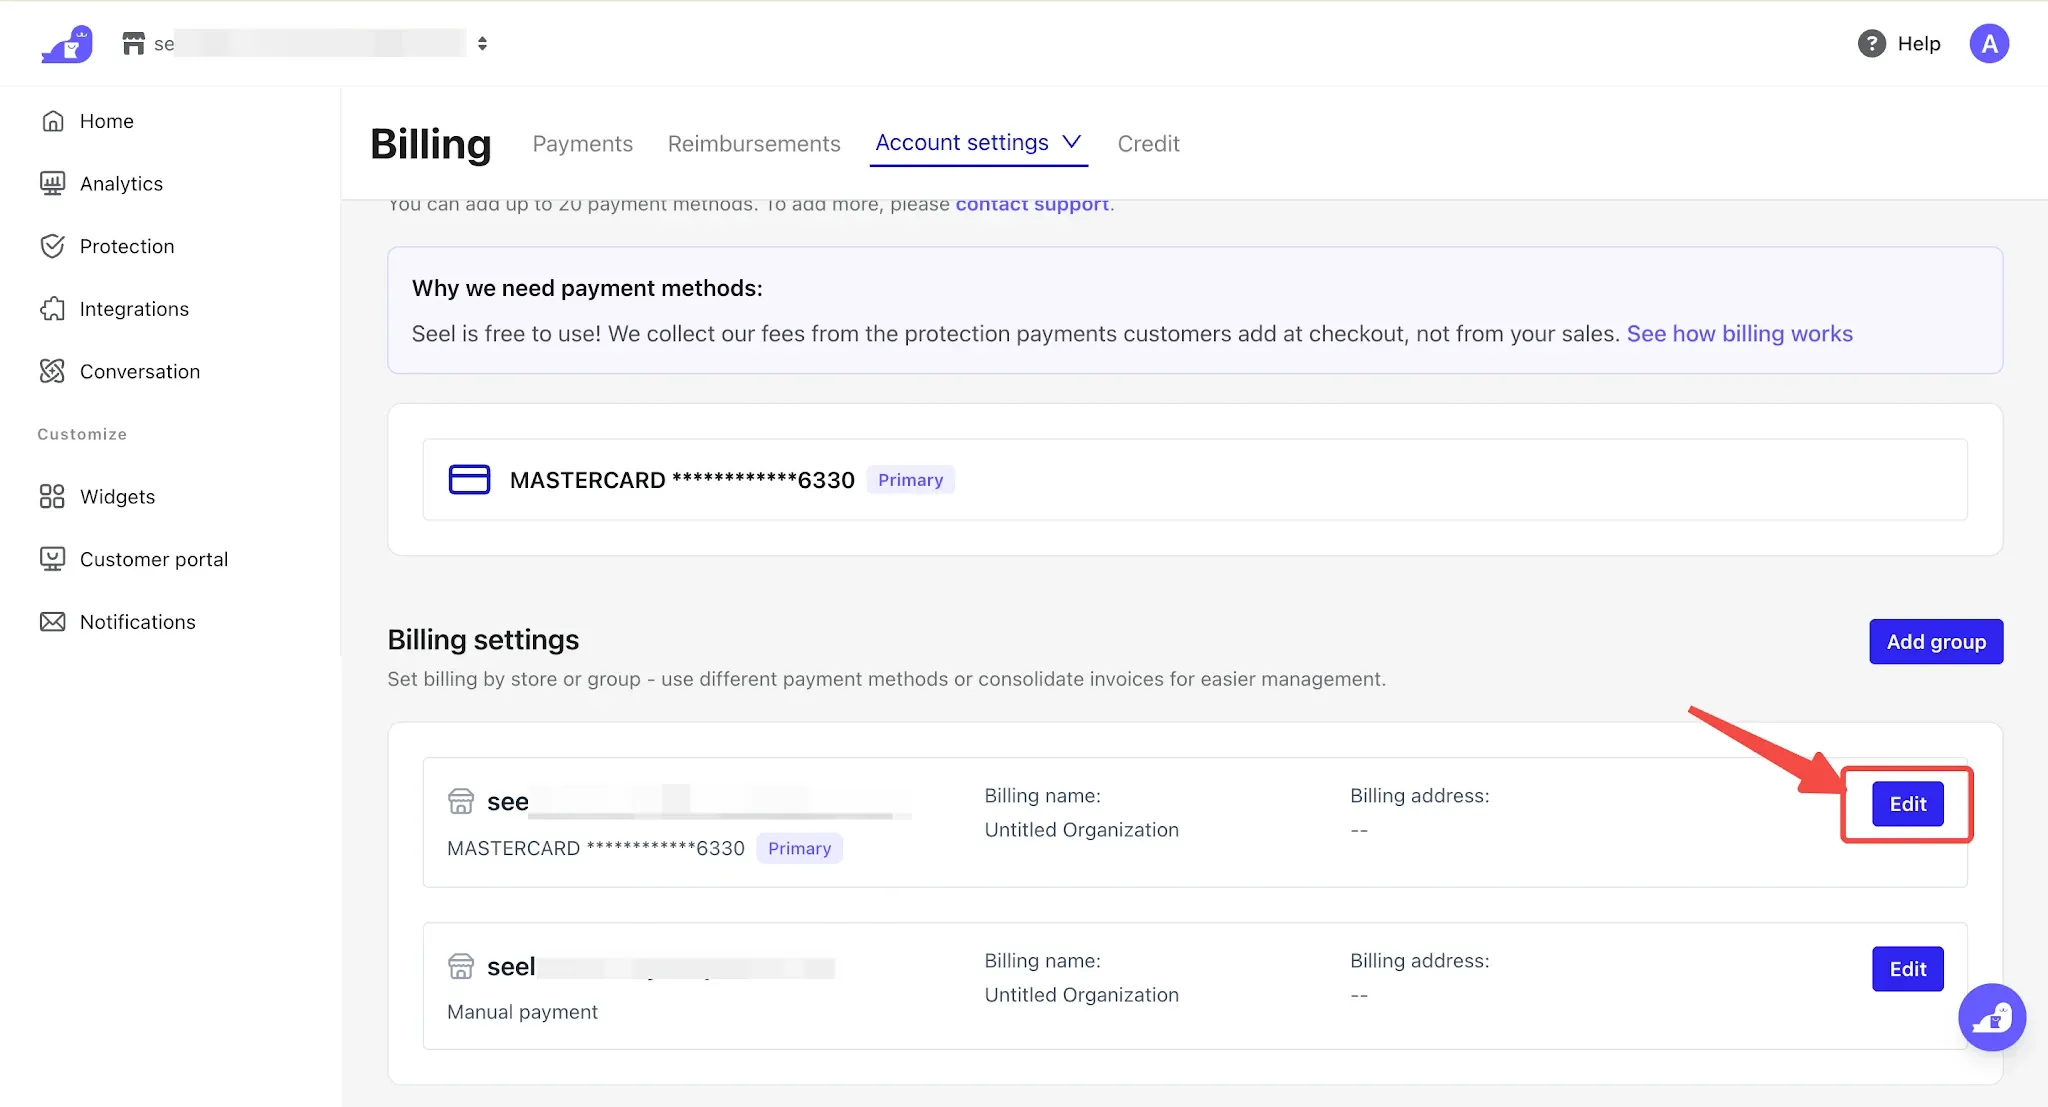
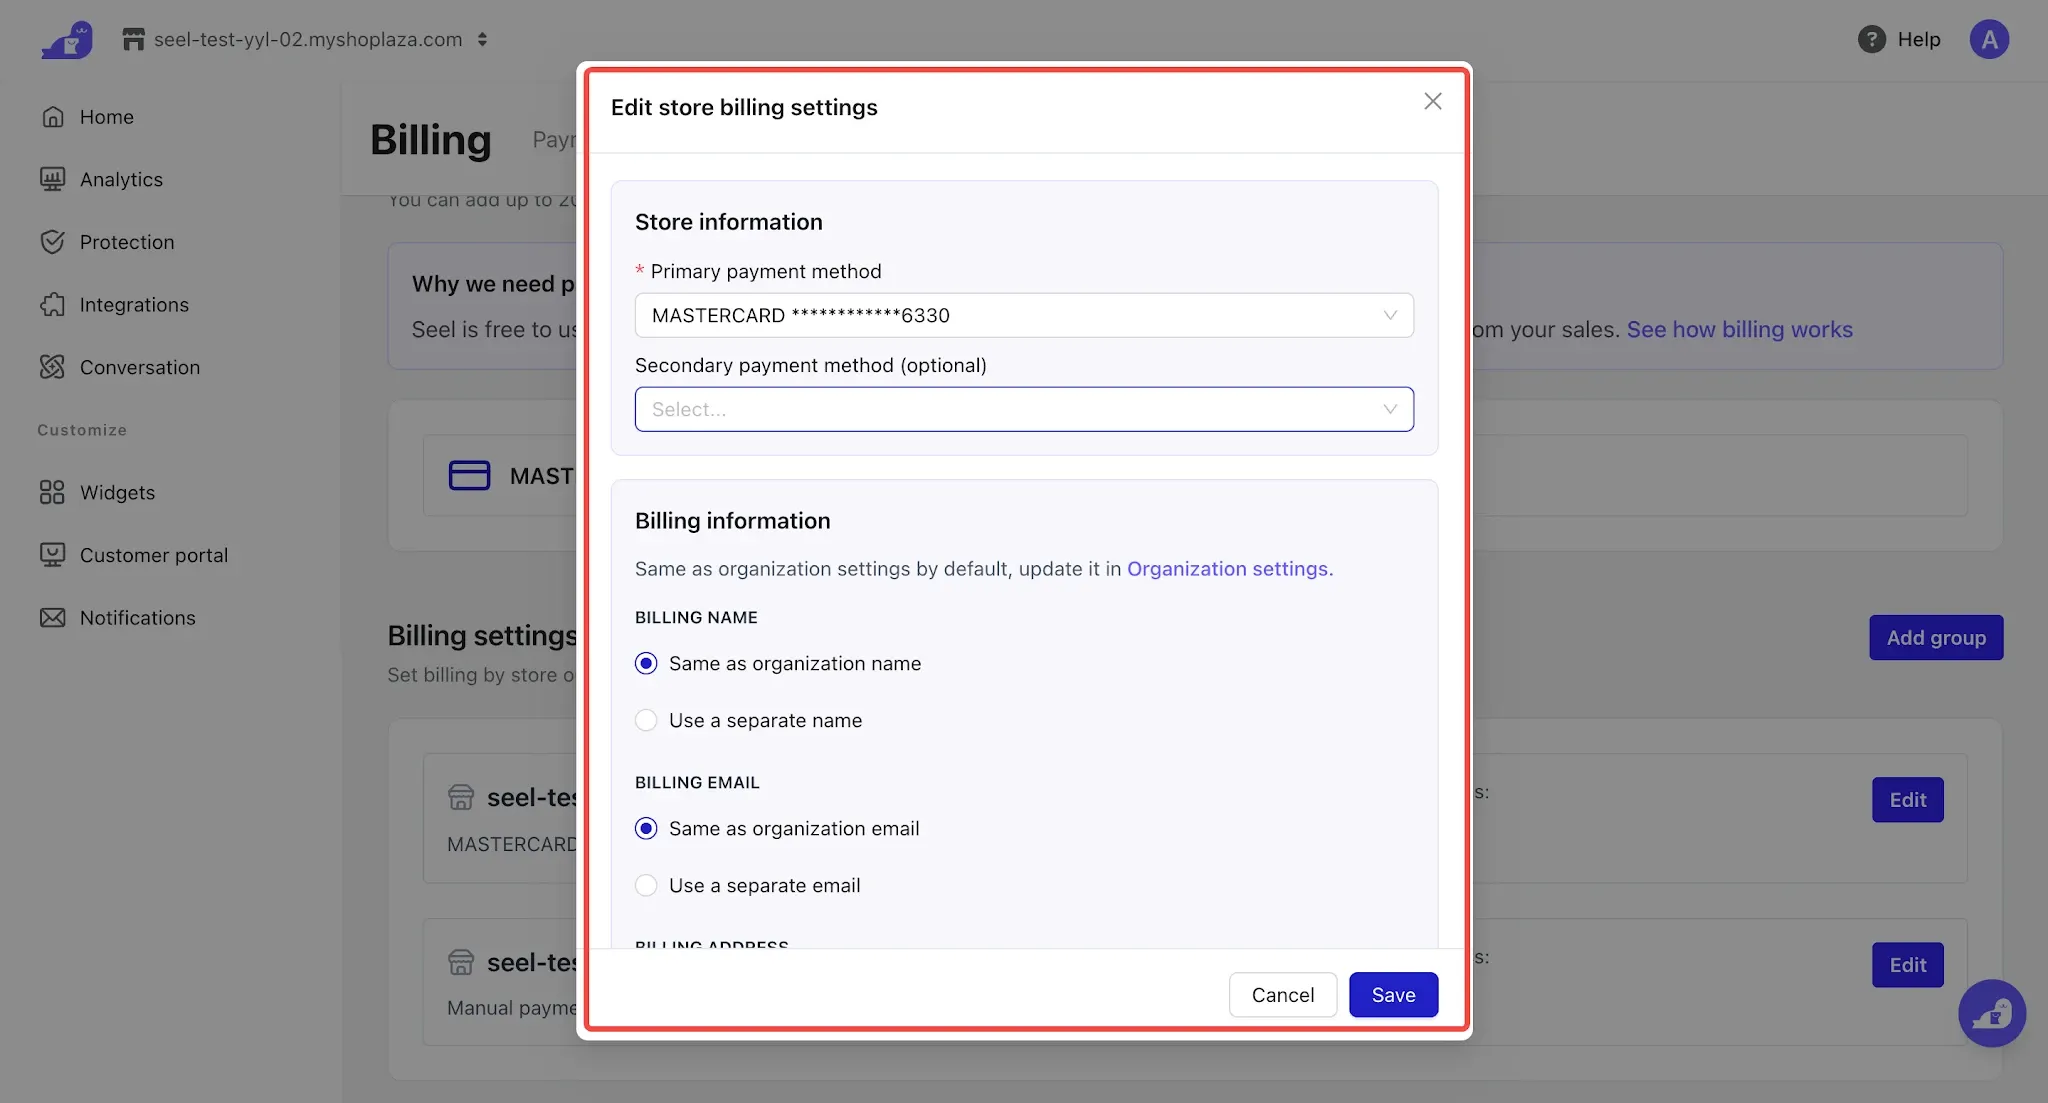
Click Edit to edit the Billing settings and modify the payment method or billing information.
- Receivable account: You can configure your receiving bank account here. However, this settings module is currently unavailable, so no action is required at this time.
4. Credit: You can view or download the transaction statement details for amounts credited by Seel due to certain special circumstances.
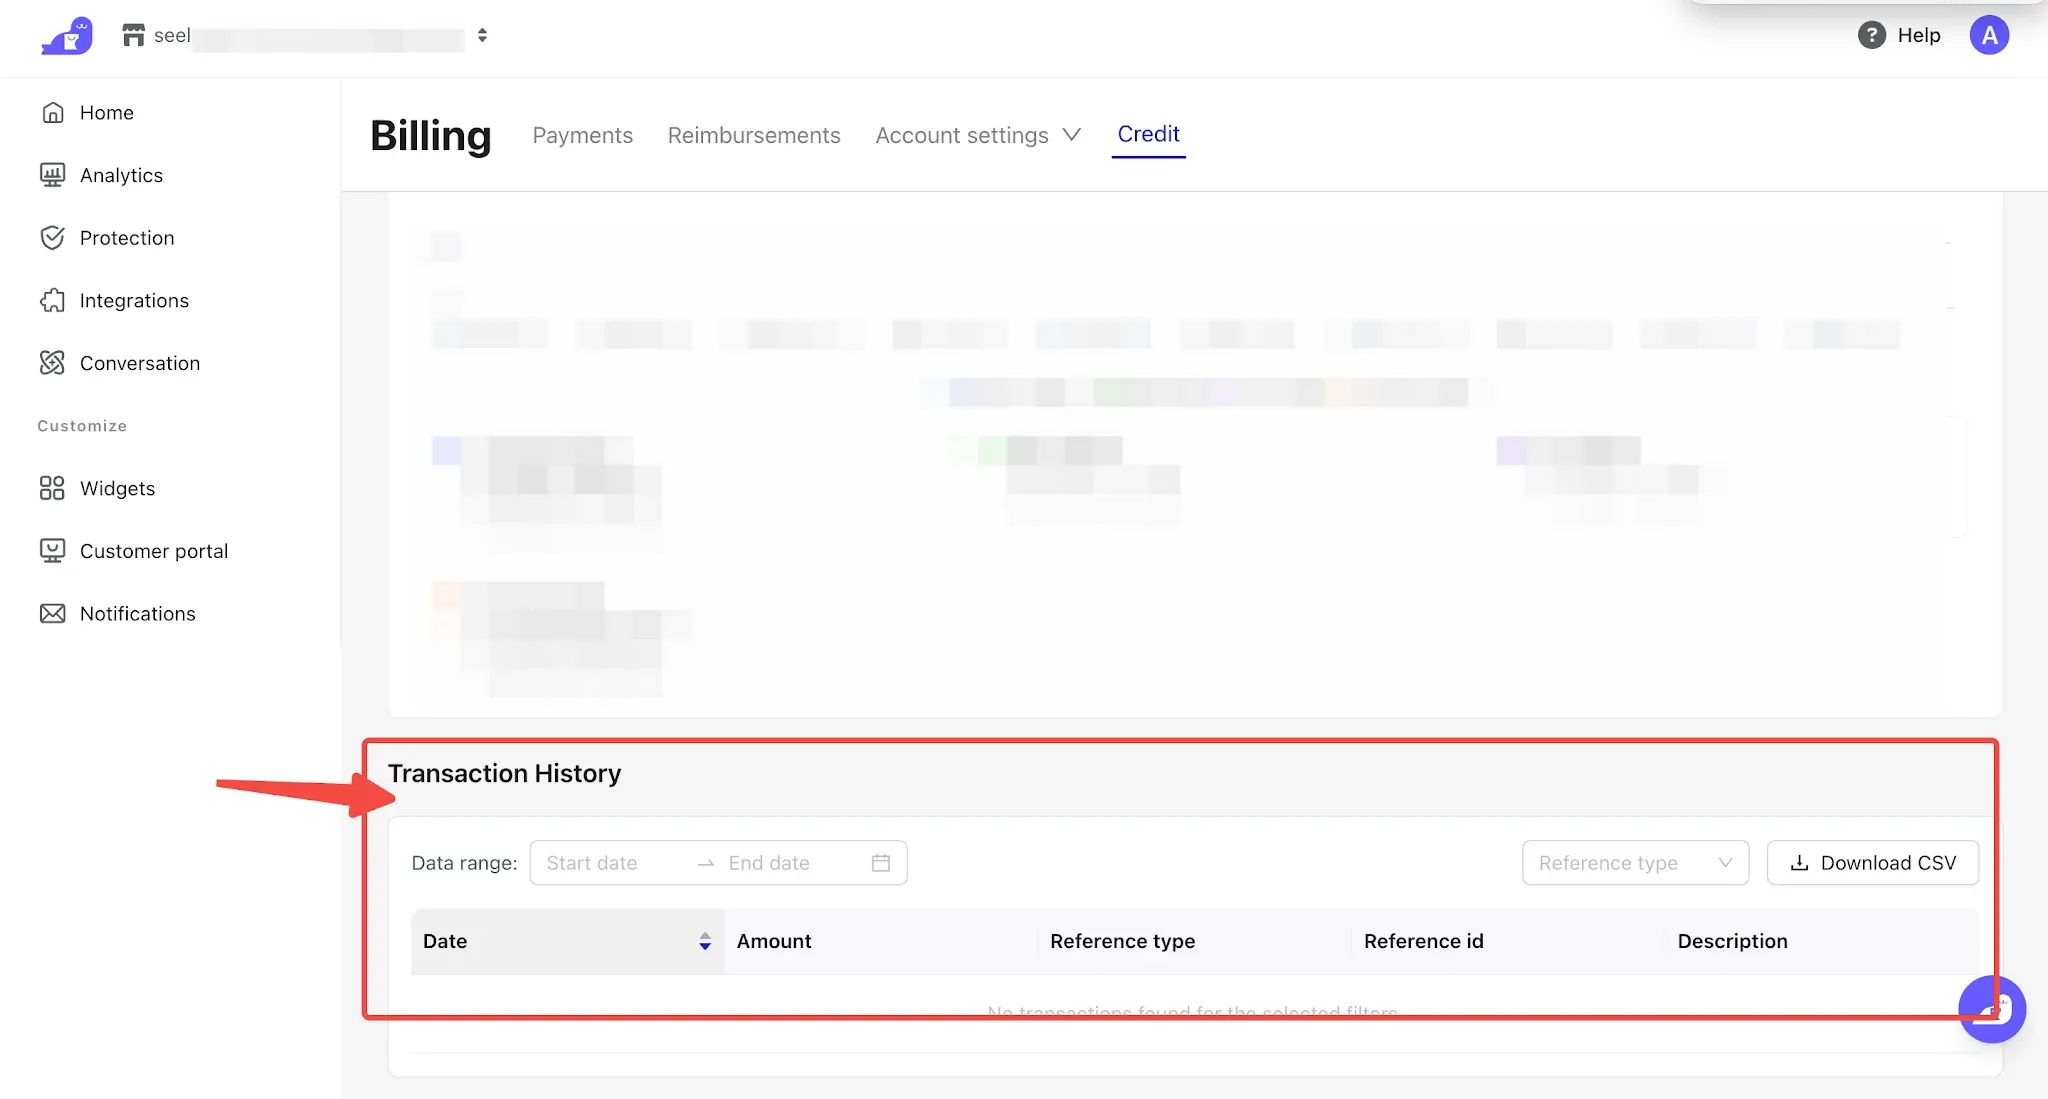
Example: If a $2 premium fee from an order in June has already been settled, but a refund of the premium is required due to special circumstances, Seel will automatically generate 2 credits as a credit balance for you. This credit amount will be applied to your next billing statement. For example, if the amount due on your next bill is $100, Seel will automatically deduct the 2 credits, and you will only need to pay $98.
Note
For any billing discrepancies, Seel will automatically handle the adjustment by applying refunds or additional charges as needed. No manual action is required from you.
Organization
In this module, you can configure your business entity information, link other stores, and add employee management accounts.
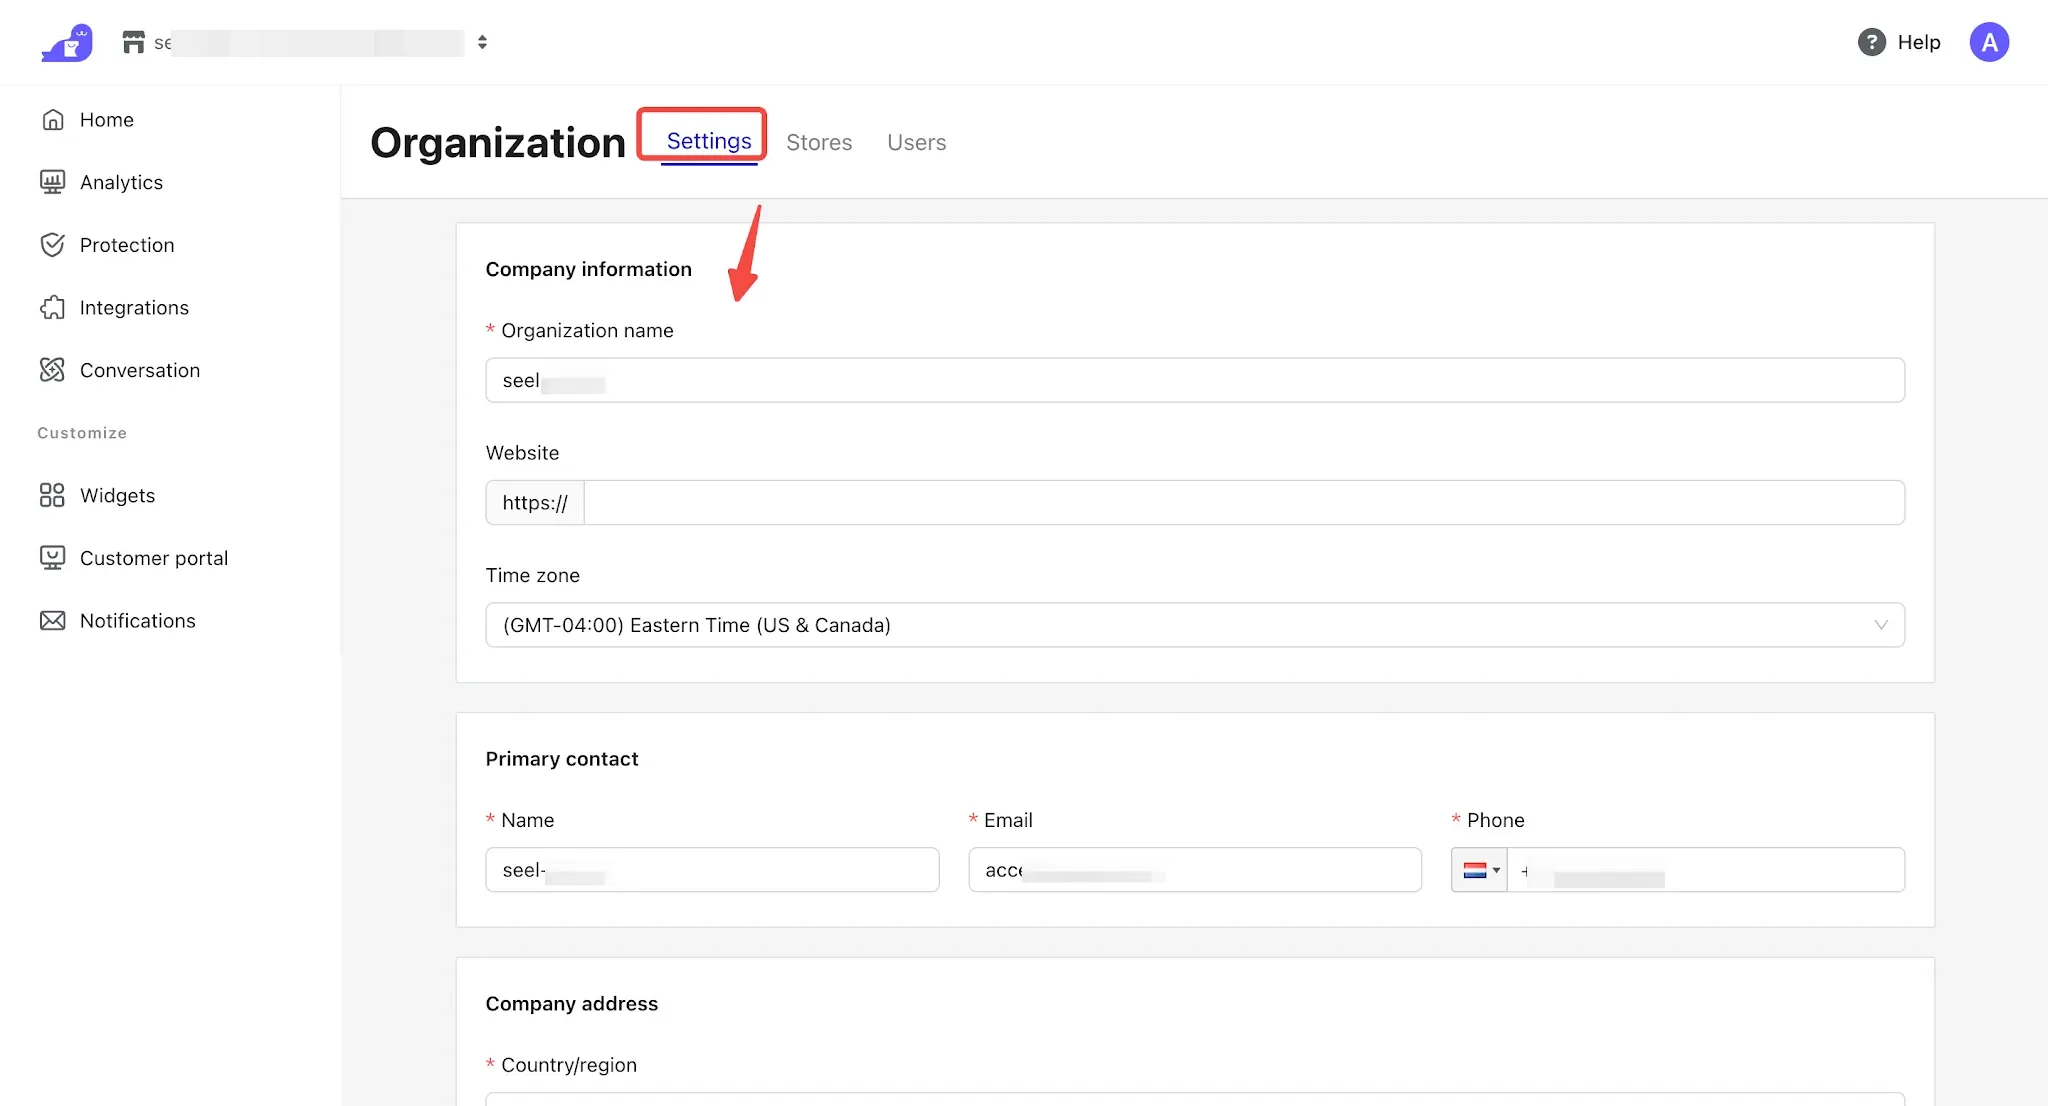
1. Settings: You can enter your company’s basic information here, such as the company name, primary contact information, and registered business address. This information is associated with the billing information in Billing settings and will be displayed on the invoices issued by Seel for premium settlements. It is not visible to consumers.
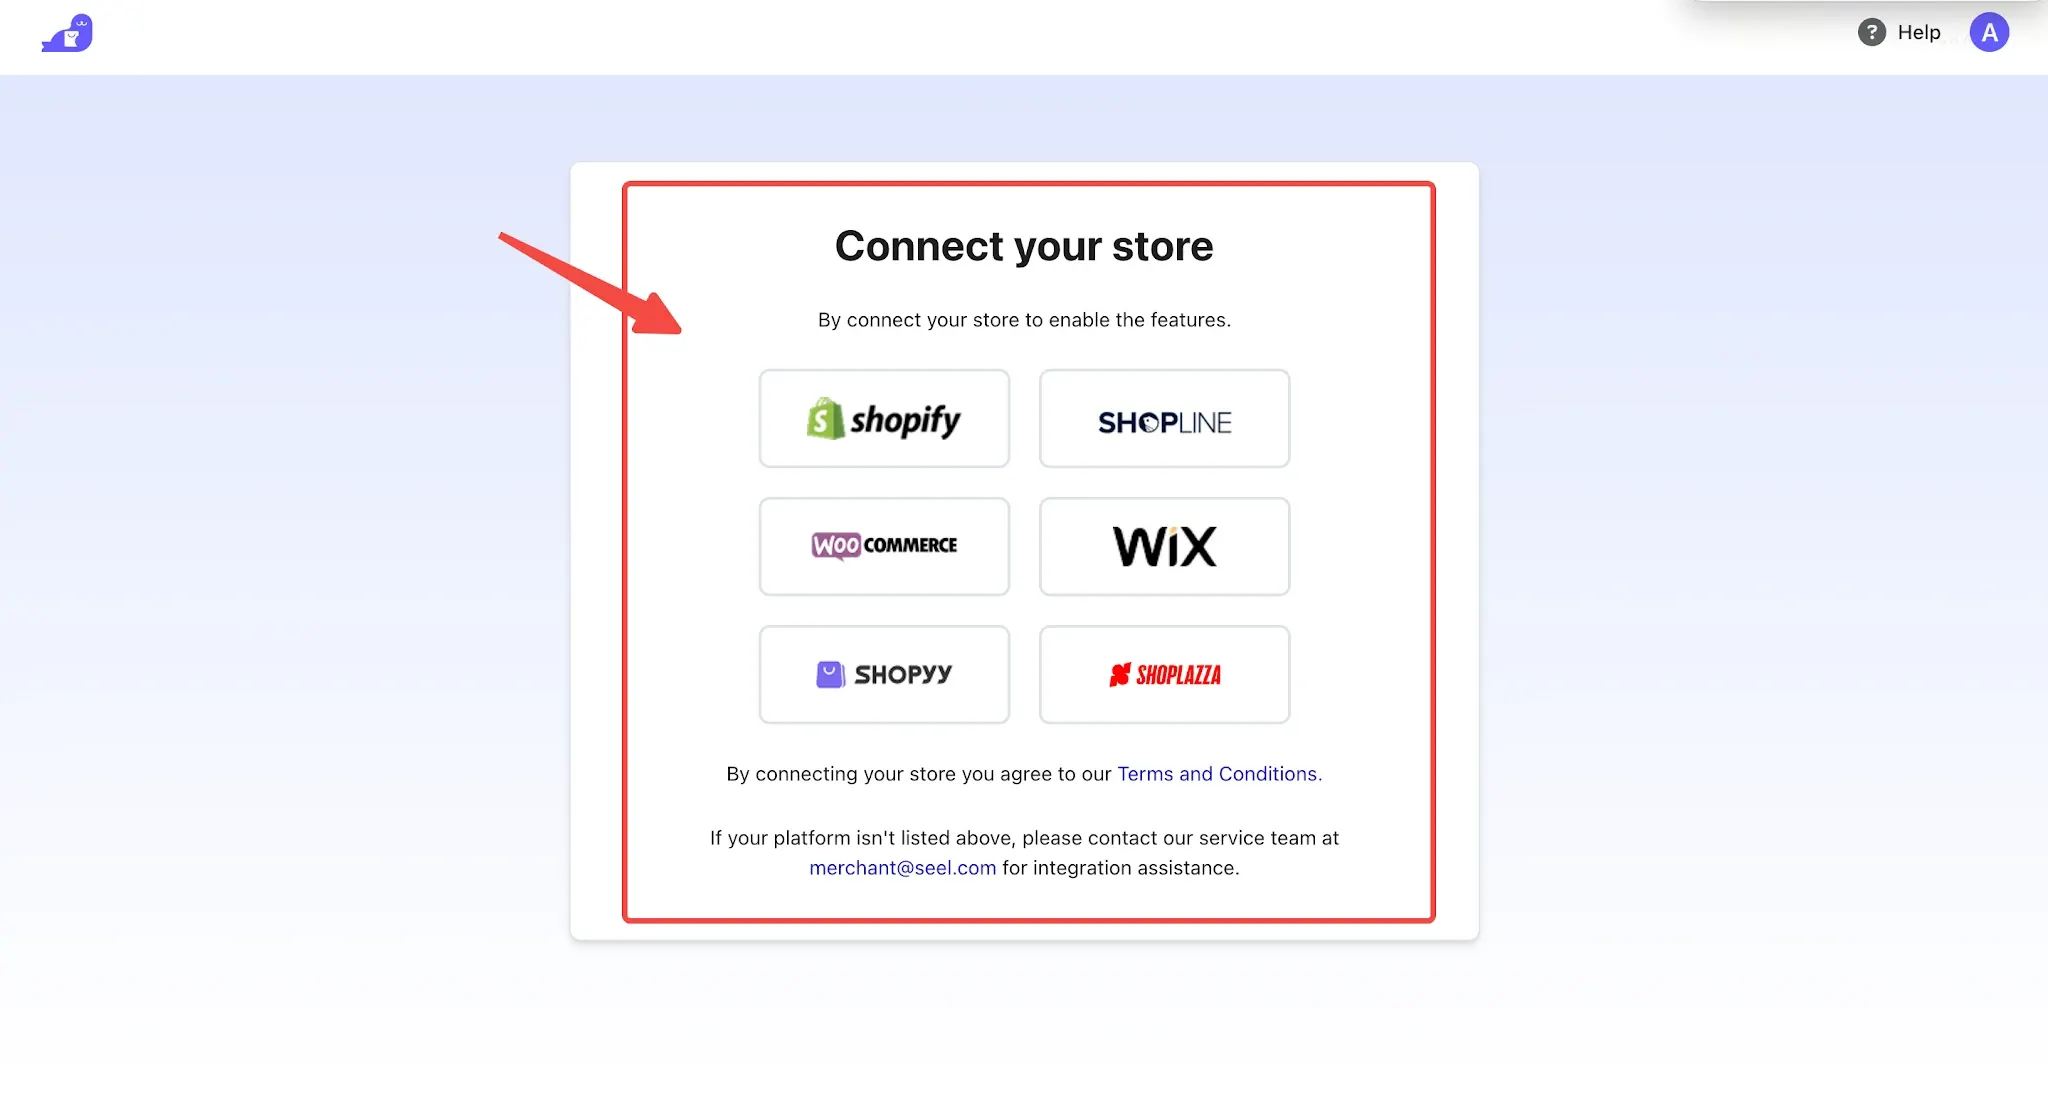
2. Stores:You can link Seel-supported platform stores to this login account, allowing you to manage and configure stores that use Seel.
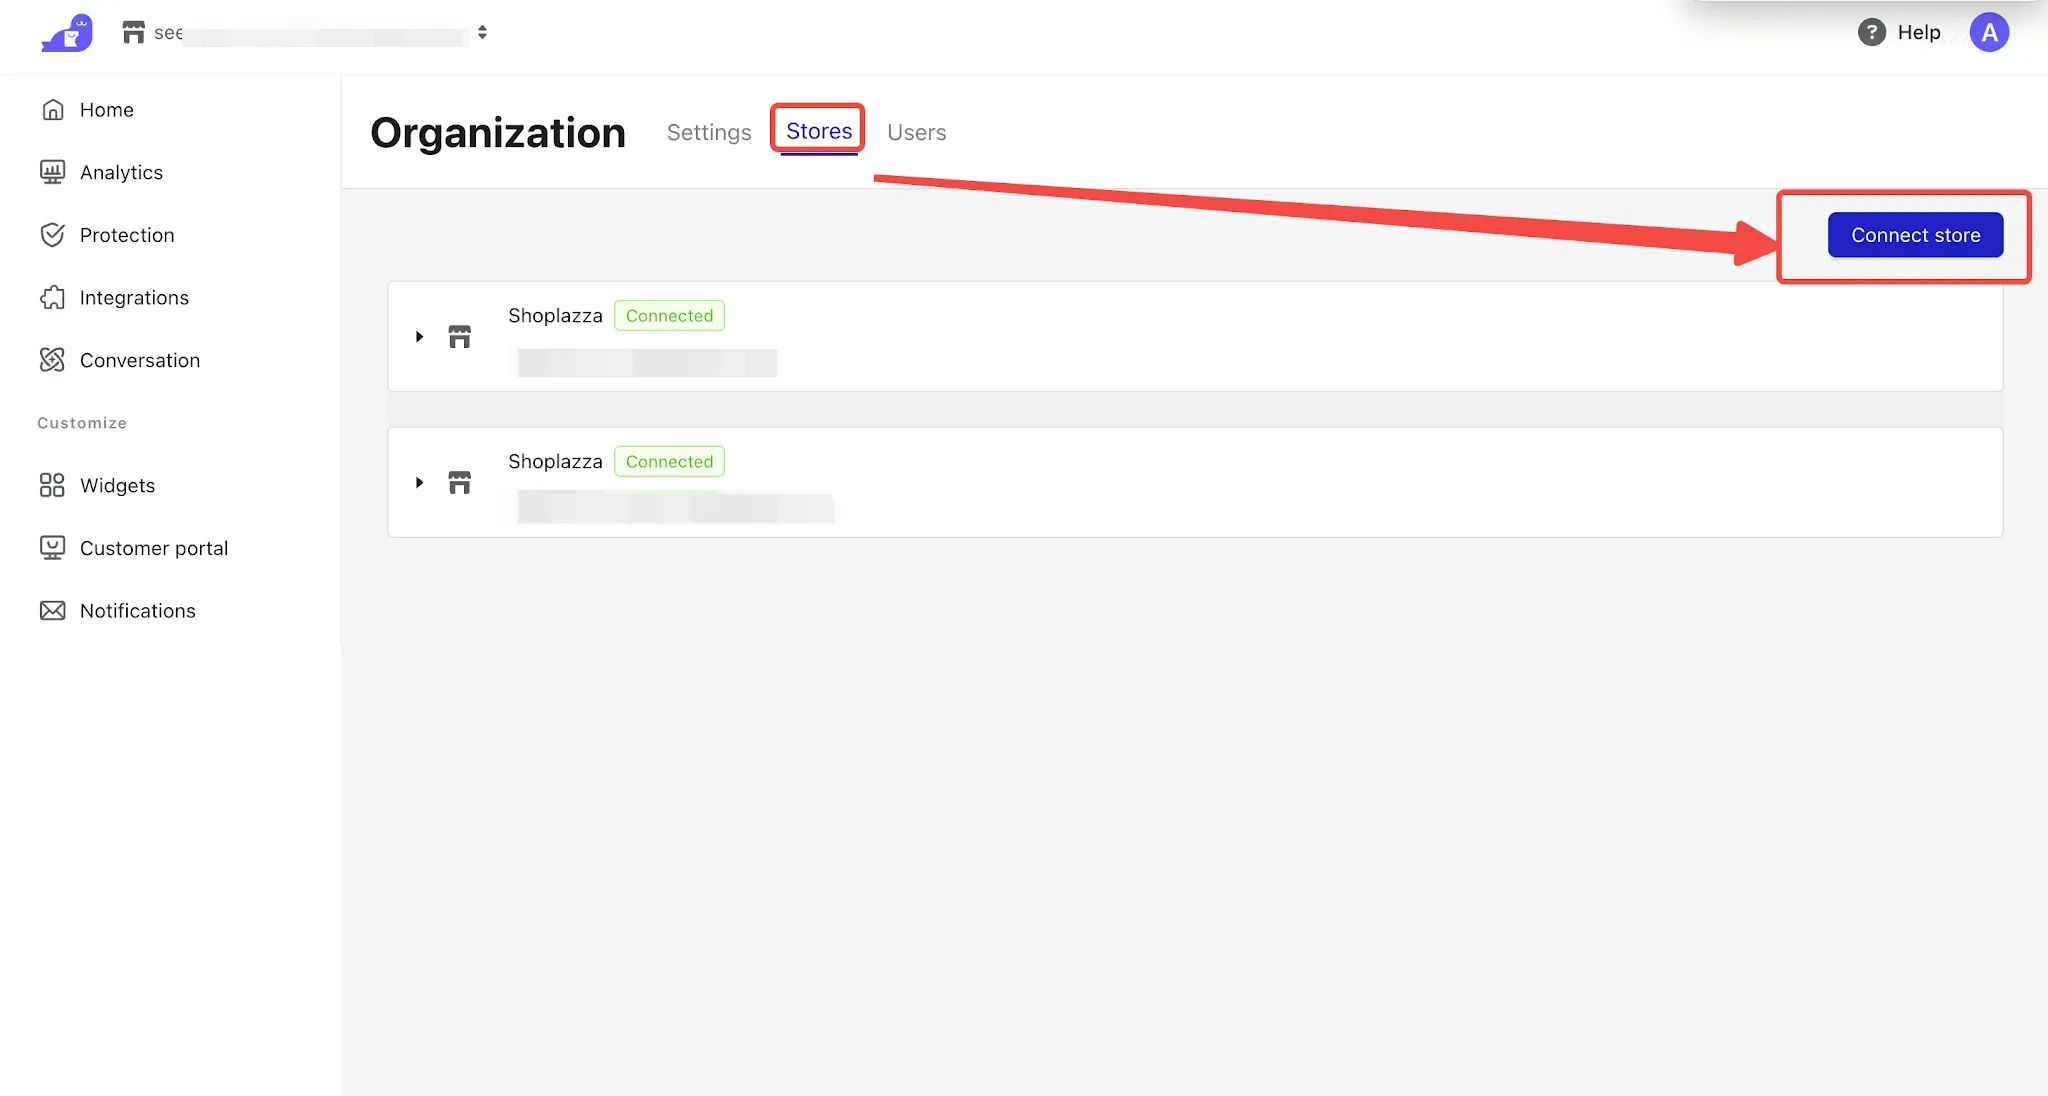
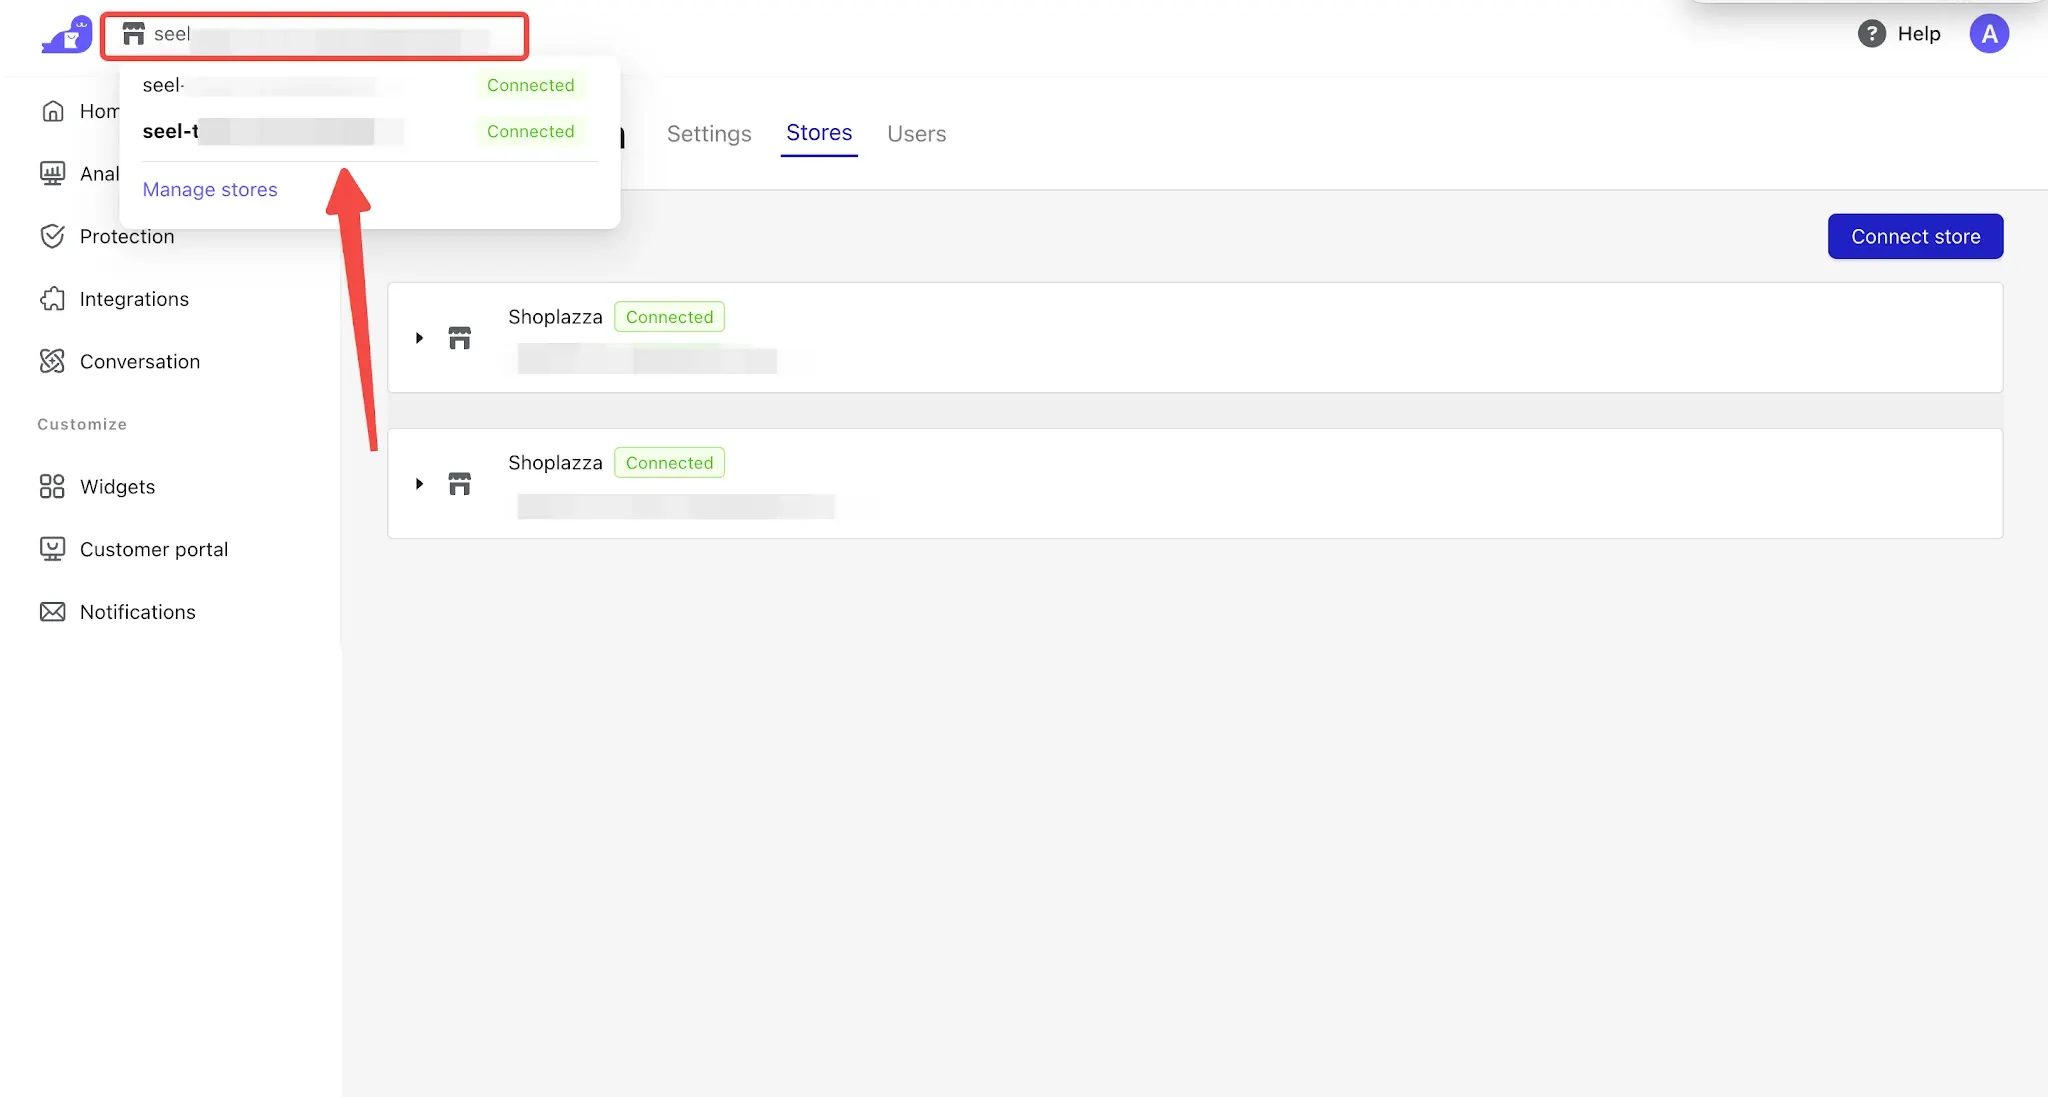
- Click the top-left corner to switch between stores for configuration. All settings apply at the individual store level. If you have multiple stores, you need to switch to each store and complete the configuration separately after linking them.
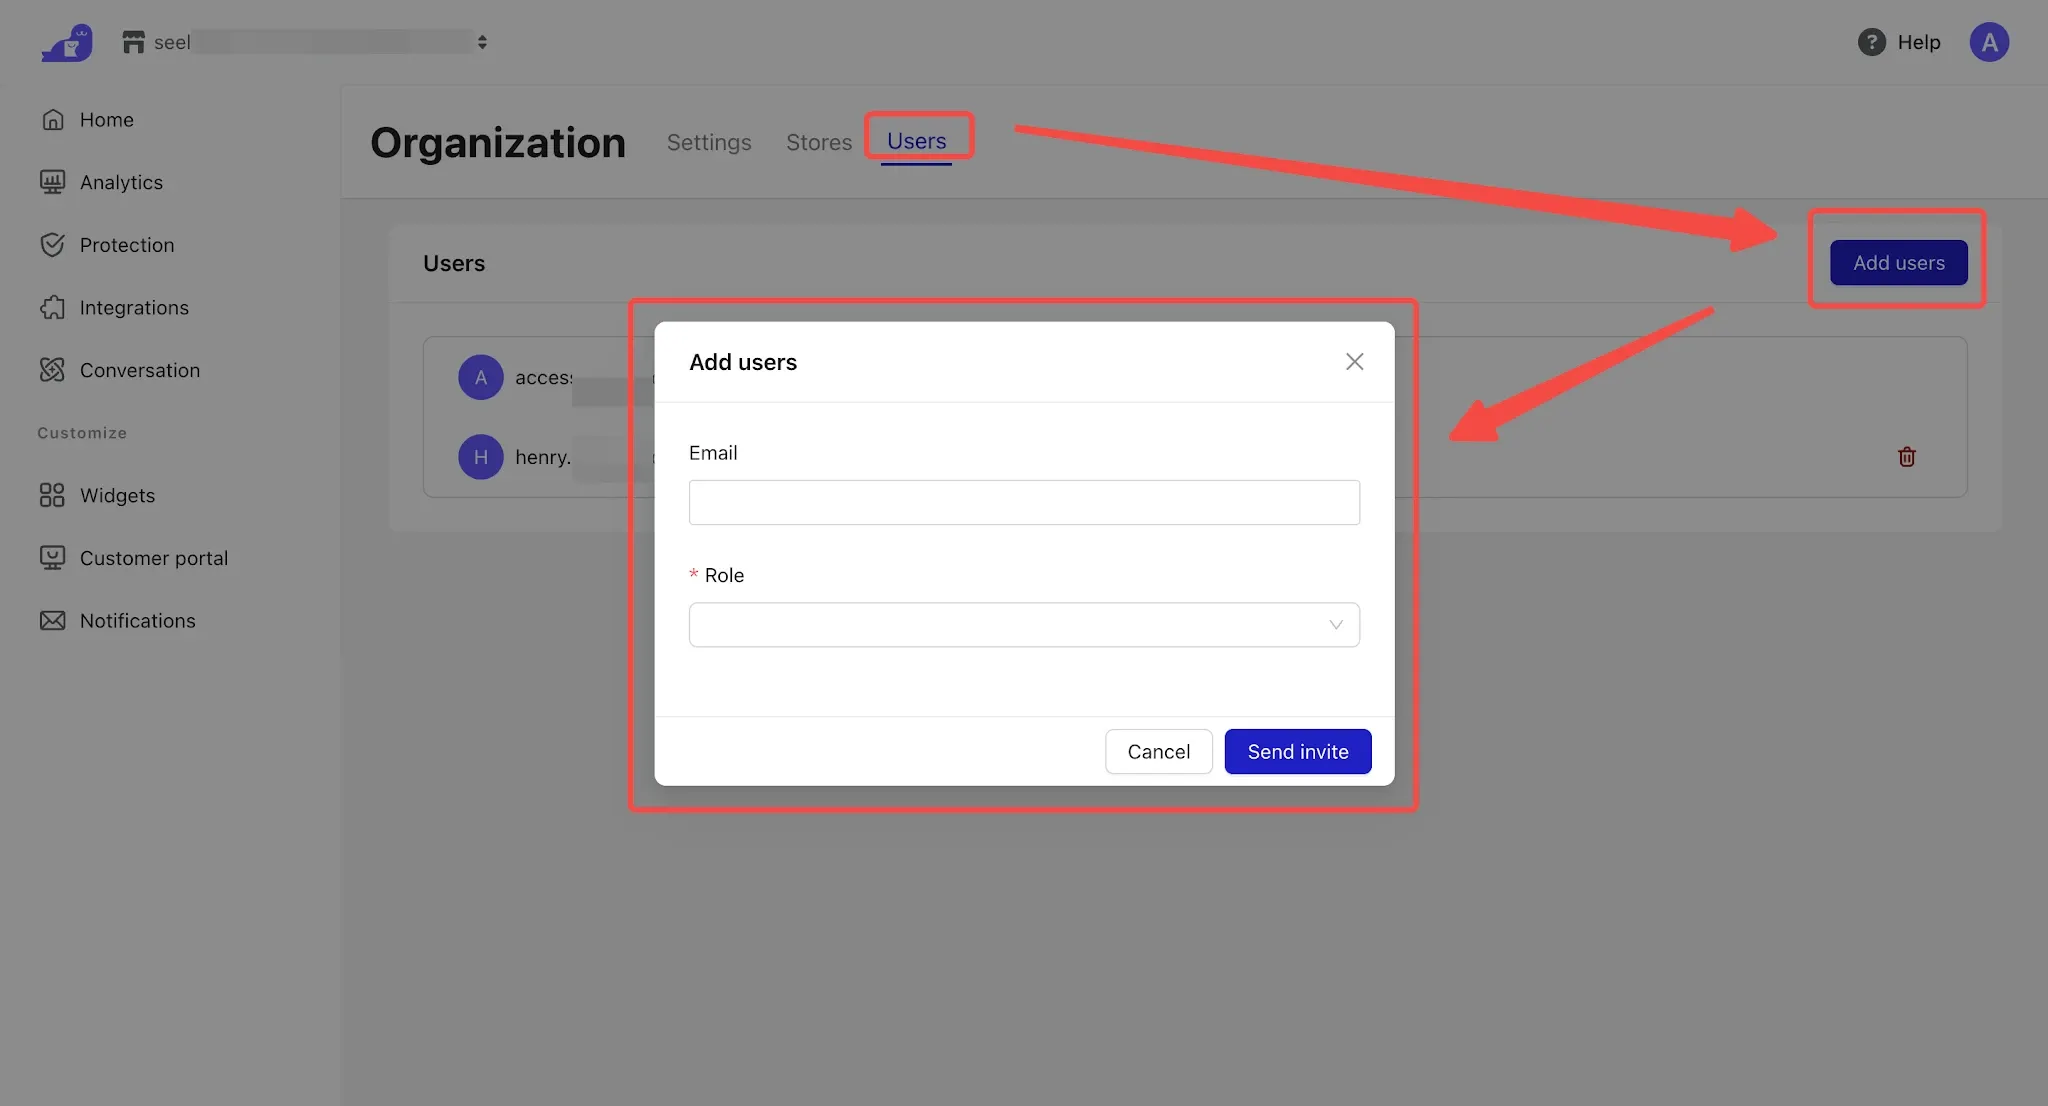
3. Users:You can assign roles to employees and set the store access permissions they can use.
- Click Add users, enter the employee’s email address, select the appropriate role (such as customer service, finance, etc.) under Role, and then click Send Invite to send the invitation.
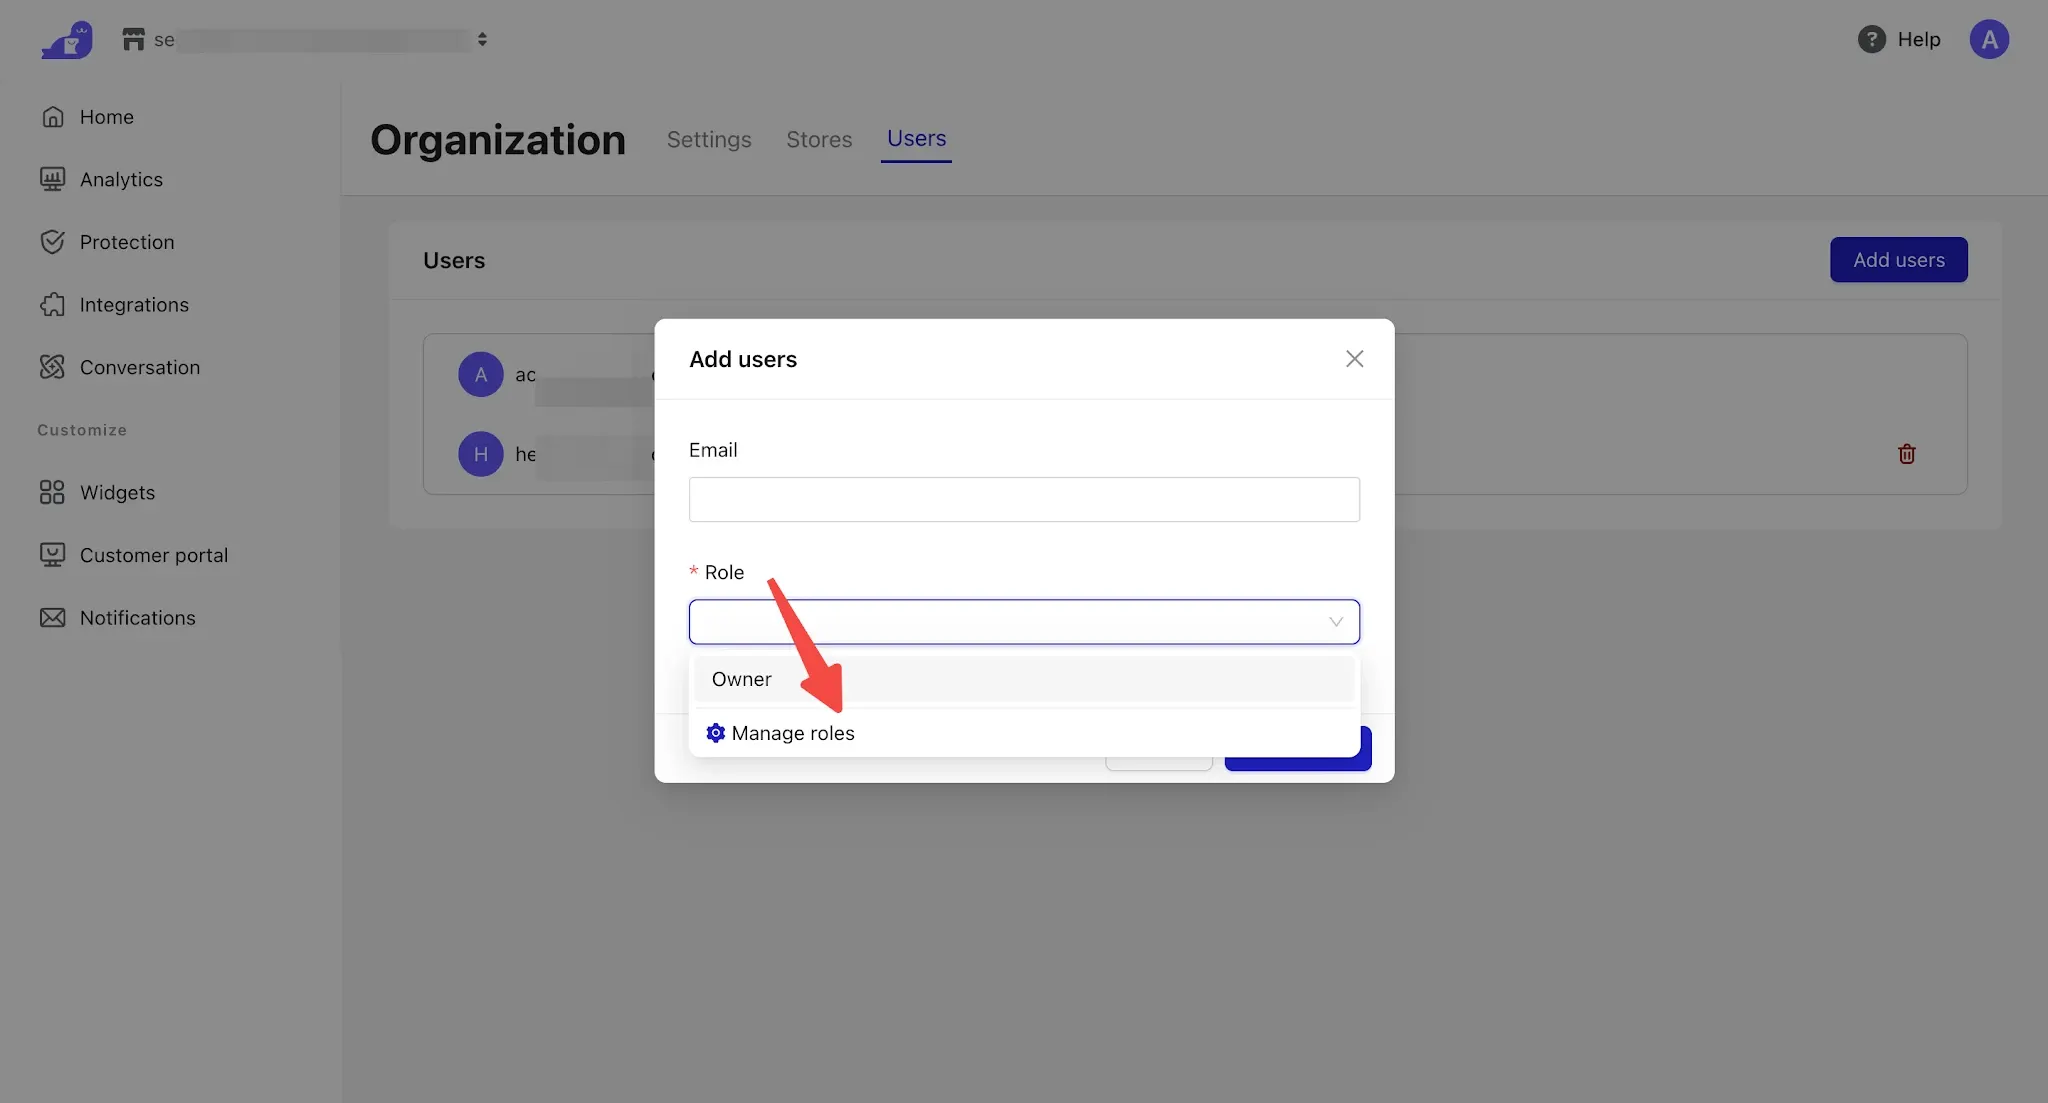
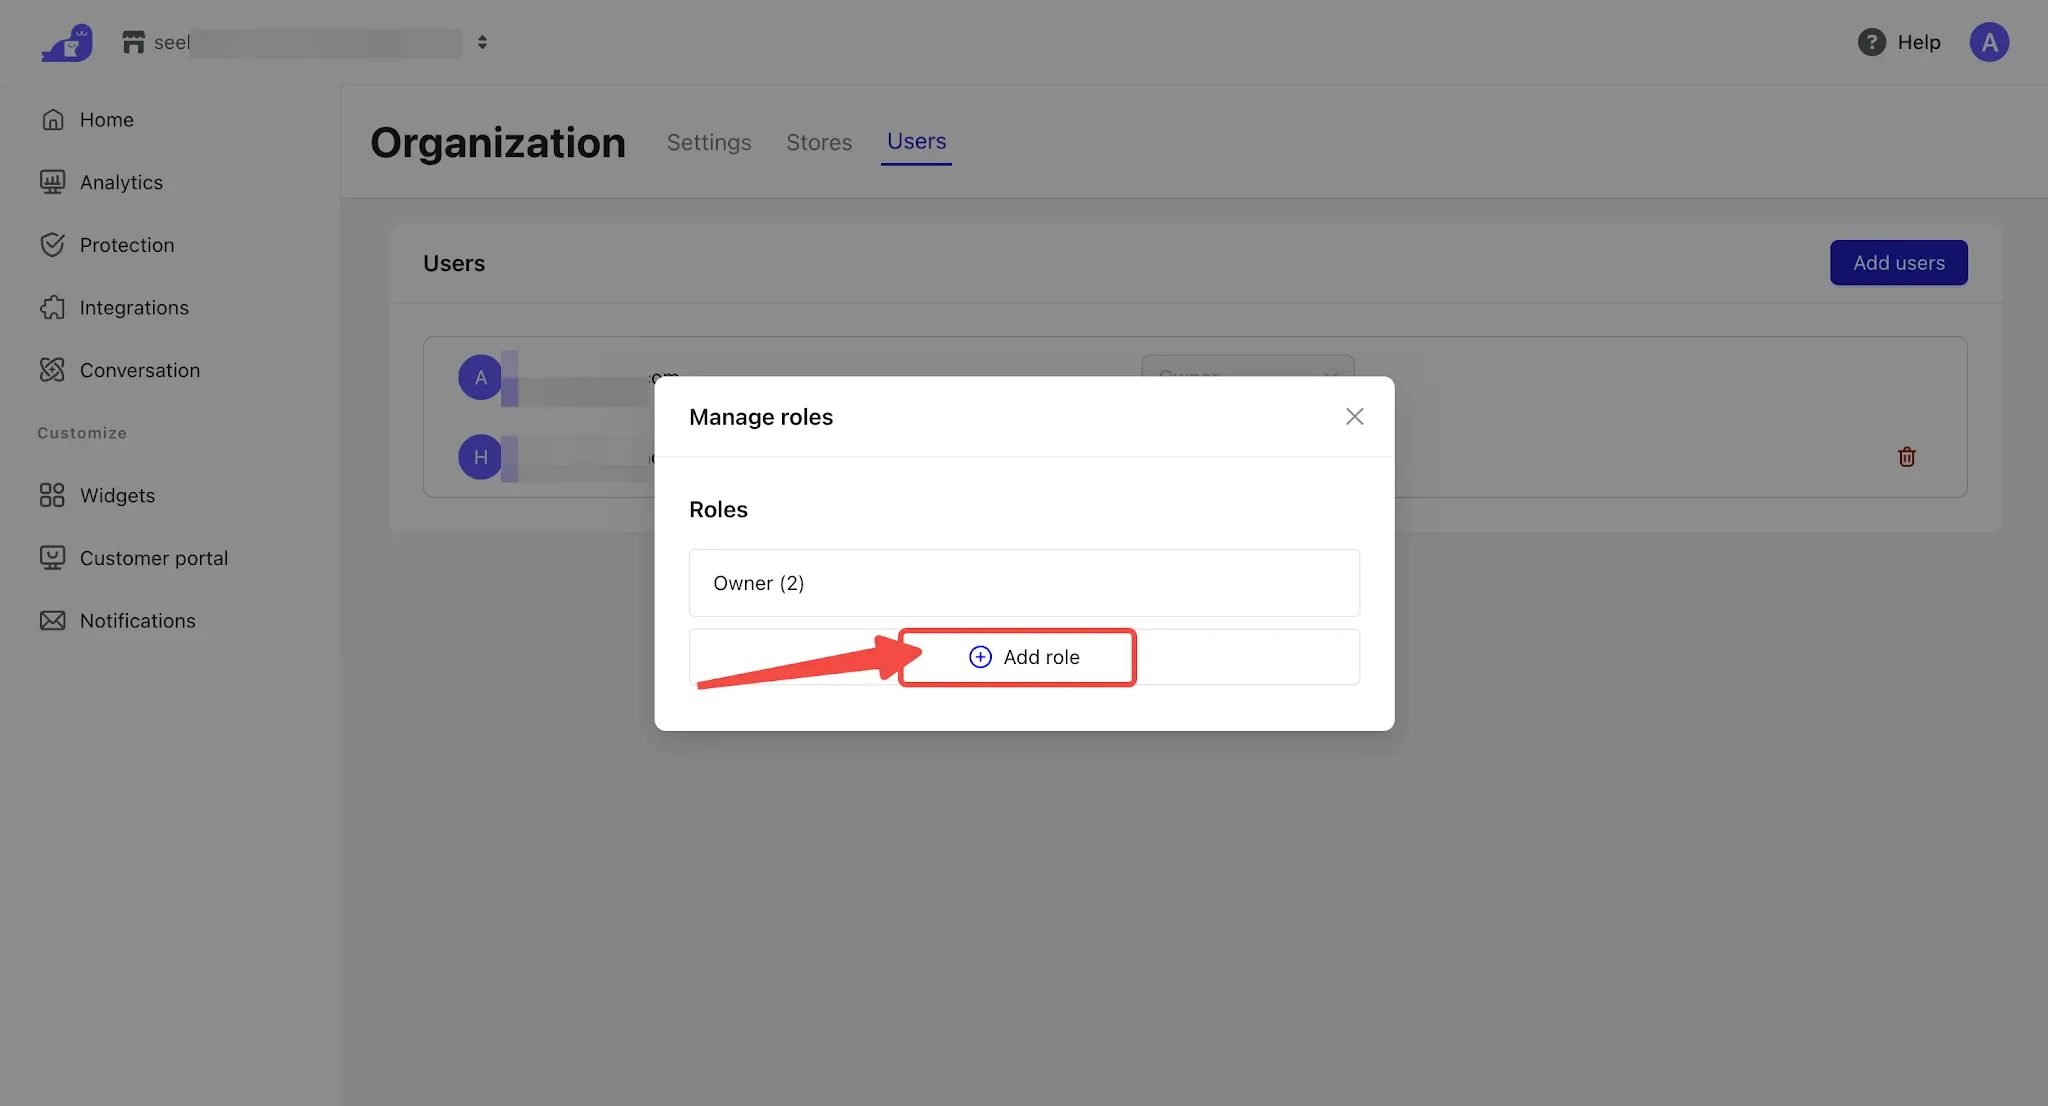
- When selecting a role, if there is no suitable role available or if you need to reassign permissions, you can click Manage roles → Add role to create a new employee role.
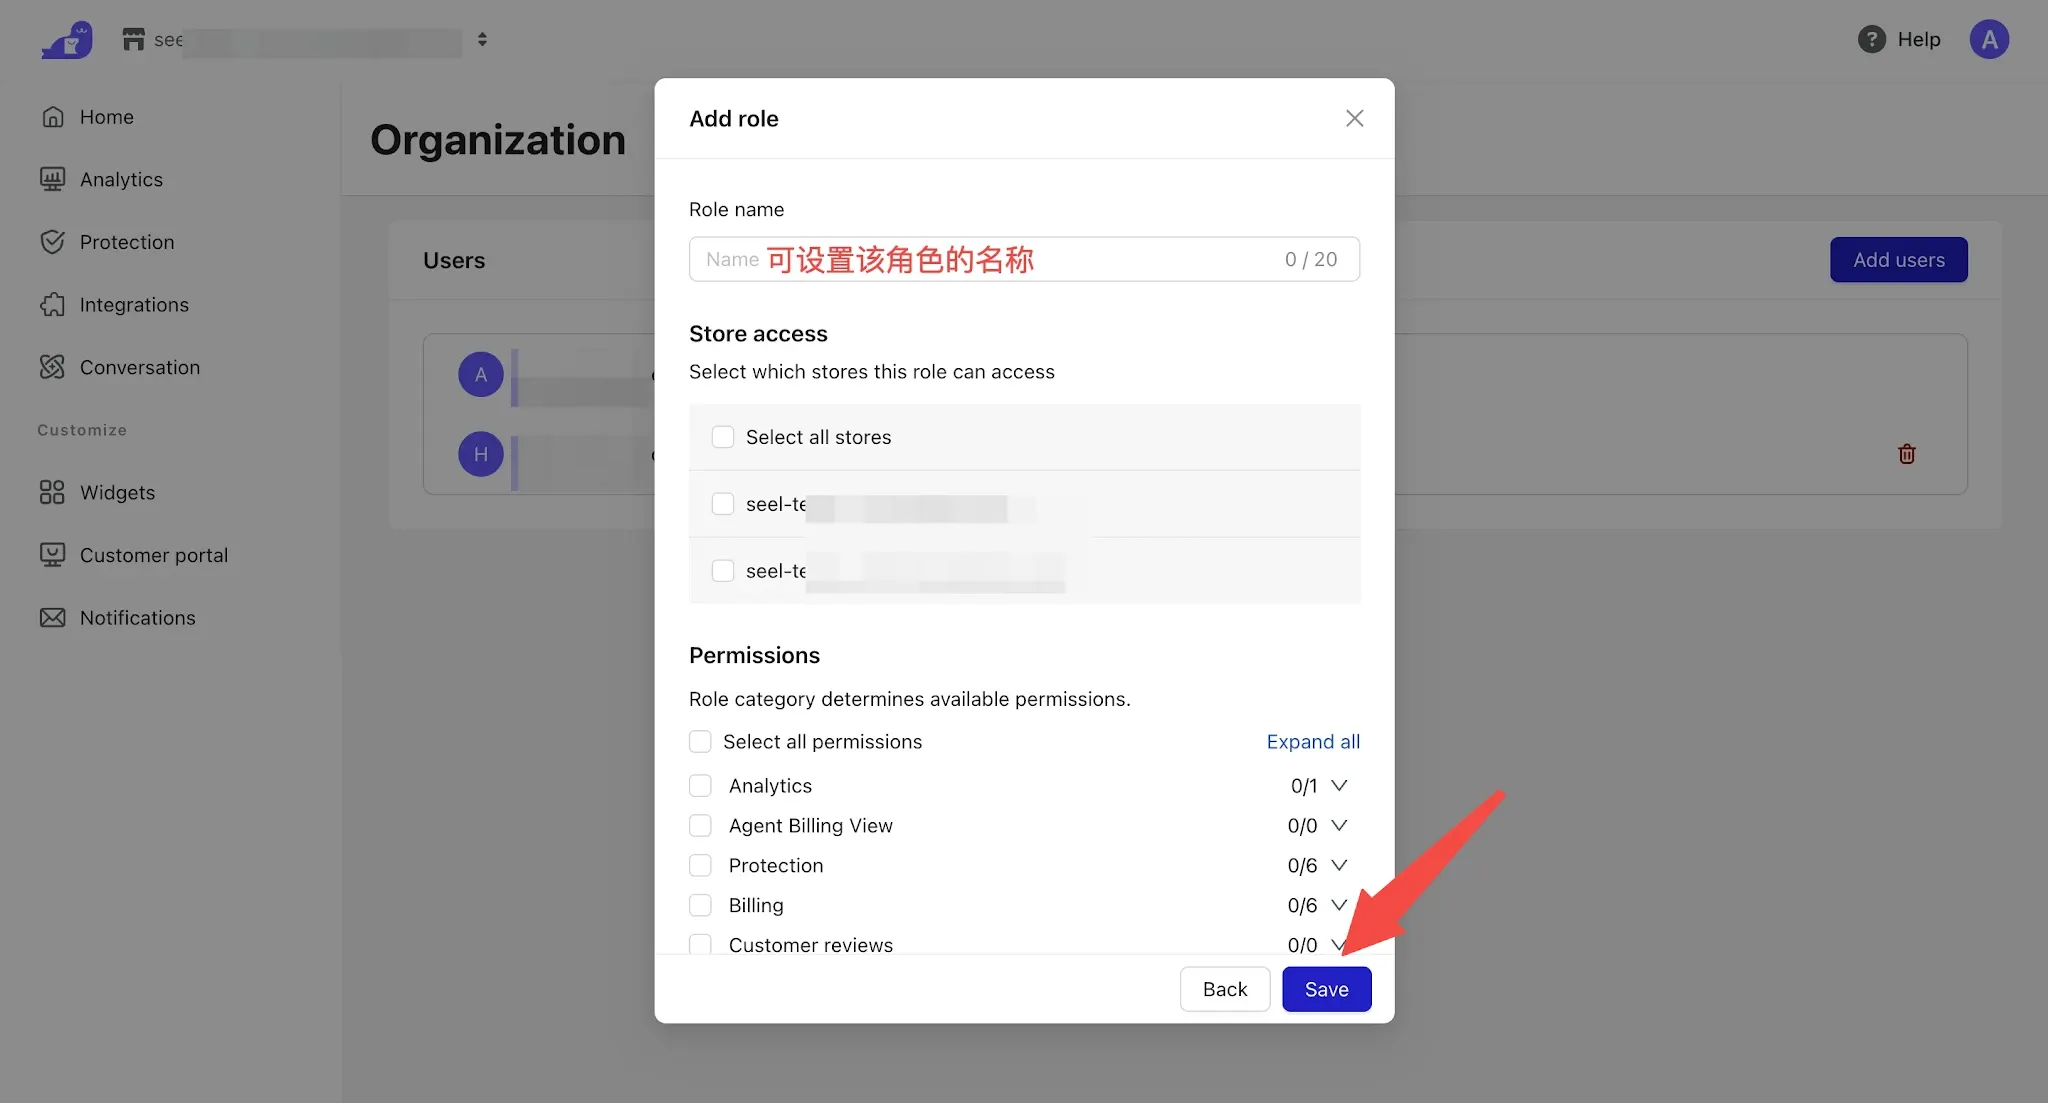
- Add role: You can set the role name, such as Customer Service, Finance, etc.; configure the stores accessible to this role; and select the corresponding Seel feature permissions. Once the configuration is complete, click Save to save the settings.
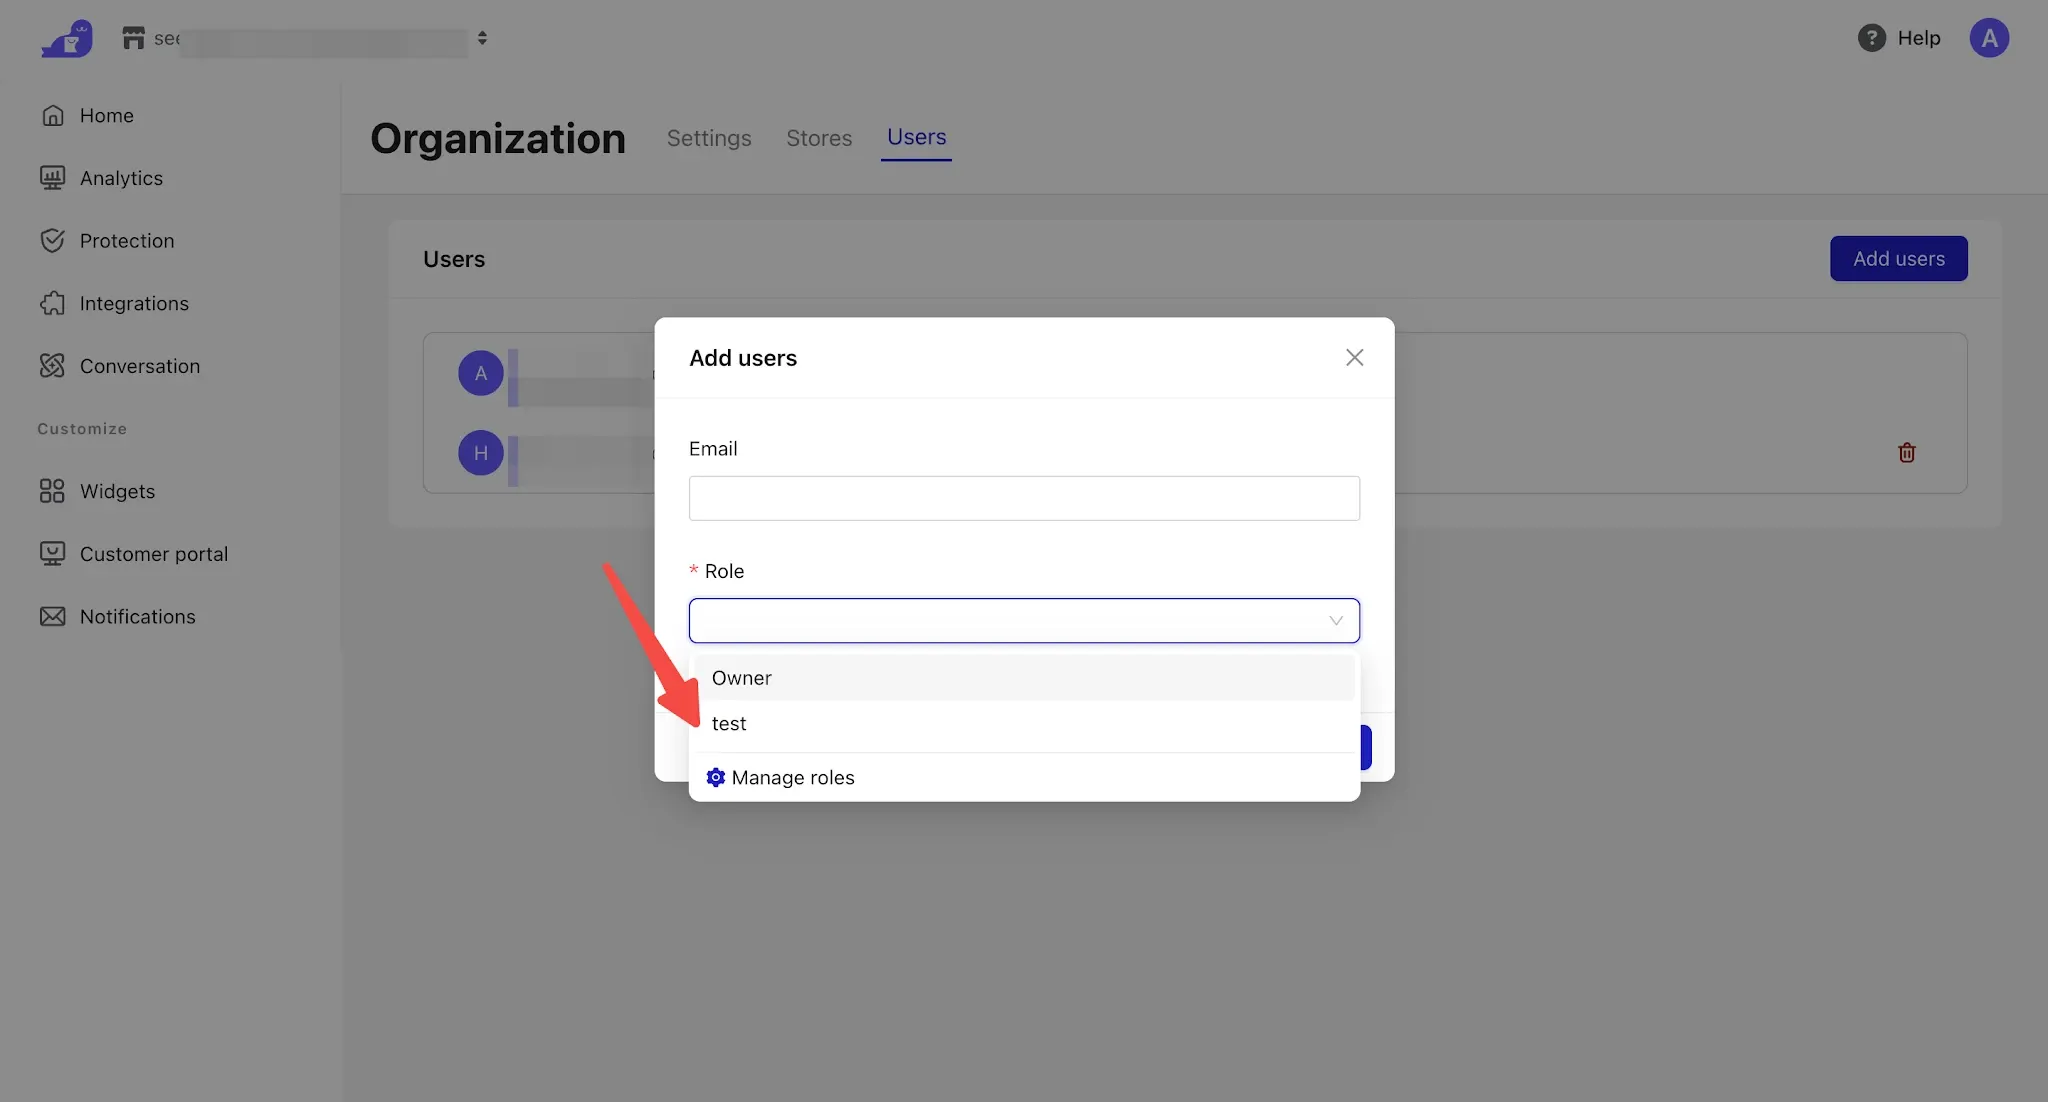
- After saving, return to the Add users page, select the newly created role, enter the employee’s email address, and then send the invitation.

Comments
Please sign in to leave a comment.